Rock Climbing Finger Tenosynovitis
In preparation for your anticipated climbing trip to Red Rocks, you double the volume and increase the intensity of your training regimen. During your second week of your new regimen, you notice that your fingers are unusually sore. Thinking of this as a good sign of getting stronger, you go to bed motivated to continue your training. The next day, your fingers are still sore, but you decide to train through it. The soreness worsens as the week progresses, and you worry you may have injured your fingers by overtraining. Your trip is just a few weeks away and all the plans are already set in motion. What should you do?
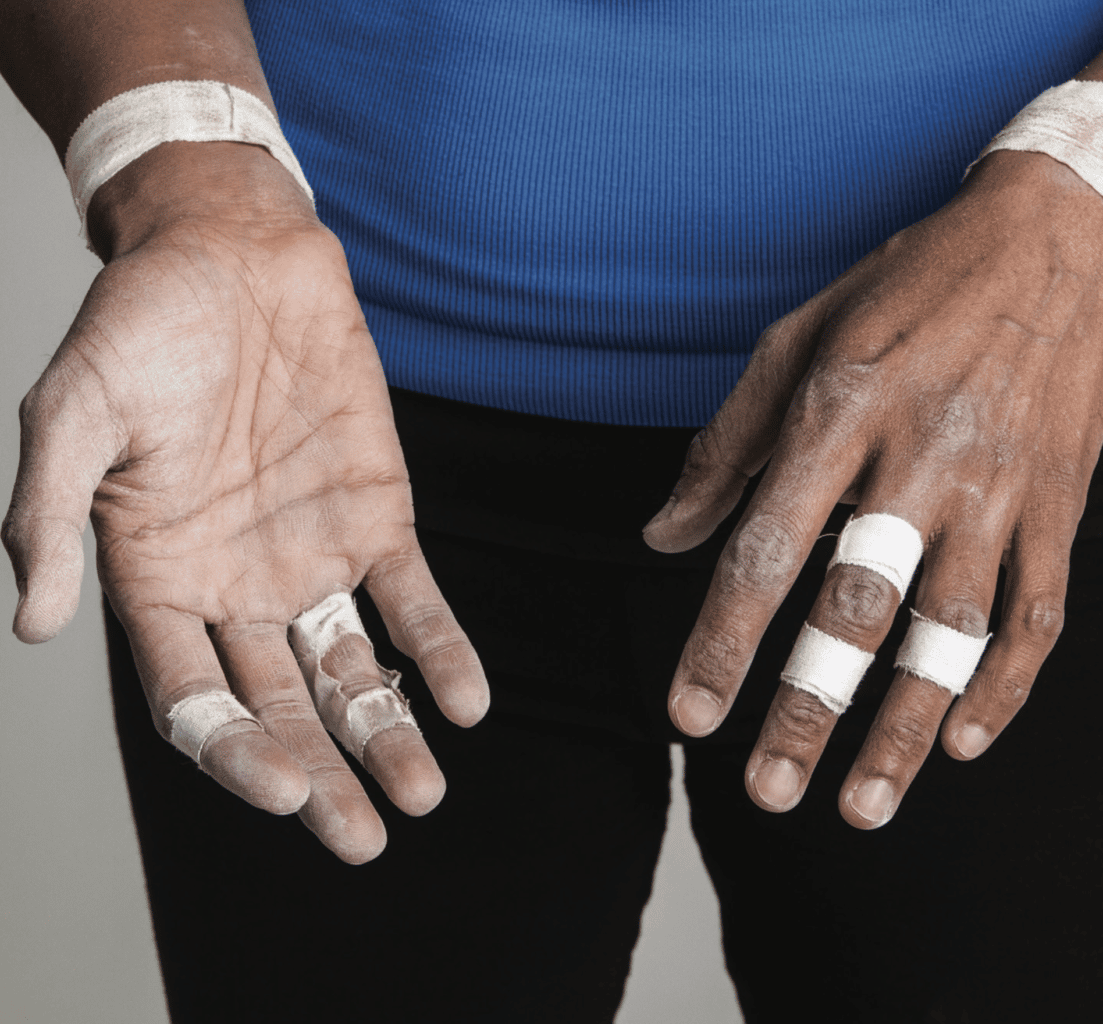
Signs and Symptoms
Pain typically comes on within minutes or hours after a climbing session, or acutely while climbing. While flexor tendon tenosynovitis can have a rapid onset from a single hard day or training session, it is most common with an increase in training volume, or from consistent overuse.
Tenosynovitis, or inflammation of the finger flexor tendon sheath (synovium), is a common overuse syndrome that climbers may experience. There are 2 musculotendinous units that could be involved, the flexor digitorum superficialis (FDS) and flexor digitorum profundus (FDP). They extend well beyond the fingers that they move, originating around the medial aspect of your elbow and forearm, and inserting into the middle and distal phalanges of the fingers. While these muscles work together to flex your fingers at their individual joints, the stresses required of them vary, especially with different holds and grip techniques.8 In general, the FDS is going to be most stressed in a full crimp position, and the FDP more involved when the fingers are bent at the last joint (think open hand crimps on small edges or large positive holds you can wrap your fingers around. As climbing technique affects how your load is distributed to these muscles, you may be able to differentiate how they are involved based on the types of holds that bring on your symptoms.
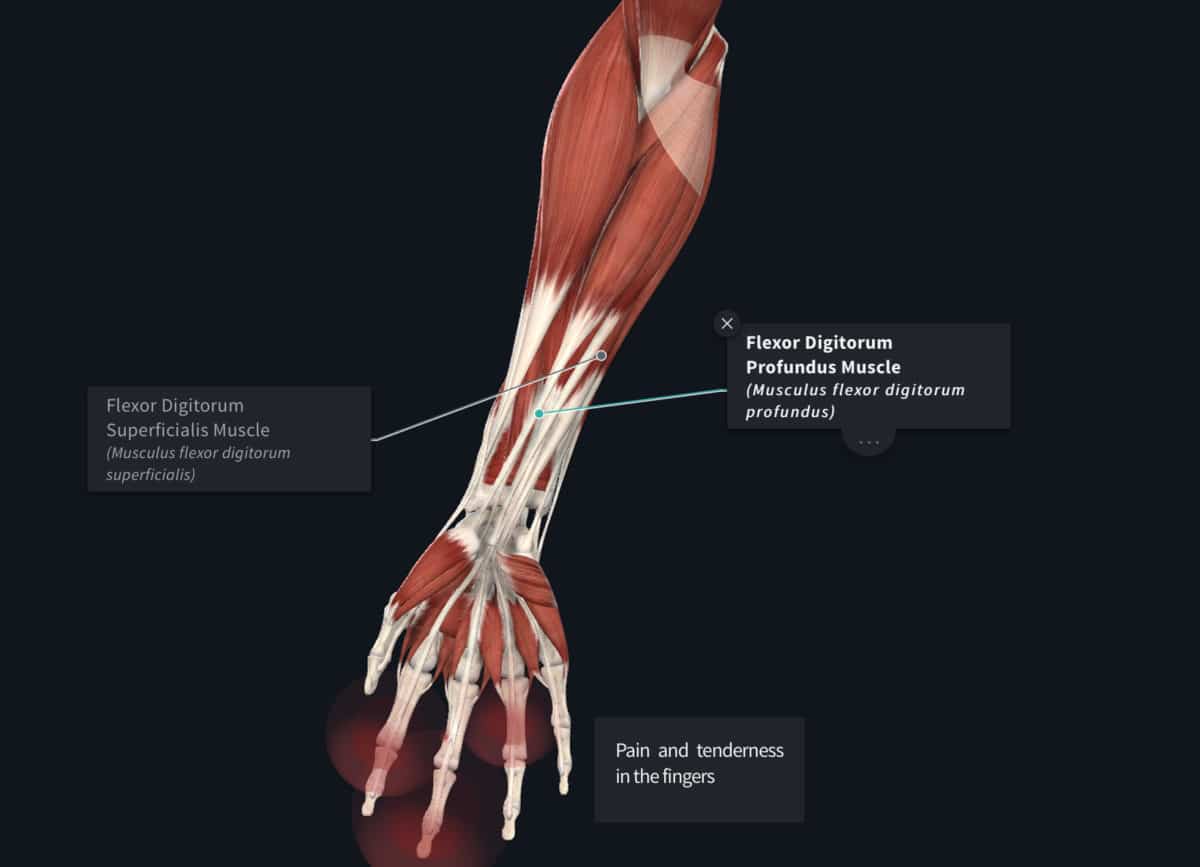
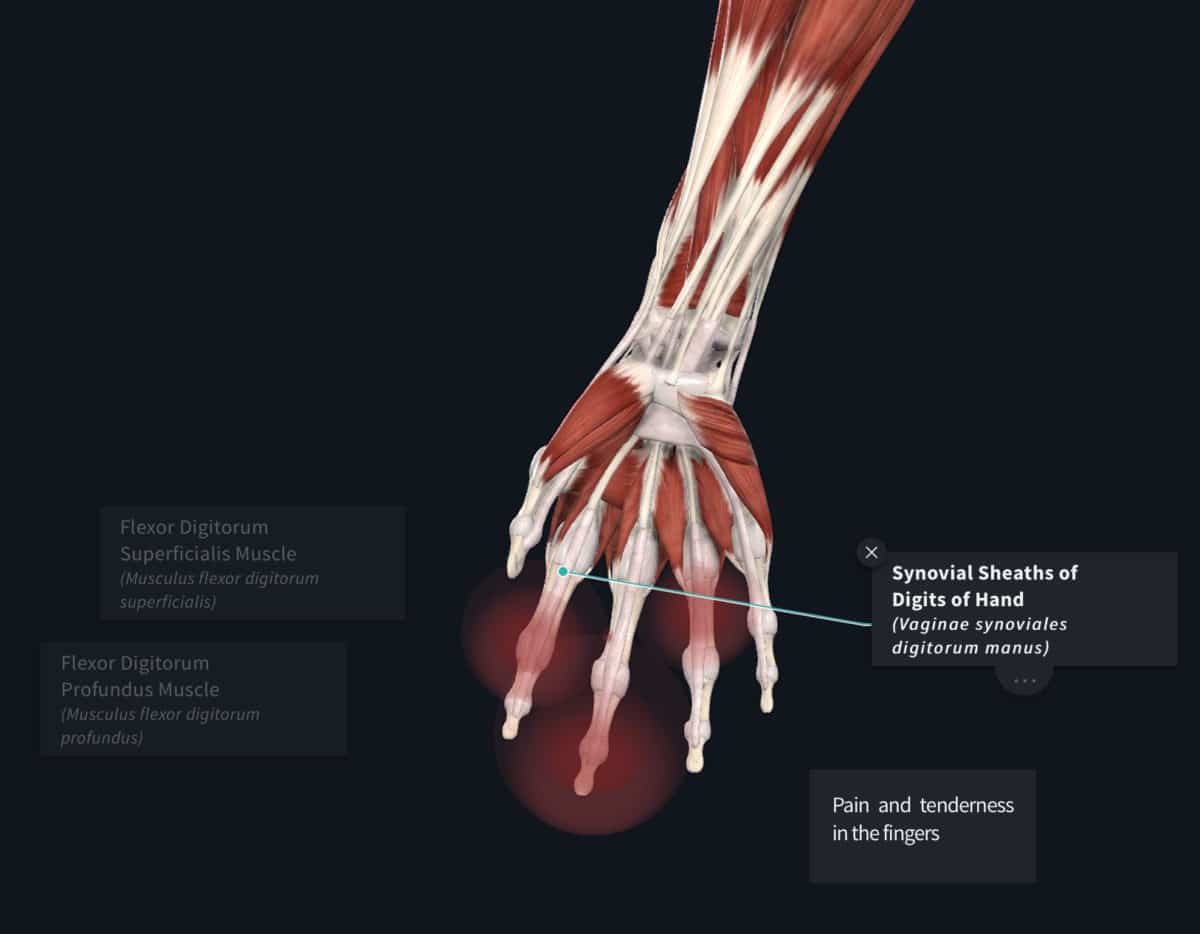
Below are some common signs and symptoms:
- Pain along the palm side of the fingers (sometimes extending into palm or forearm)
- Mild swelling compared to opposite fingers/hand
- Decreased grip strength while climbing
- Tenderness in the fingers while gripping/grasping objects
- Soreness that persists hours to days after climbing
Assessment
As tenosynovitis results from overtraining, one of the most important things to do is take a look at your training history and see if there are any sudden increases in volume or intensity, especially long periods without significant rest.1 This will help you (and your healthcare provider) make the diagnosis and recognize the factors that contributed to it so you don’t experience it again in the future.
Pressing on the palmar side of the fingers determines if the soreness is localized to that side, or is more diffuse throughout the finger. You would expect noticeable soreness on the palmar aspect compared to the dorsal side. This also contributes to the diagnosis. Look for swelling or fullness in the fingers, particularly at the base.1,2 Then, assess your movement by curling and straightening your fingers, and then doing so by passively moving them with the opposite hand. With tenosynovitis, you would expect it to be more provocative with active motion than passive.
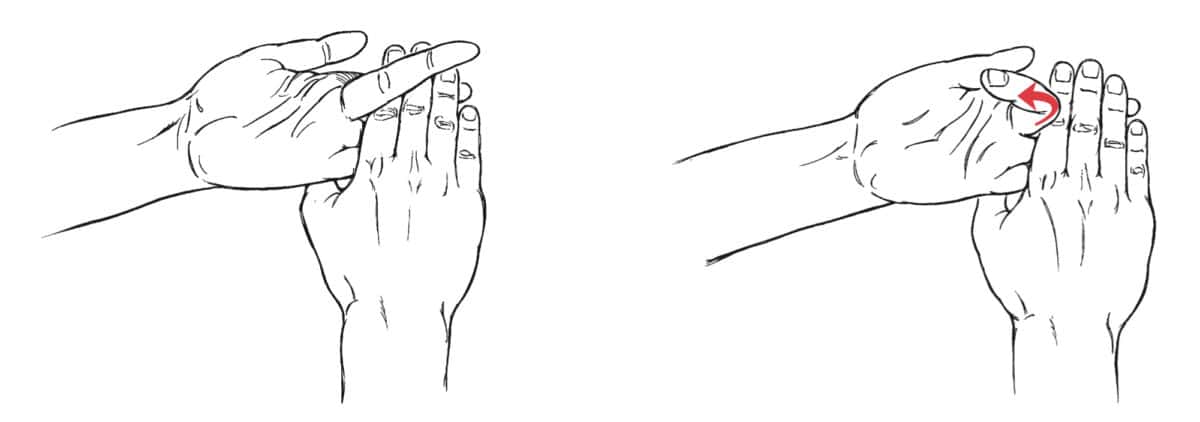
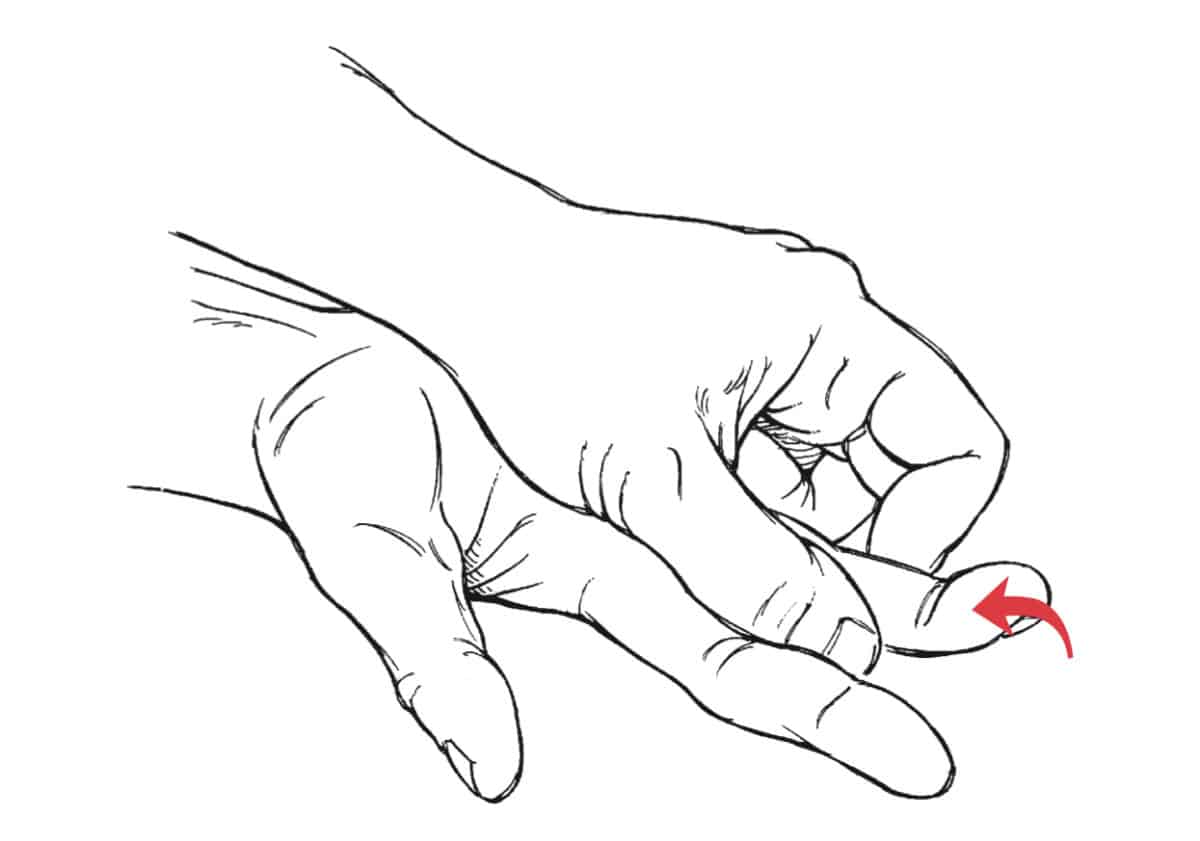
To determine the extent of which these tendons are involved, you can perform a manual muscle test by individually curling your fingers against the resistance of your other hand, both at the proximal interphalangeal joints (PIP) and distal interphalangeal joints (DIP).4 This is most easily done by placing your hand palm up on the table, and curling one finger at a time, while blocking the others. See video for further instruction.
The Rock Rehab Pyramid
The Rock Rehab Pyramid was developed by physical therapist and rock climber, Dr. Jared Vagy and illustrated in his book Climb Injury-Free. It is a progression that climbers can use that directs you when and how to proceed. Each step builds on top of the previous, creating a strong foundation for recovery and future injury prevention. It should not replace the guidance of an experienced clinician, especially with nagging injuries, but it serves as an excellent starting point and map for your own recovery. Reassess daily, progress, maintain, or regress as indicated.
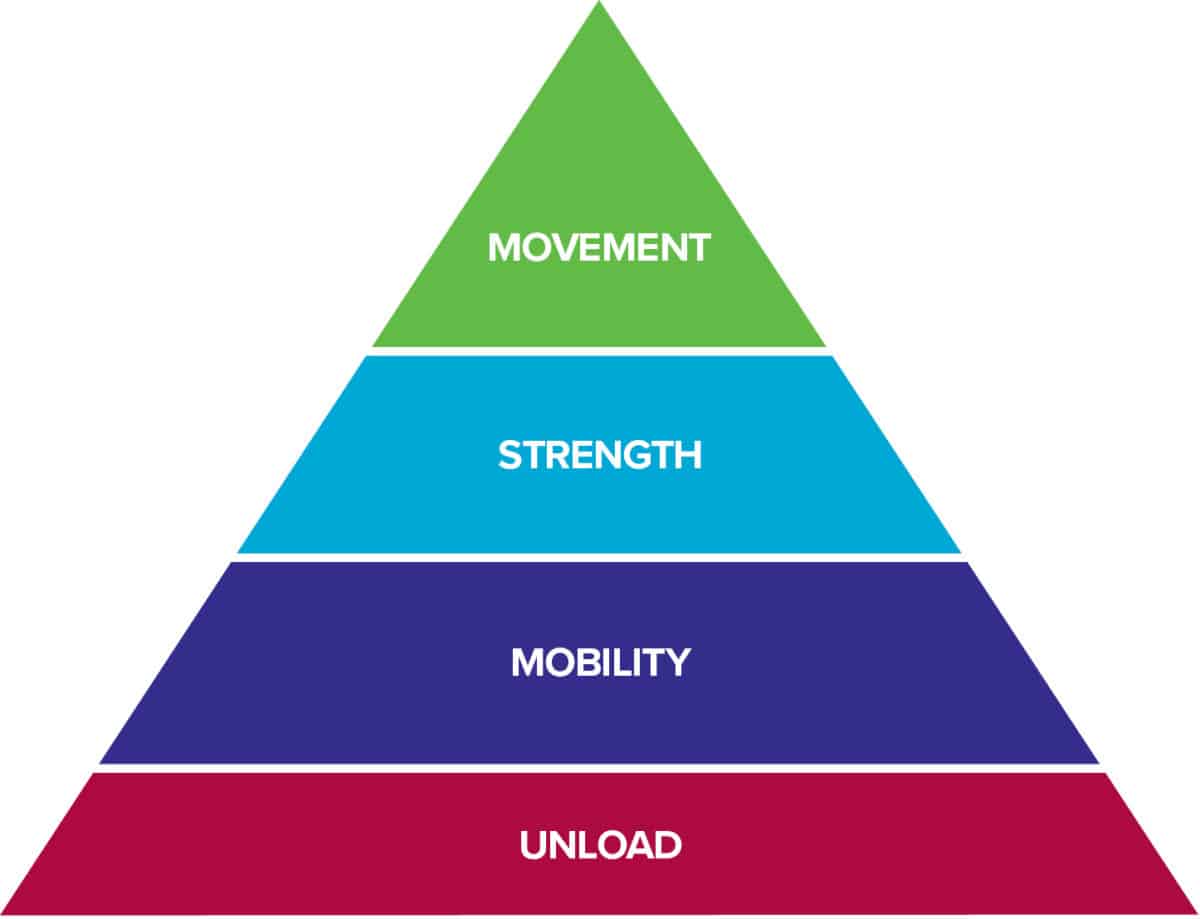
The bottom level of the pyramid aims to decrease Pain, Inflammation and Tissue Overload so that the tissues have the best healing environment. Often times, after an injury there is some sort of change in Mobility. After the tissues have calmed down from the previous level, this stage will look to reestablish normal, pain free range of motion. Once the injured area restores its mobility, it is time to increase the Strength of the surrounding muscles so that Movement in the following level can be coordinated and optimized. Click here to learn more about the rock rehab pyramid structure.
As climbing stresses the flexor tendons, inflammation is a normal biological response that promotes healing, growth, and progression, something all climbers desire. Tenosynovitis occurs with repetitive use from a significant increase in training volume or intensity. This is a sign that your body needs more rest and time to heal in order to adapt to the increased demand. This means taking a few days off from climbing, potentially up to 2-3 weeks. The good news is that tissues heal, and just need the right amount of rest and movement to make a full recovery. For now though, it is time to take some time off from the offending party AKA hard climbing. Overtraining has brought you to this point and making the right strategic adjustments will get you out of it.
Unloading Phase
Rest until symptoms improve: 48 hours to 2 weeks
- True inflammation may last up to 72 hours, during which full rest is ideal. Let the inflammation take its course and subside.5
- As you improve, incorporate active rest, using your fingers for light activities that don’t bring back your symptoms. This is a great time to incorporate the wrist tenodesis movement from the mobility section throughout the day.
Ice for pain relief: 15 minutes per hour as needed
- Ice has been shown to be beneficial in reducing inflammation and providing pain relief.
Mobility Phase
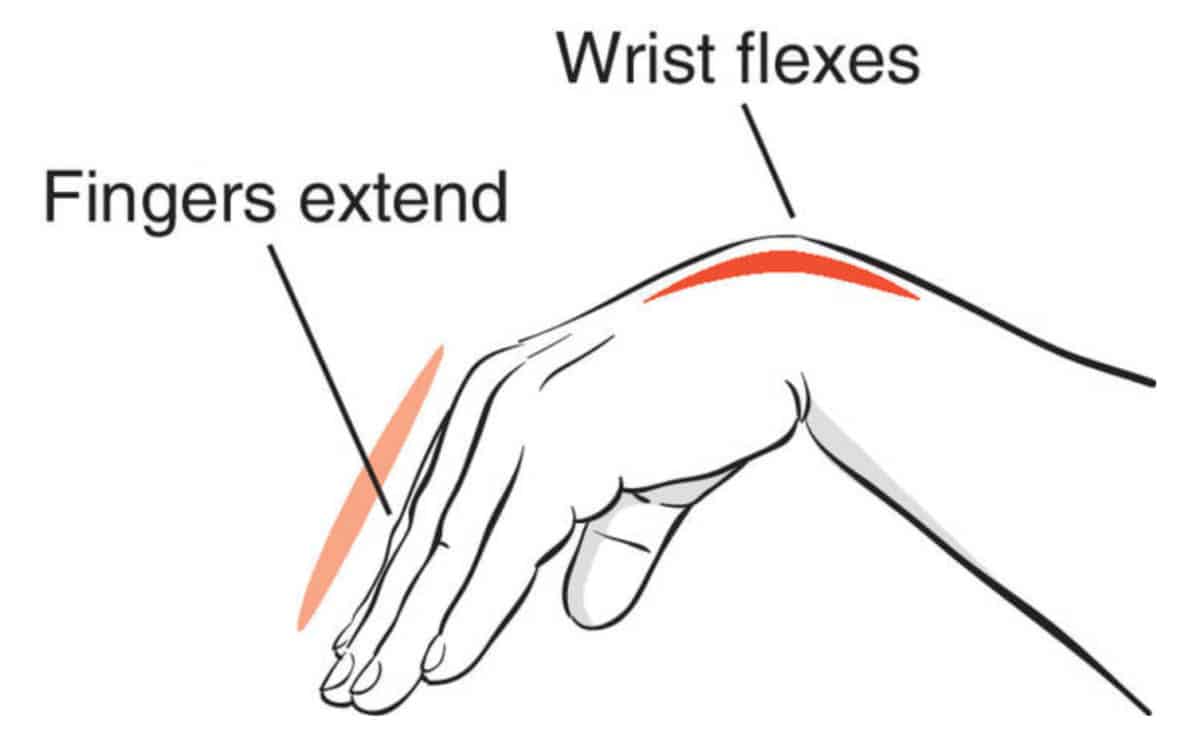
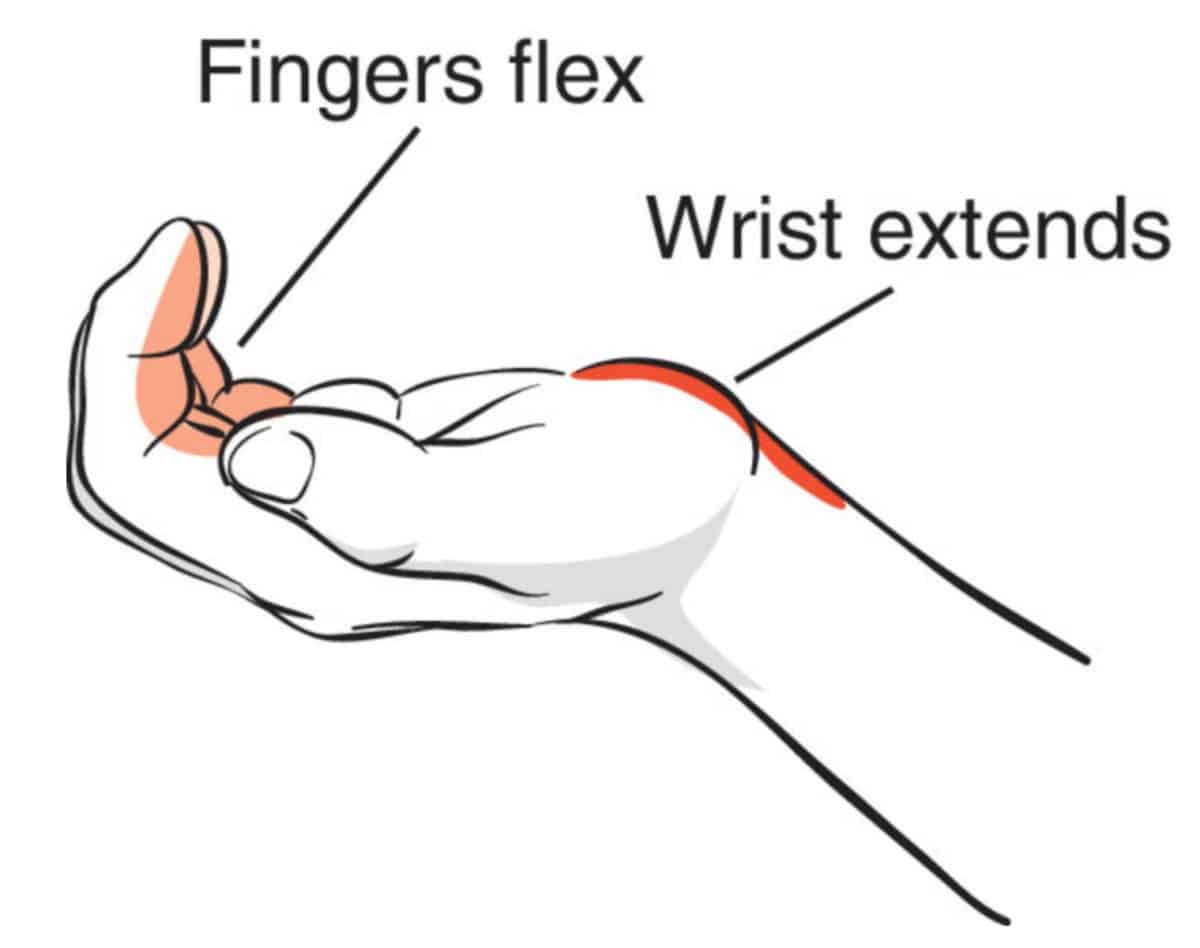
Wrist tenodesis movement: 2 x 15; 3 times per day
- This allows for relative passive motion of the finger flexors. Flex the wrist, which will naturally allow the fingers to extend, and then extend the wrist, allow the fingers to naturally bend. This motion gently mobilizes your flexor tendons by putting them on slack and then tensioning them.
Flexor tendon glides: 2 x 10; 4 times per day
- These help to isolate the affected muscles in a gentle manner.6 The various positions activate your FDP and FDS, taking you through a full range of motion. Slow and smooth is the name of the game here. Be specific and control each movement. Perform the movements in order forwards and backwards.
Pen rolling: 2 x 1 minute; 3-4 times per day
- This progression of the flexor tendon glides gets those fingers actively moving, especially in the range near full flexion. Play around with larger and smaller items to change the feel of it. See video for demonstration.
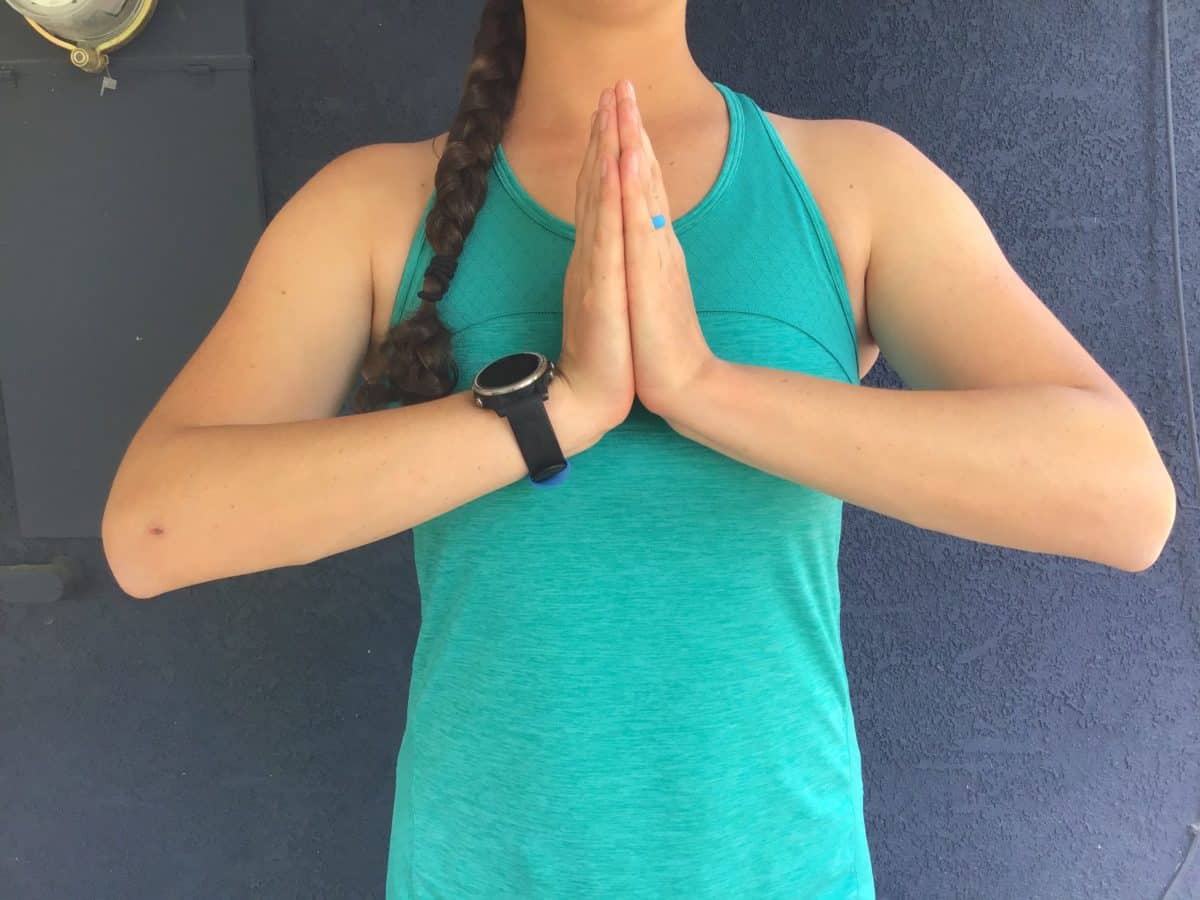
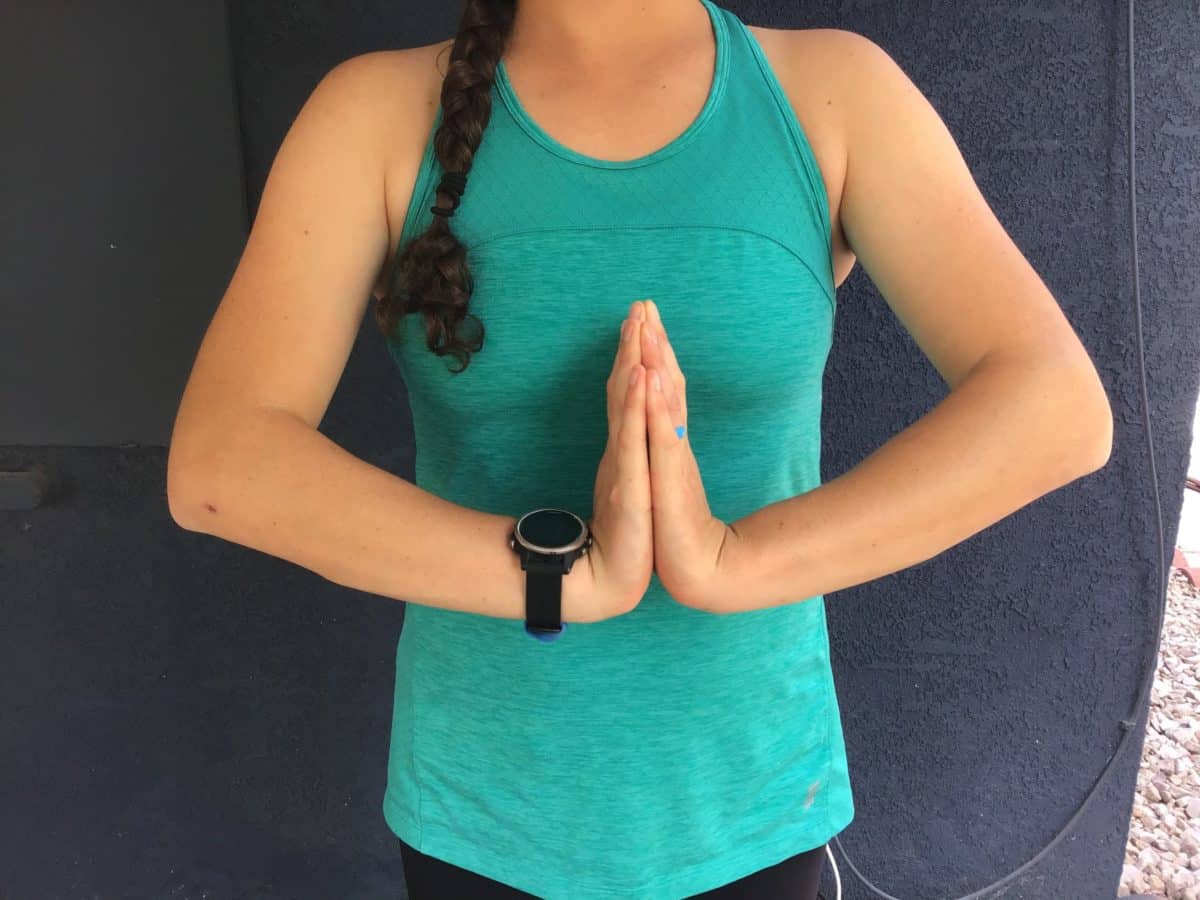
Prayer stretch5,7: 3 sets of 30 seconds; 2 times per day
- This variation of a familiar stretch not only helps at the fingers and wrists, but also prepares you to begin strengthening phase. Place both hands together in prayer position about chest level. Lower your hands until you feel a gentle stretch in the wrist and fingers. From this position, you will individually tap opposing fingers together. Hold the stretch at the beginning and end for about 30 seconds. See images.
Strength Phase
Rice bucket 3 x 30 seconds each; 3 times per week
- With your wrist and fingers in neutral, stab your hand into the rice up to about palm depth. Grab or squeeze the rice and pull your hand out. Complete 1 round of 30 seconds. Repeat, this time extending your fingers against the rice to train the antagonist muscles.
- PRO TIP: To prevent future injury, do both hands! This makes for a great addition to your warm up in the future.
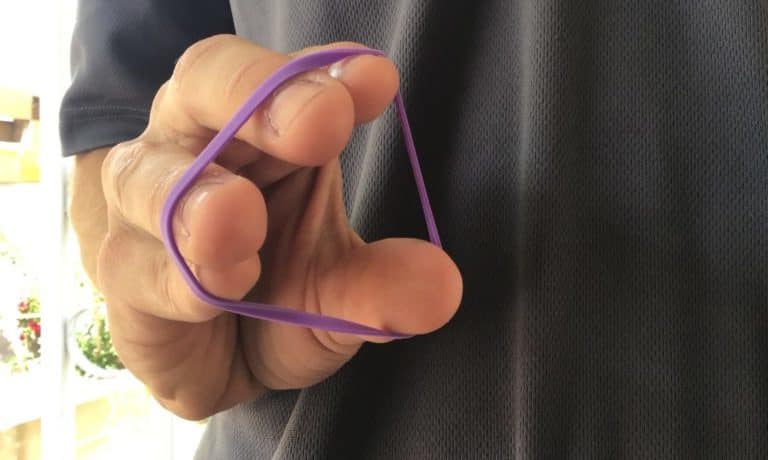
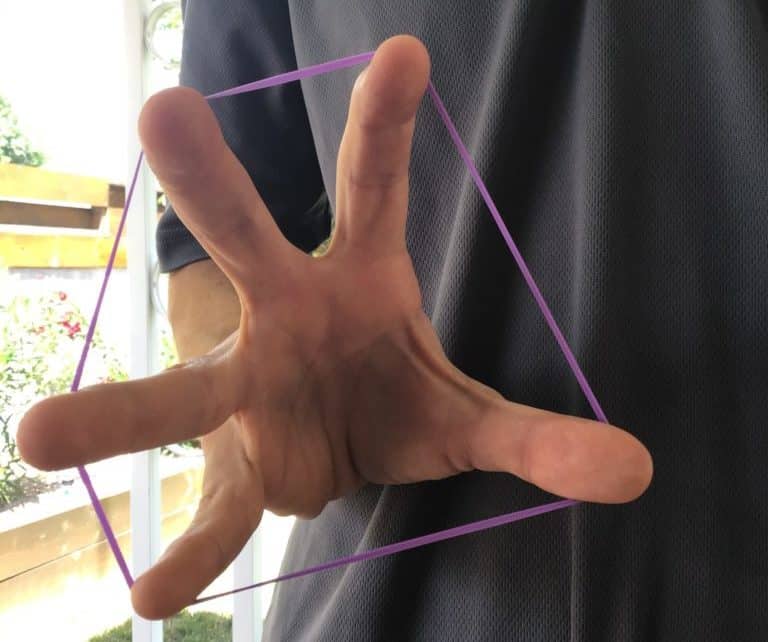
Rubber band finger extension: 2 x 10 reps; after hangboard routine
- Train those antagonist muscles to support your flexors. Holding a rubber band in the opposite hand, wrap it around individual fingers, and actively extend that finger in a slow and controlled manner, going from a flexed position to extended. If multiple fingers are involved, place the rubber band around all 5 fingertips, and spread them all at the same time. See images.
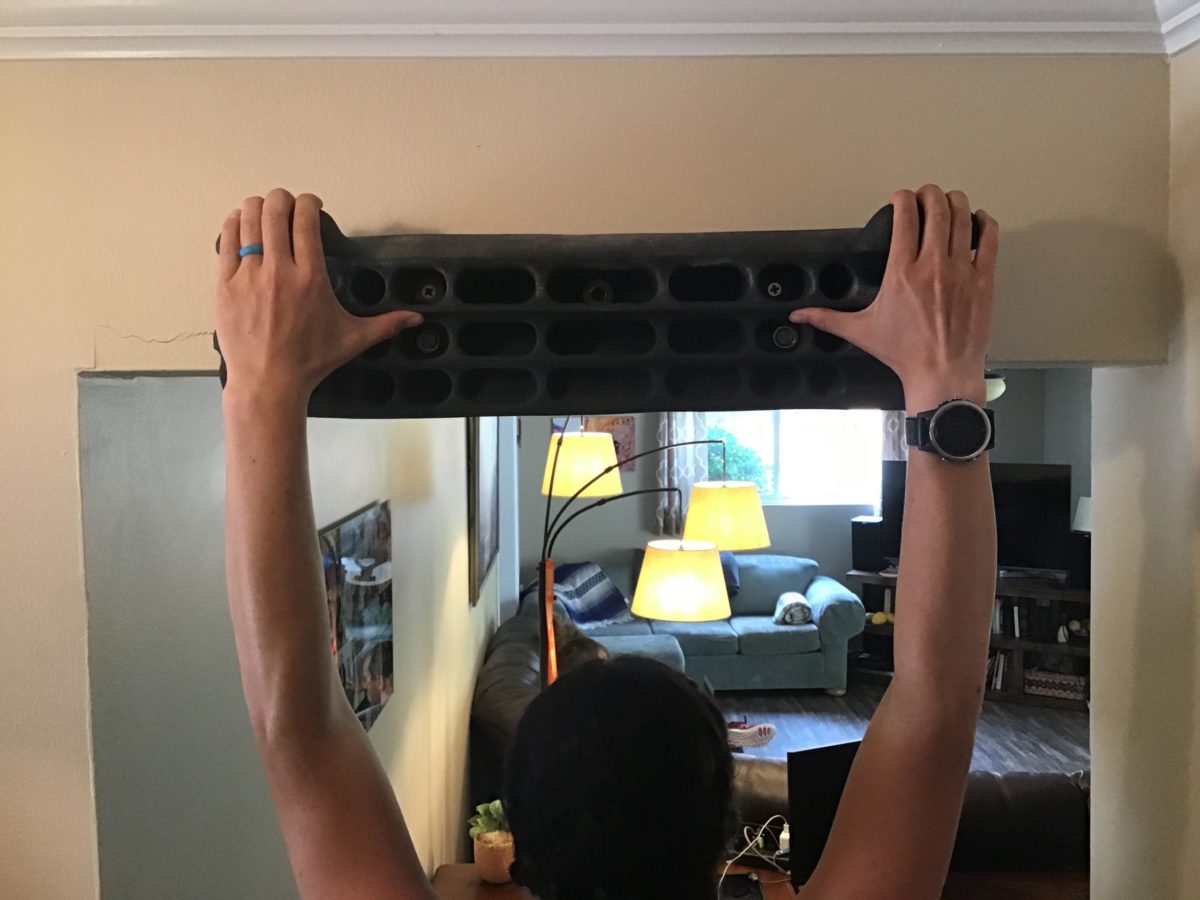
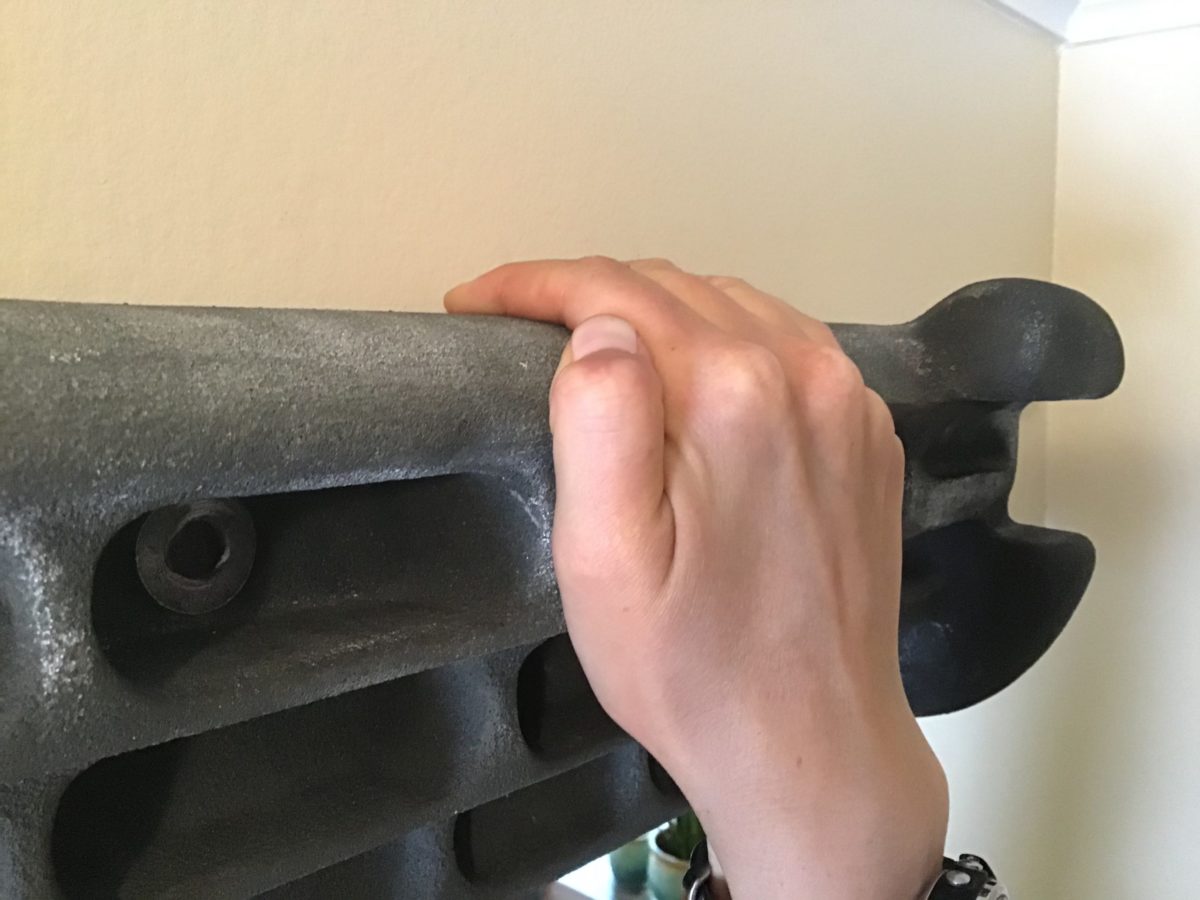
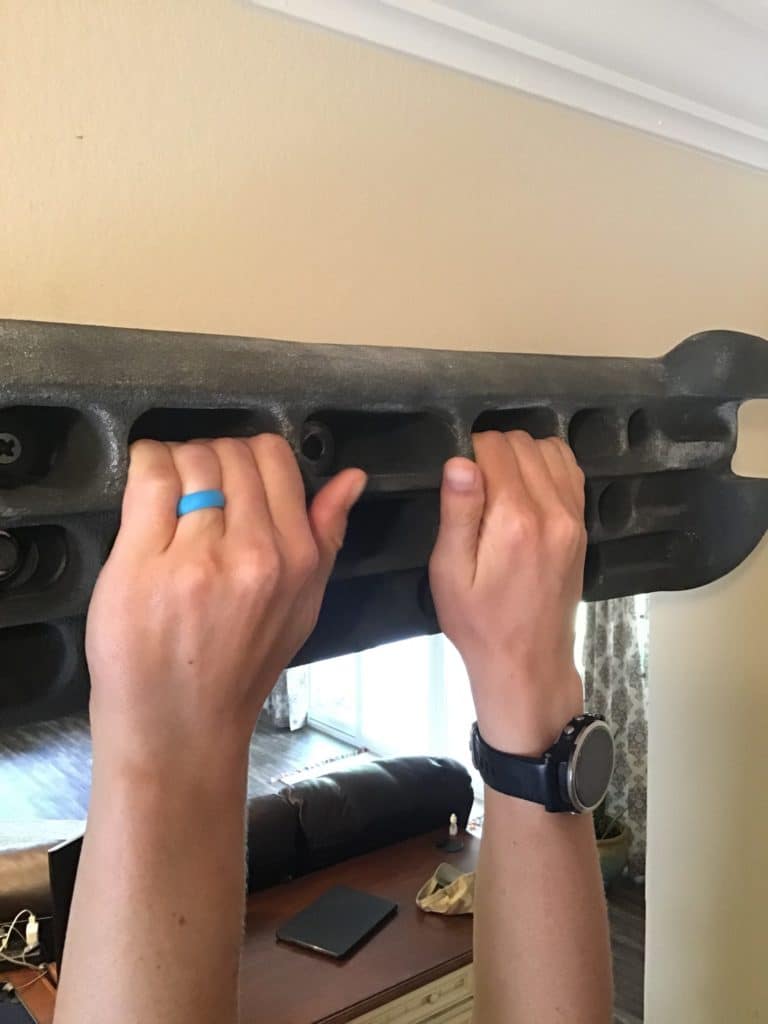
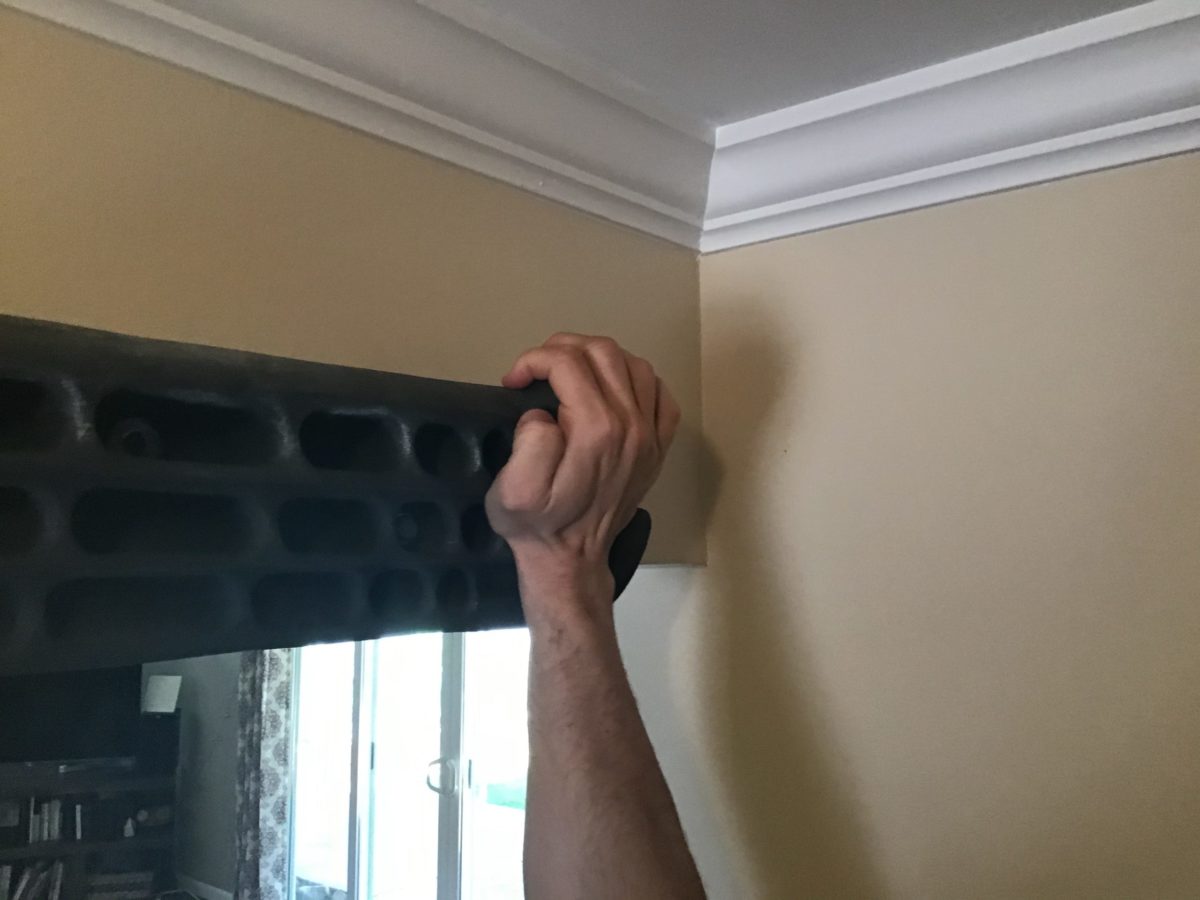
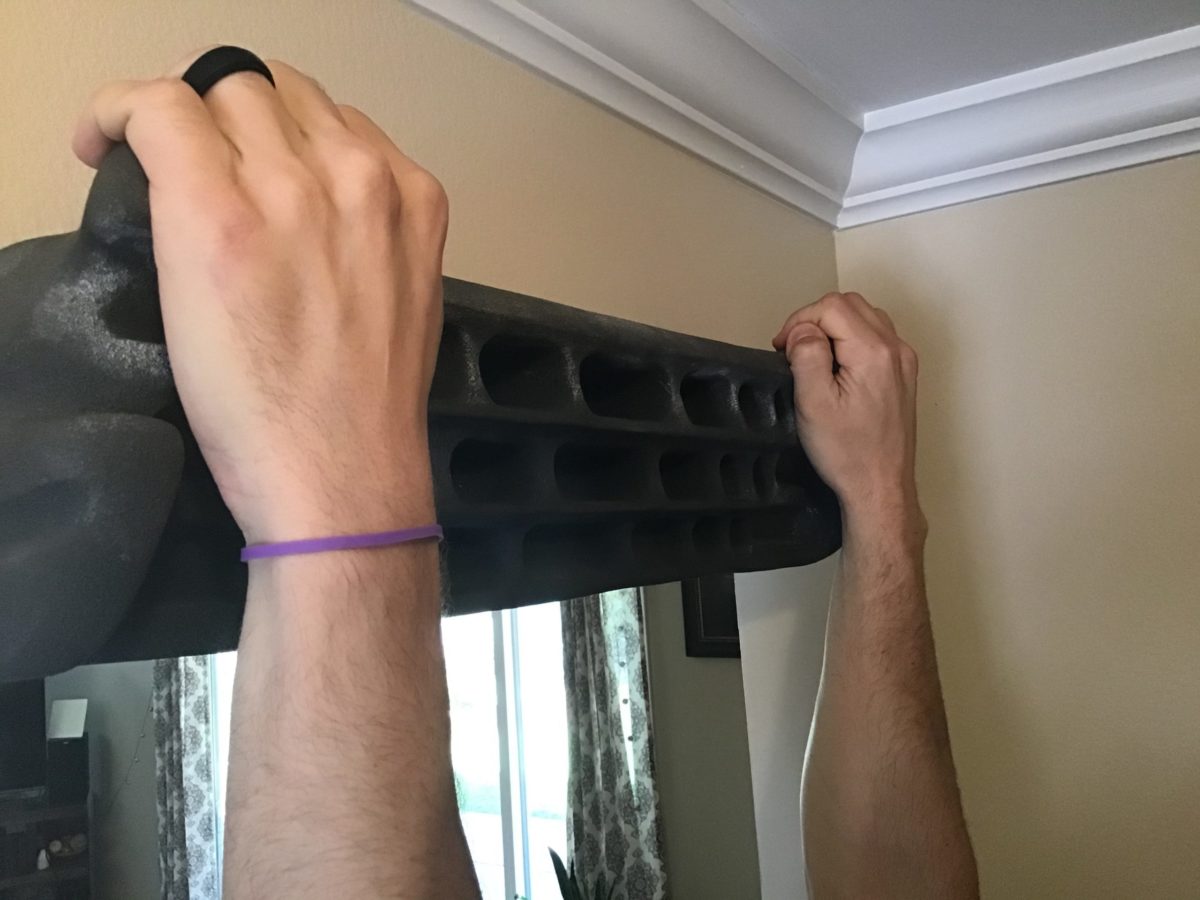
Hangboard isometrics: 5 x 10 seconds; 2-3 sets, 2 times per week
- Tendons respond to the load placed upon them. A controlled hangboard routine isolates your finger flexors, allowing you to load them at that “just right” level, which promotes tendon remodeling and healing. Choose an appropriate edge, avoiding full or closed crimps, that allows you to safely work up to the range of mild discomfort, about a 2/10 for those number people out there. Pain should disappear within a few minutes, with no additional soreness or stiffness the following days. Use a pulley system to unload body weight as needed, so that you can complete the hold time within mild discomfort range. See images.
Movement Phase
You’ve done all this hard work over the past few days and weeks, and are itching to get back on the wall. The last time you tried hard seems like a distant memory. Before you throw yourself back into full training mode, emphasize these last steps to solidify your recovery.
- Ensure proper warm up via tendon glides and rice bucket exercises from above. If you’re not already, include 5-10 minutes of full body movement to actively warm up.
- Pull on a few jugs, or climb 2-3 routes well below your red point ability. You are still testing the waters here. Listen to your body and back off if needed. Gradual progression in your return to full climbing will be far better than re-aggravating things and having to regress multiple steps or phases.
- Foot placement matters! Your legs and feet carry your body around all day long. Try supporting your body weight on your arms and hands, and most people last a few minutes at most. Get more out of your legs by allowing them to carry more of the load. Crouching and frogging positions are a great way to rest. On those overhanging routes, use your toes to “pull in” to the wall and create upward motion. This facilitates less pull on your arms and hands and more push through your legs.
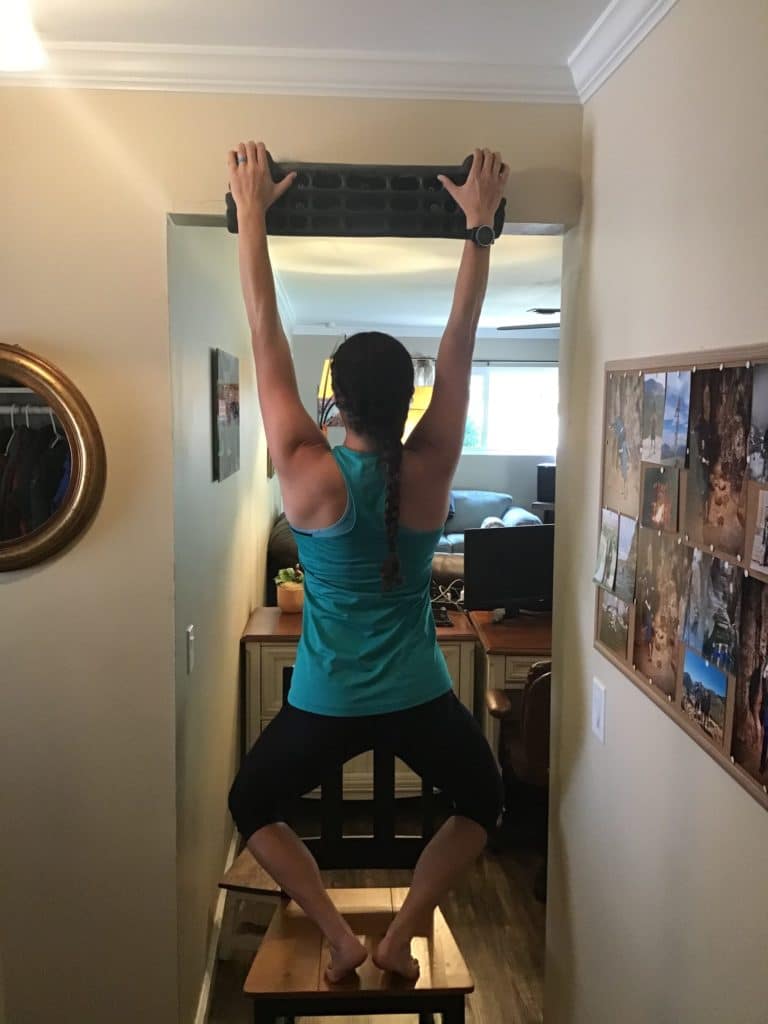
- Activate your core! Having a strong core and using it allows you to create more tension holding you to the wall, helping to offload that strain from your hands and fingers. You’ve got to train these muscles in a way specific to how they are used in climbing. Trying hanging comfortably from a hangboard or pull-up bar, and performing leg lifts as if you were carefully placing your feet on the wall. Alternatively, while climbing you can actively engage your core by using your transverse abdominis, one of the deeper abdominal muscles that works like a corset to stabilize your abdomen.
- As much as possible, focus on having neutral wrists and using more open handed grips. Your flexors create a stronger pull by playing off of the physics that come with extended wrists and half and full crimps. By maintaining a neutral wrist, you essentially help to limit excessive force going through your tendons. Being more mindful of this will benefit your overall climbing.
The Research
- Schöffl, V R, & Schöffl, I. (2007). Finger pain in rock climbers: Reaching the right differential diagnosis and therapy. Journal of Sports Medicine and Physical Fitness., 47(1), 70-78.
- Klauser, A., Bodner, G., Frauscher, F., Gabl, M., & Nedden, D. Z. (1999). Finger Injuries in Extreme Rock Climbers. The American Journal of Sports Medicine, 27(6), 733–737.
- Neiduski, R., & Powell, R. (2019). Flexor tendon rehabilitation in the 21st century: A systematic review. Journal of Hand Therapy : Official Journal of the American Society of Hand Therapists., 32(2), 165-174.
- Montgomery, J., Avers, D., Brown, M., & Hislop, H. J. (2013). Daniels and Worthinghams muscle testing: techniques of manual examination and performance testing. Oxford: Saunders.
- Martin, R., Davenport, T., Reischl, S., McPoil, T., Matheson, J., Wukich, D., & McDonough, C. (2014). Heel pain-plantar fasciitis: Revision 2014. The Journal of Orthopaedic and Sports Physical Therapy., 44(11), A1-33.
- Brotzman, S. B., & Manske, R. C. (2011). Clinical orthopaedic rehabilitation an evidence-based approach (3rd ed.). El Sevier.
- Martin, R., Chimenti, R., Cuddeford, T., Houck, J., Matheson, J., McDonough, C., . . . Carcia, C. (2018). Achilles Pain, Stiffness, and Muscle Power Deficits: Midportion Achilles Tendinopathy Revision 2018. The Journal of Orthopaedic and Sports Physical Therapy., 48(5), A1-A38.
- Schweizer, A. (2001). Biomechanical properties of the crimp grip position in rock climbers. Journal of Biomechanics., 34(2), 217-223.
Additional Image Sources
- https://medical-dictionary.thefreedictionary.com/tenodesis
- 3D4 Complete Anatomy
See a Medical Practitioner
The worst thing about injury, beyond the injury itself, are the nagging questions of “How bad is it?” And “Is what I’m doing helping or making it worse?” While the body has an amazing capacity to heal itself, seeing a medical practitioner that is familiar with your sport cannot be overstated in finding peace of mind and facilitating your recovery. There is a lot going on in your hand, and many injuries present similarly. Getting the right diagnosis is key, and is sometimes aided by imaging. This allows for the right treatment progression including the rest your body needs needs, and active progression of loading and movement to stimulate healing. You don’t want this to happen again right? We most often think of healthcare in a reactionary manner, after something has gone wrong. Seeing someone familiar with this injury will help you heal faster and smoother as well as giving you the tools to recover and train in such a manner that you are able to reduce your risk of future injury. An ounce of prevention is worth a pound of cure.
About the Author
Aaron Simon is a 2nd year doctorate student of physical therapy at the University of Nevada, Las Vegas. Prior to graduate school, he worked as a recreation therapist, helping people in addiction recovery with his favorite intervention, the great outdoors. Now a weekend warrior, he enjoys sharing this love with his wife and nearby family and friends, including climbing, canyoneering, skiing, biking, and running. He volunteers with local search and rescue efforts, and dreams of having the time to dedicate to running an ultra-marathon. Studying physical therapy has opened his eyes to the healing power of movement and exercise, and how we could all live a little bit better if we just move a little better and a little more. He is currently involved as a student investigator in a study involving somatosensory input and gait mechanics with people post-stroke. Upon graduating, he aspires to work in many areas of physical therapy including acute care, cardiac rehab, and providing services for outdoor athletes and search and rescue teams.
OLYMPUS DIGITAL CAMERA
To reach out to the author with questions or comments:
Email: aaron@onsightmovement.com
Instagram: @onsight.movement
- Disclaimer – The content here is designed for information & education purposes only and the content is not intended for medical advice.

great article, using those exercises now. for synovitis in my finger joints
Just got tenosynovitis diagnosed in 3 of my fingers. Can’t wait to try those recovery exercises! Thanks for this article!
Excellent article, thank you. Have developed tenosynovitis in a single finger while resting from climbing (2 weeks after last session with no trauma or loading) and it’s now been 6 weeks of rest without improvement. Seeing a medical professional about it, but great to read up on it and already have some recovery exercises in mind for when we figure out what’s going on. This article really helped give some good context!
I’d suggest the inverted prayer stretch also
Thanks for this great content!
Very informative, well written article with relevant videos embedded. Wish I’d found this earlier, maybe would’ve treated my fingers better!