Shoulder Mobility…or Lack Thereof
You’ve heard it a million times –
“Your shoulders are tight – gotta get those pec stretches in!”
“That’s as far as you can move your arms over your head?!”
“You’ll never reach the hold like that!”
You’ve felt it a million more times –
You’re staring down the last hold on your project yet as you reach for it, your back starts to arch or you slowly feel your body being pulled from the wall and just like that you’re slumped in your harness hanging on the rope or on the crash pad staring up wondering what happened?
Sound familiar? You might have a shoulder mobility issue.
What is Shoulder Mobility?
Mobility, in general, is a joint’s ability to move through its full range of motion (ROM) – to accomplish this the structures supporting the joint (muscles, tendon, and nerves) and the joint itself need to have both the appropriate strength and flexibility.
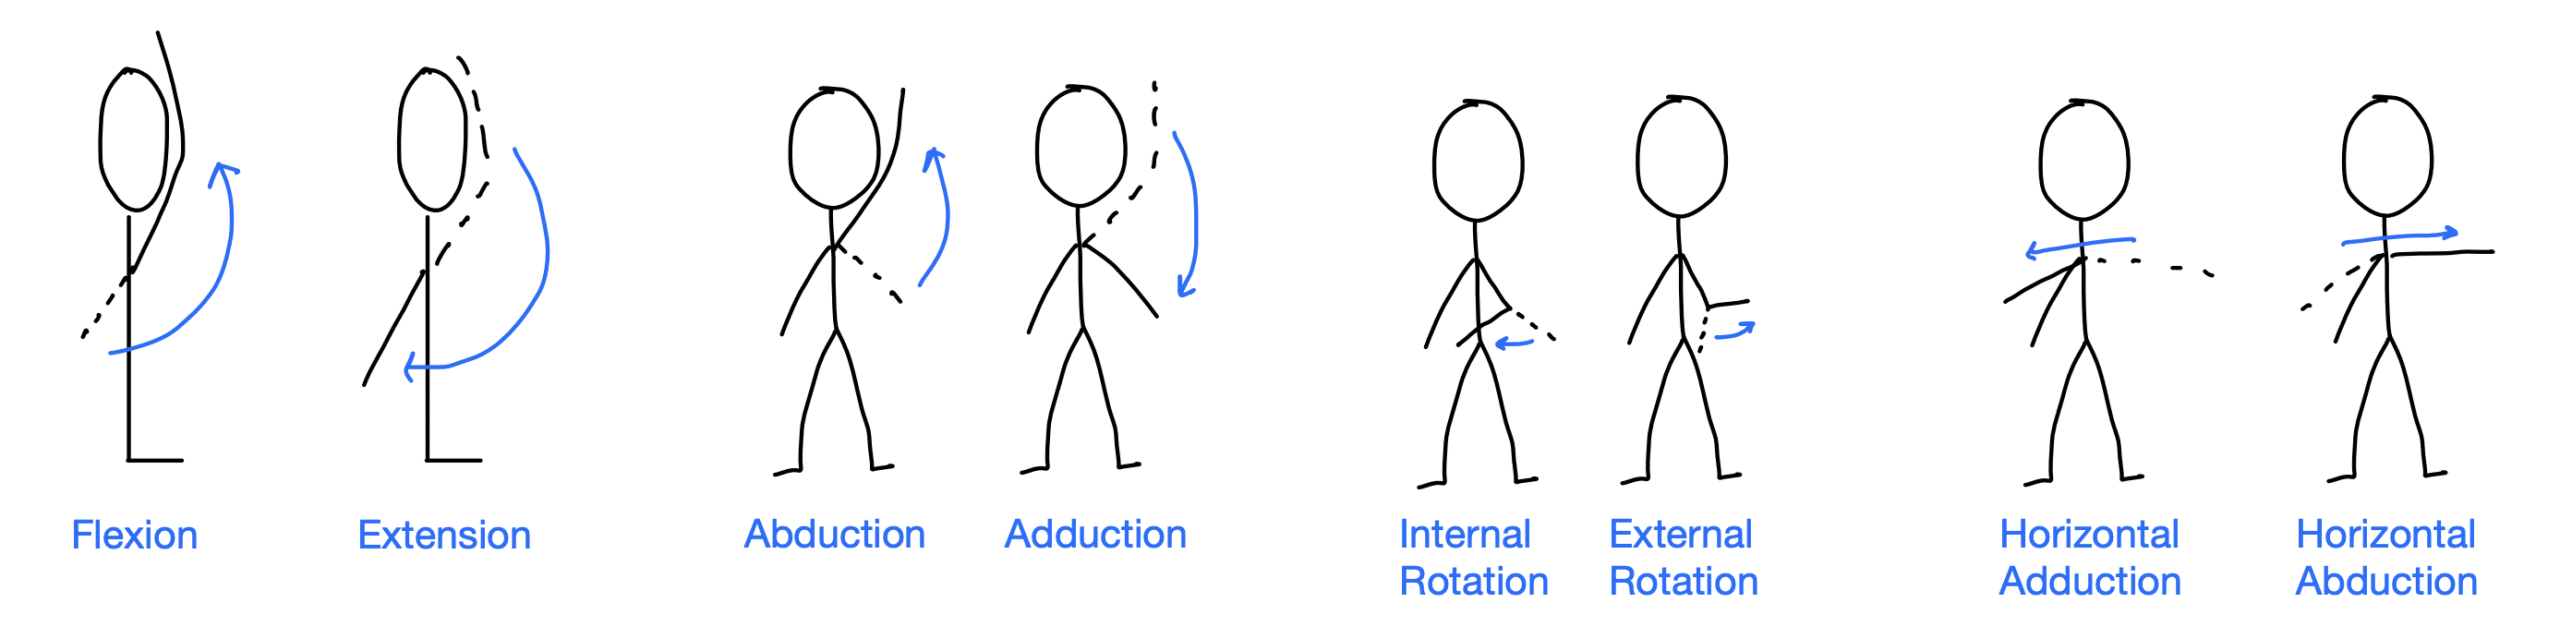
As a ball and socket joint, the shoulder can move in all directions – flexion, extension, internal/medial rotation, external/lateral rotation, abduction, adduction, horizontal abduction, and horizontal abduction.
For the shoulder to move through its full ROM we need adequate strength and flexibility in the glenohumeral (shoulder) joint itself, the thoracic spine (mid back), and scapula (shoulder blade), because they all play a role in how the shoulder moves.
Glenohumeral / Shoulder Joint
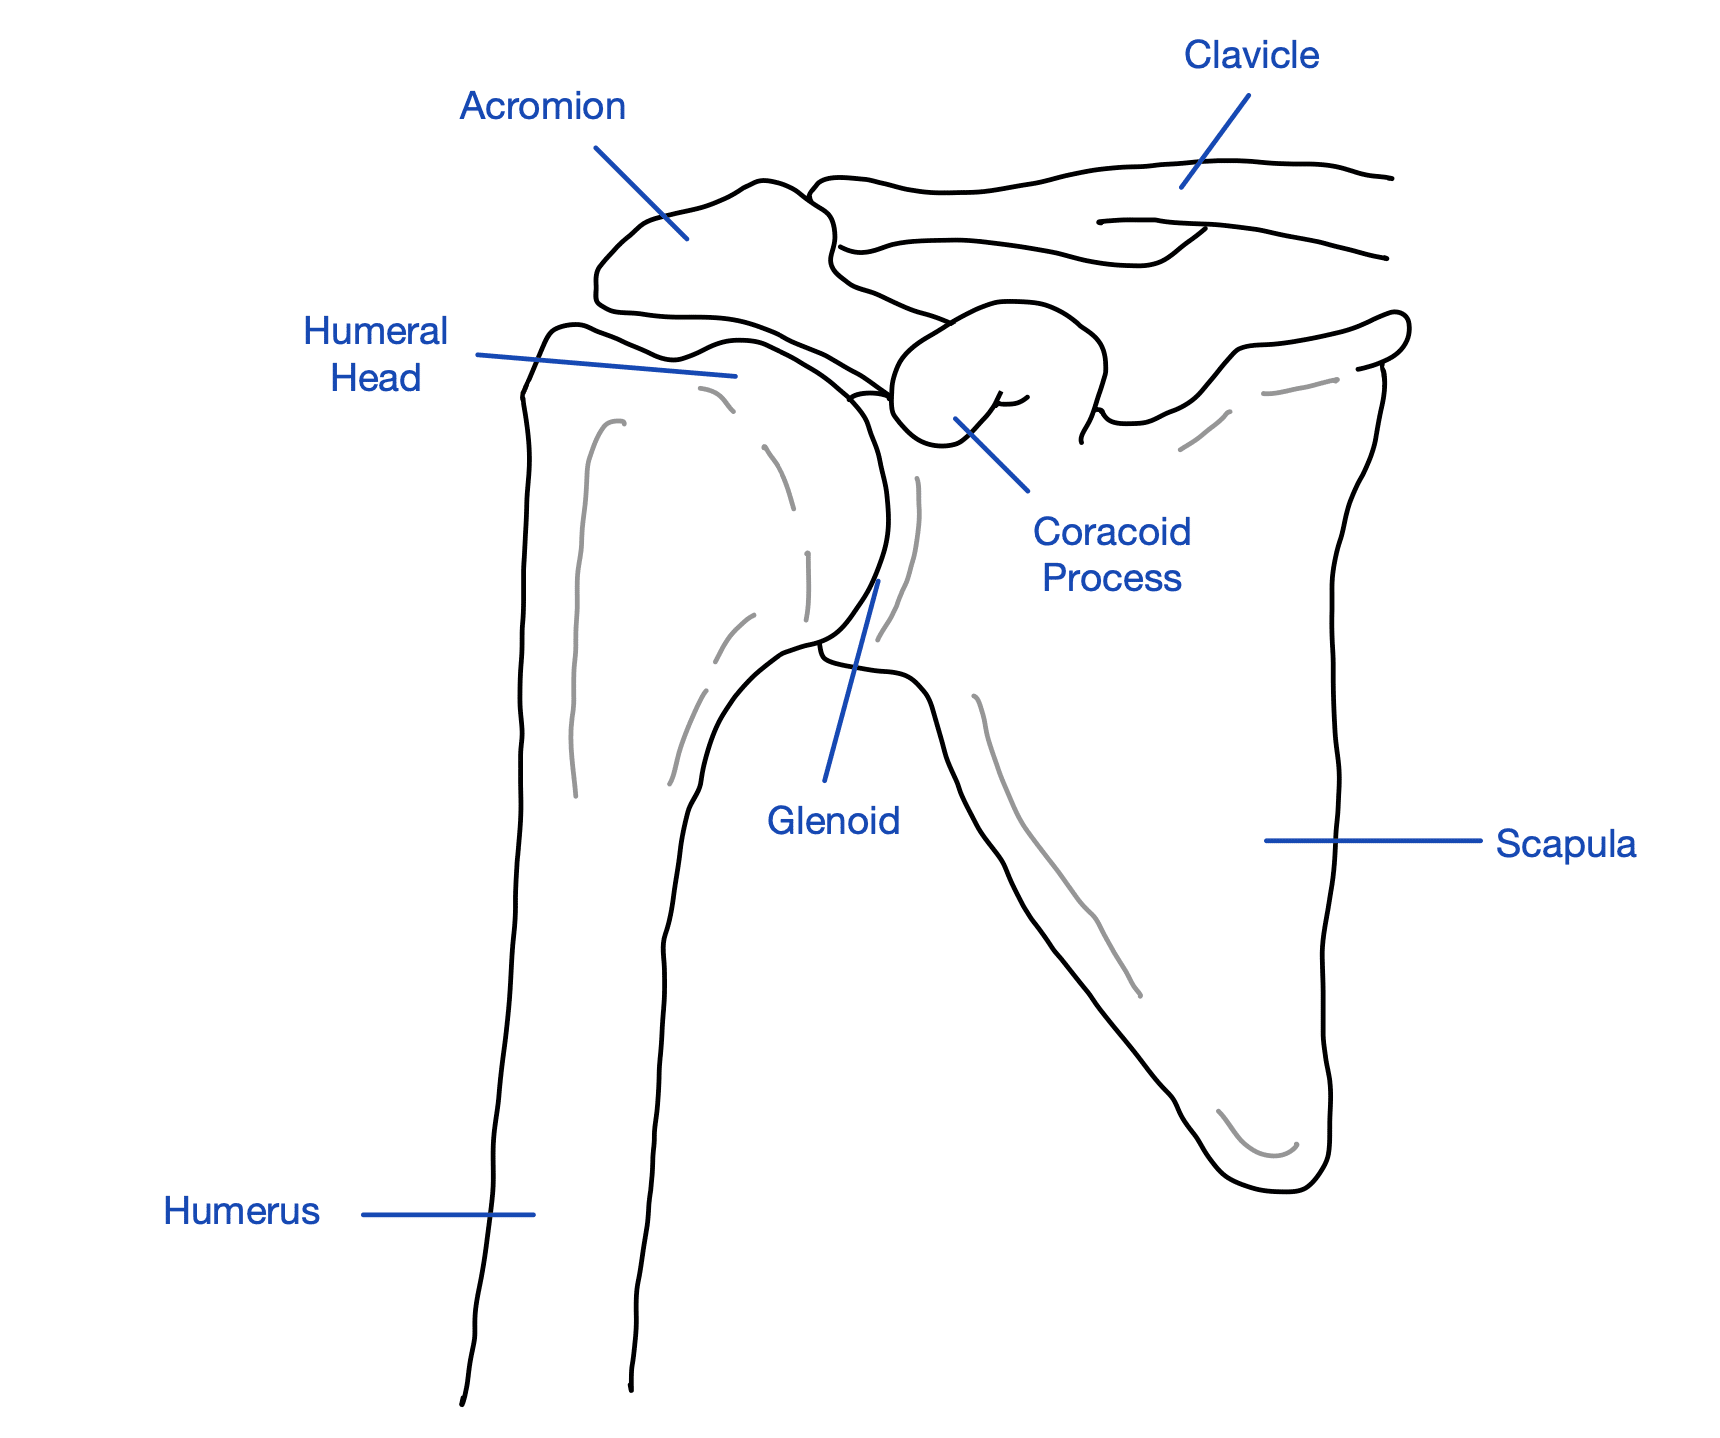
As mentioned previously the shoulder joint is a ball and socket joint that allows your shoulder to move in multiple directions. The joint is made up of the head of the humerus (ball) and the glenoid fossa (socket) of the scapula. The muscles in front and behind the shoulder help to stabilize the ball within the socket so the shoulder can move optimally throughout its range.
Scapula (shoulder blades)
We can’t really talk about the shoulder joint without talking about the scapula. The scapula works in a coupled motion with the shoulder joint during ROM. For many of the overhead movements involved in climbing – flexion and abduction, the scapula needs to upwardly rotate to achieve the full ROM. If supporting muscles responsible for this upward (and subsequent downward) rotation are stiff or weak we can see impacts on shoulder ROM and injury risk.
Thoracic Spine
The thoracic spine makes up the middle portion of our spine, consists of 12 vertebrae, and provides the attachment point for the ribs. The scapulae rest on top of our ribs and the resting position of the scapulae are largely dependent on how the thoracic spine and consequently the ribs move. Additionally, many of the muscles that control and support the shoulder and scapula have attachments on the thoracic spine. Therefore, if the thoracic spine is not moving optimally, we can see downstream effects on scapular and shoulder mobility.
Why Does Mobility Matter?
Okay okay the shoulder is complex and relies on several components for its mobility. Why does this matter for my climbing?
- Injury Prevention – appropriate shoulder mobility and stability are integral parts of injury prevention. Both hypermobility (excessive movement) and hypomobility (decreased movement) of the shoulder have been shown to lead to increased risk of shoulder injury whether it be via dislocation or impingement.
- Performance
- Reach – simplistically shoulder mobility is required to reach in all directions. If you are lacking shoulder mobility you are not going to be able to reach a hold while keeping the rest of your body in an optimal position (e.g. keeping your hips close to the wall or your center of mass over your feet).
- Force Generation – muscles generate their greatest force while in their ideal or resting position and then less force when they are lengthened or shortened. Often shoulders with increased or decreased mobility are accompanied by shortened and lengthened muscles which can result in decreased force generation while in certain climbing positions.
- For example if your lat muscles are short, you may not be able to fully bring your arms overhead. Instead your range of motion may stop just around your ears – meaning the end range of your muscle and shoulder is now in the position you are climbing in.. If this is the case you will not be able to generate maximum force in this position because your muscle is fully elongated.
While both hypermobility and hypomobility present challenges to climbing, the focus of this article is on hypomobility specifically as it relates to impairments in flexibility, not strength.
How do I determine if I’m hypomobile?
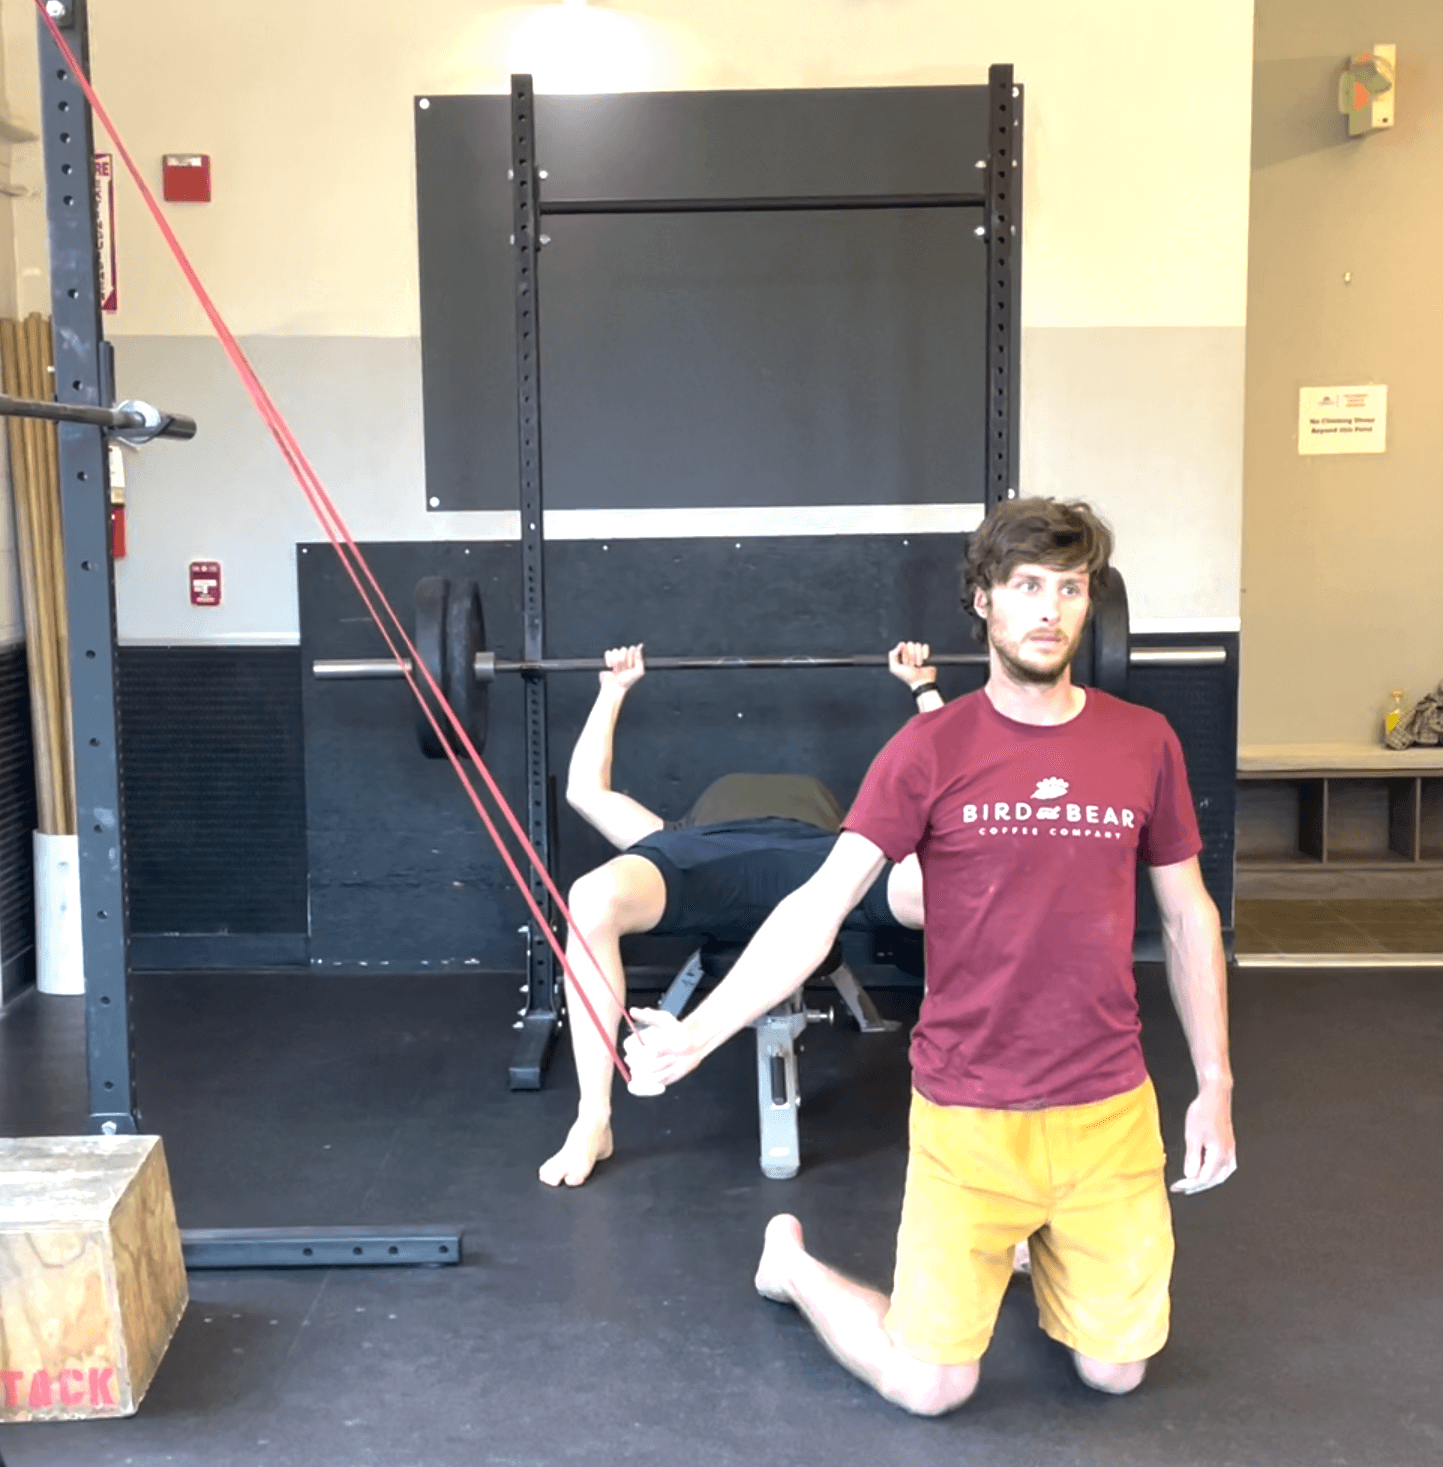
Functional Shoulder Test
This test is a solid bang for your buck as it requires shoulder, scapula, and thoracic mobility!
Performing the Test
- Enlist a friend with a tape measure or ruler or film yourself from behind with the camera at about shoulder blade height.
- Stand up tall with feet together
- Make hands into fists with thumbs tucked in and extend arms out to your side
- Bring one arm up and behind your head trying to reach the fist down your spine as far as you can
- Bring the opposite arm down behind your back and reach the fist up your spine – like you are trying to have your fists meet
- Measure the distance between your fists
- Repeat steps 2-6., but switch which arm moves up behind the head and down behind the back
Interpreting the Results
- Measure the distance from the tip of your longest finger to the crease at the base of your hand (at the wrist)
- Compare the distance between your fists from the test to the length of your hand
Normal mobility: the distance between your fists is about 1 hand length
Hypomobile: > 1 hand length
Hypermobile: significantly less than 1 hand length (think knuckles touching)
I’m hypomobile, now what?
As mentioned previously, the shoulder is a complex joint whose ROM is dictated by the relationship between the scapula, thoracic spine, glenohumeral joint, and associated musculature. Rather than go through flexibility screens for individual muscles and complexes, below are two routine suggestions that target some of the major players to help keep your shoulders mobile.
What you’ll need
- Foam roller
- Static strap
- Theraband
Active Mobility circuit – Best before or a workout or on climbing days
Complete 10 reps of each exercise (on each side where appropriate) and move on to the next exercise. Complete the entire circuit 2 times.
- Active assisted flexion and abduction
- Foam roller wall slide
- Thread the needle
- Thoracic extension with dowel
Active Assisted Flexion and Abduction
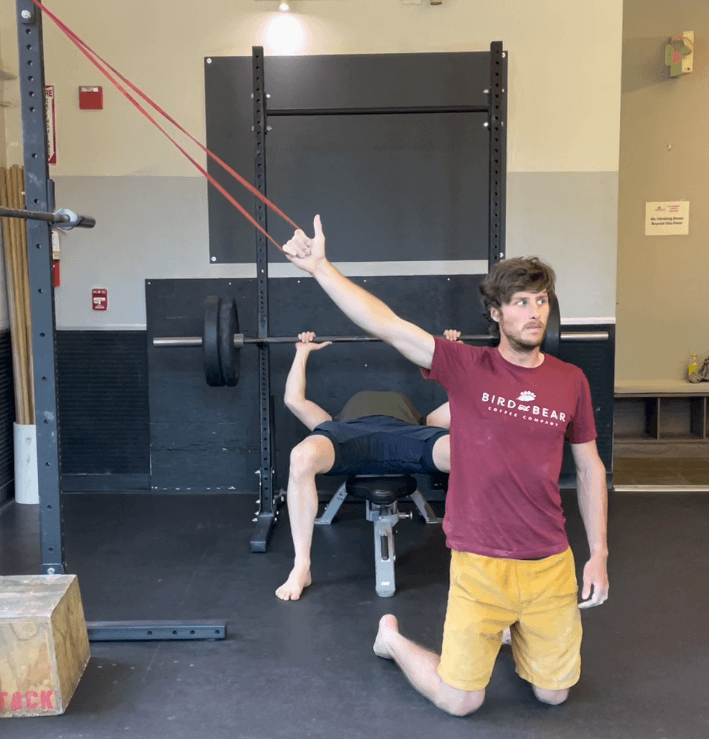
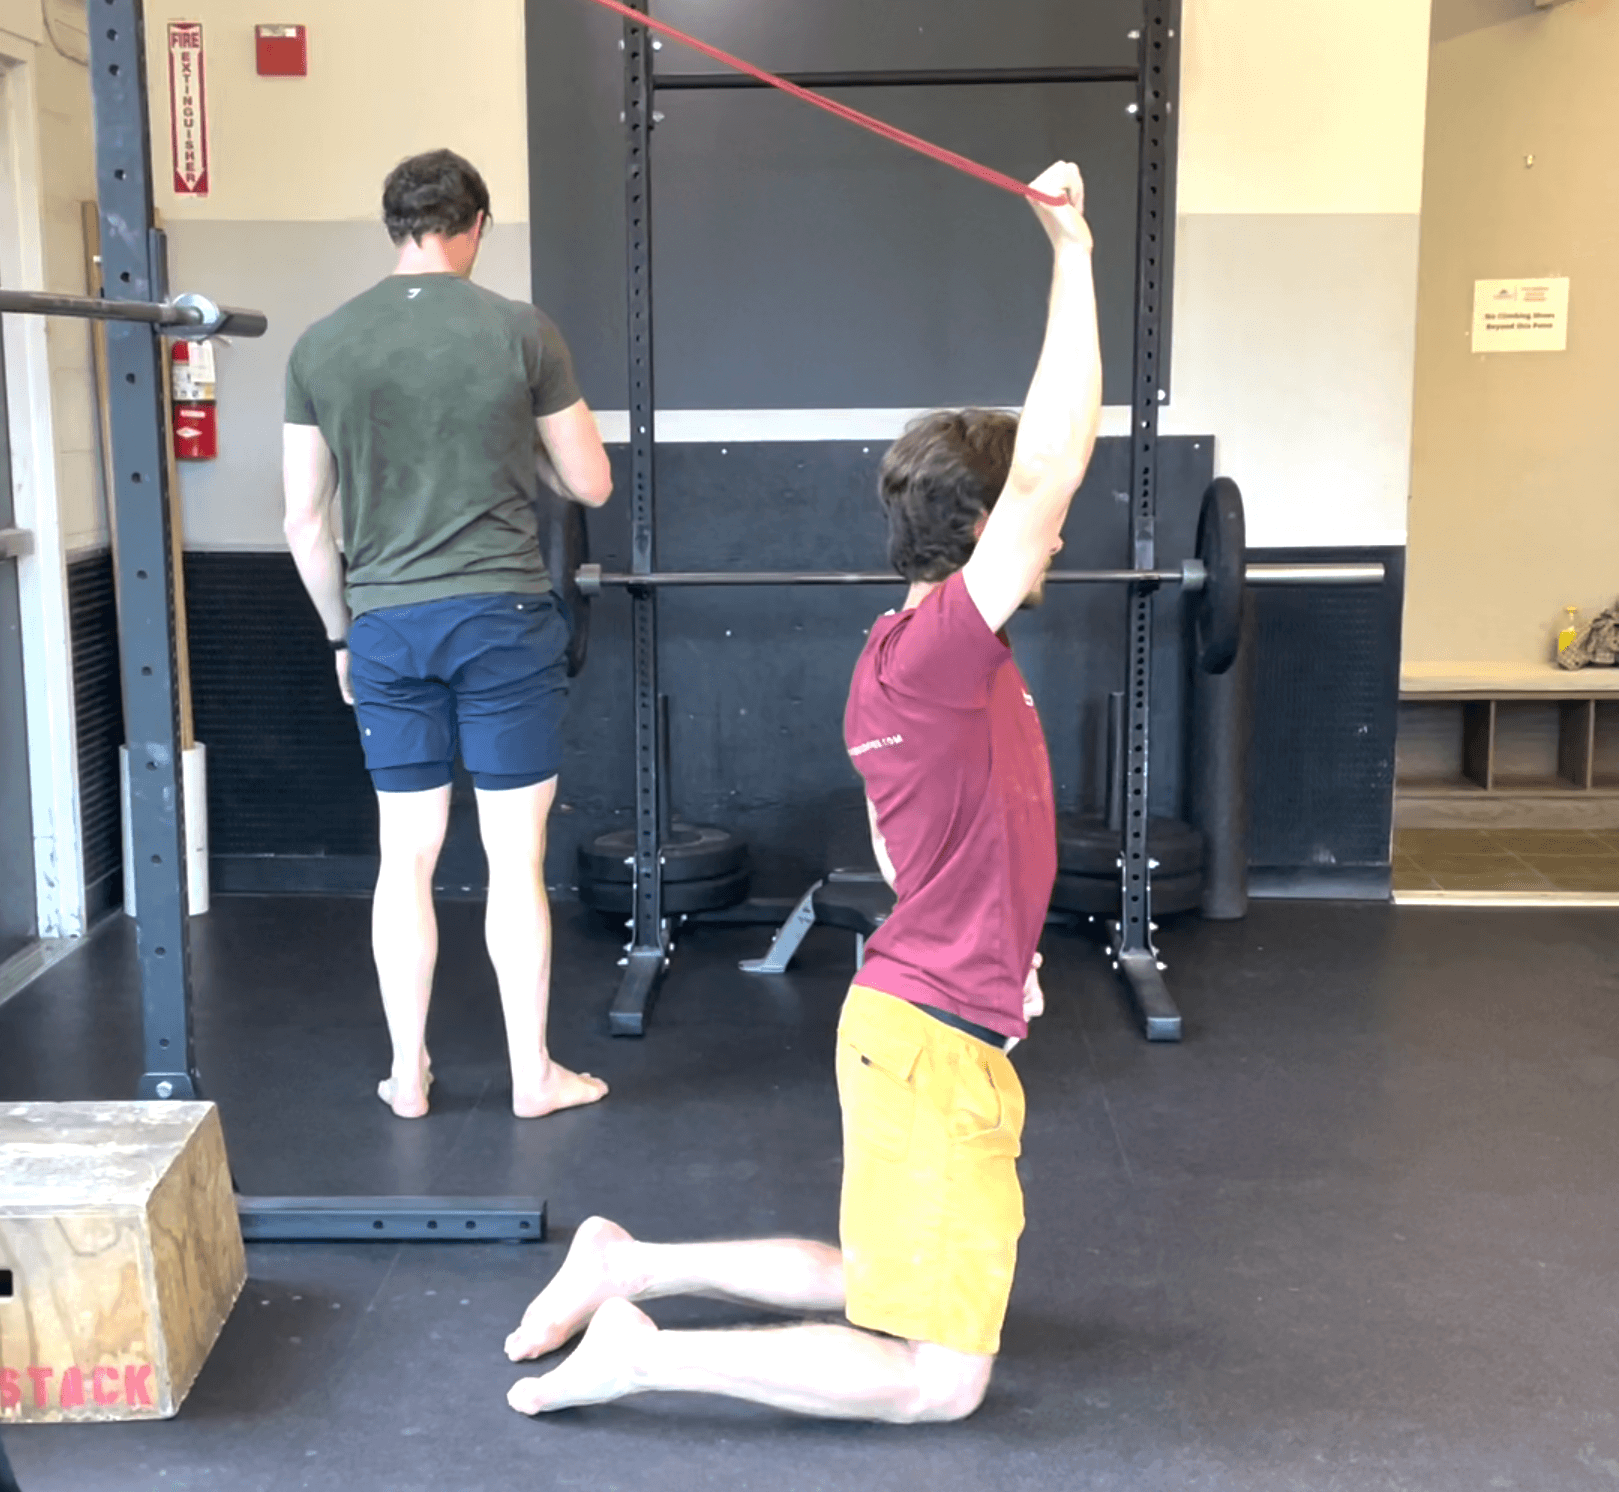
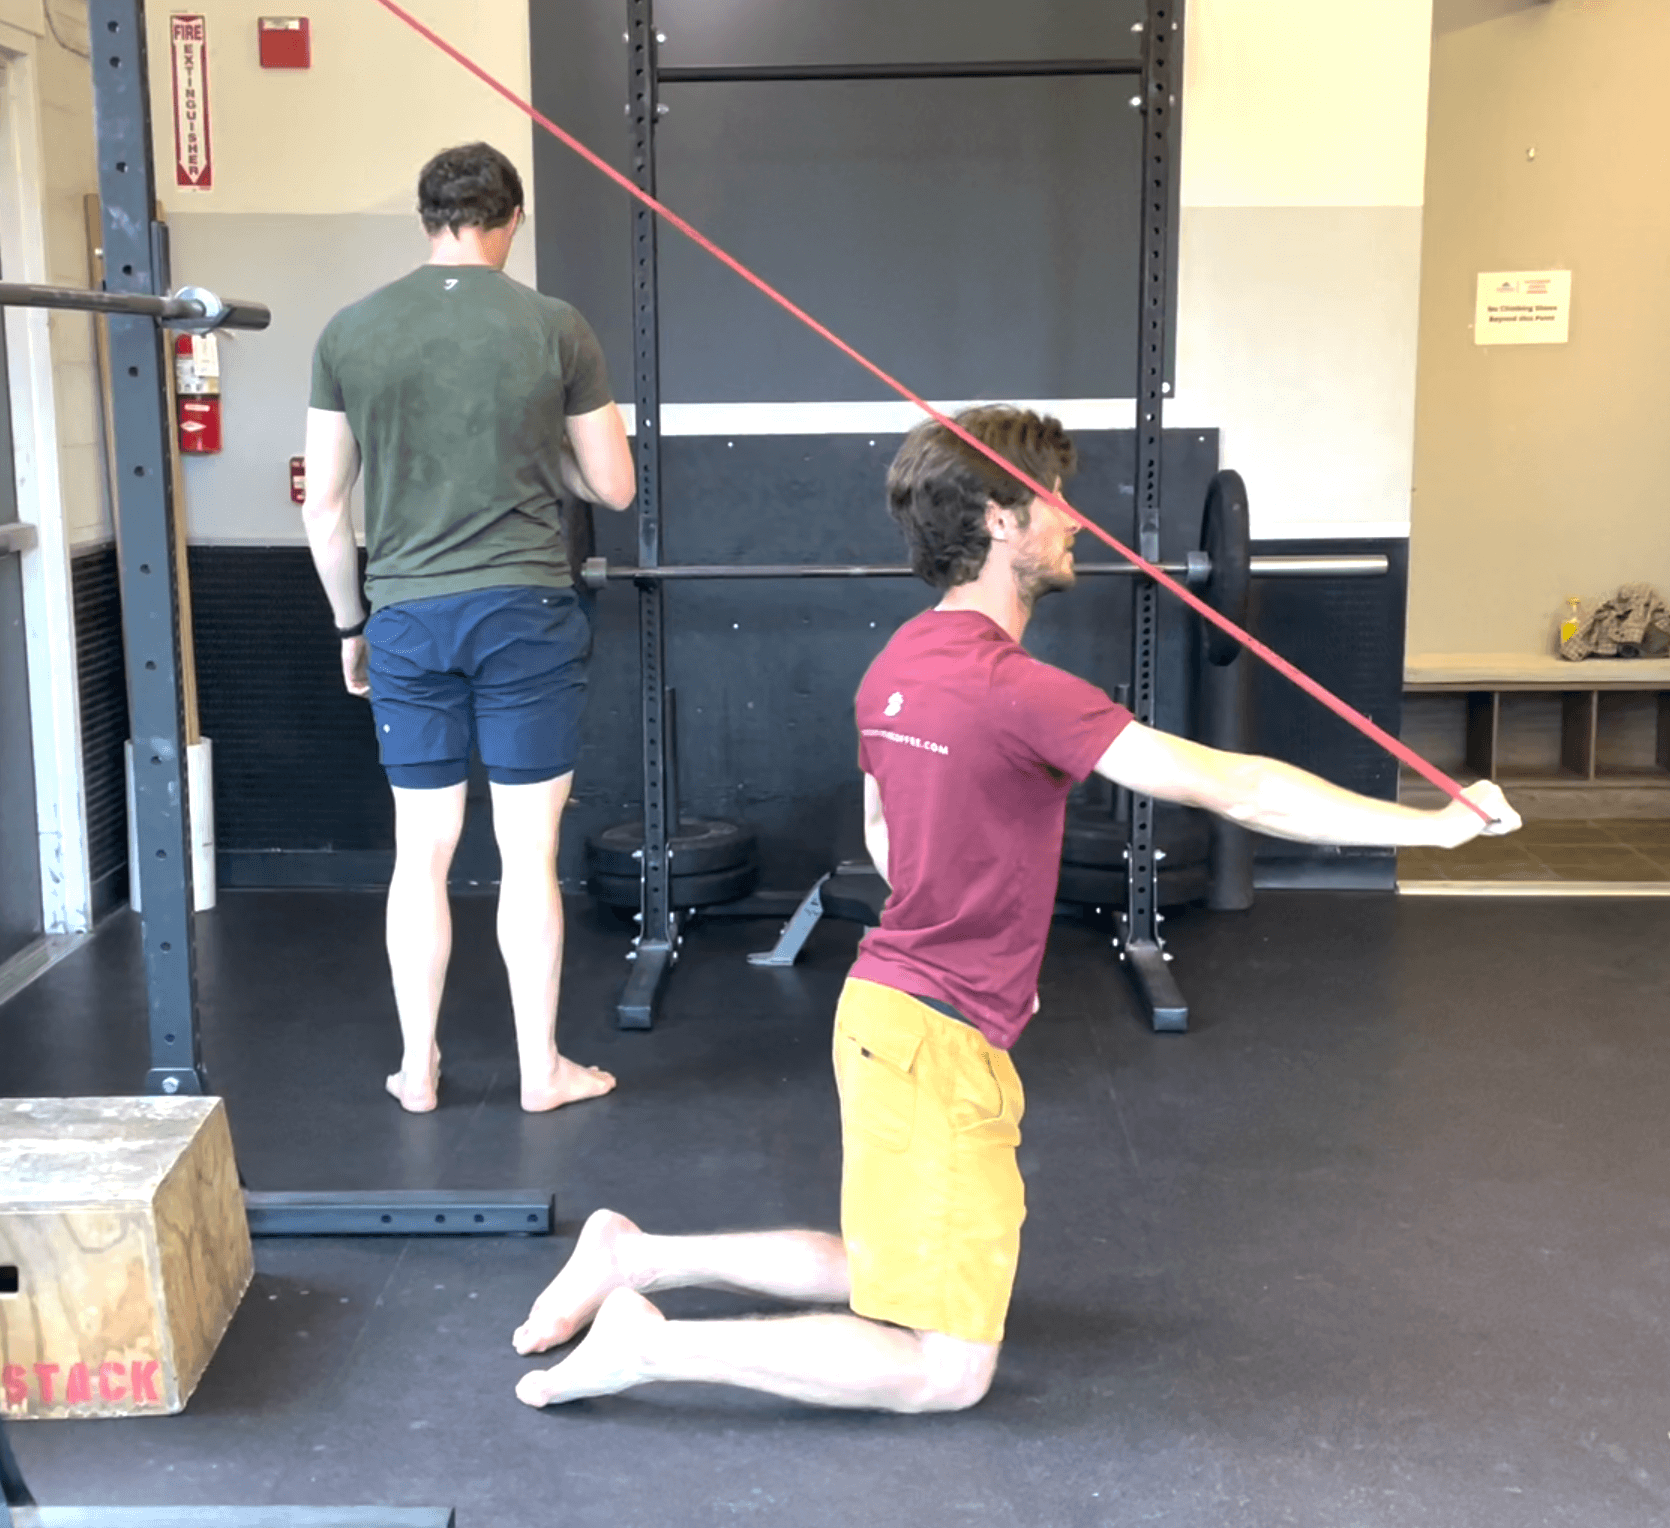
Anchor a theraband above head height. Stand in a split stance with a neutral spine. For both exercises below, keep the spine neutral throughout the range of motion and allow the band to assist and provide a gentle stretch.
-
- Flexion: with arm straight out in front of you, slowly bring arm overhead
- Abduction: with arm straight out to the side, slowly bring the arm over head
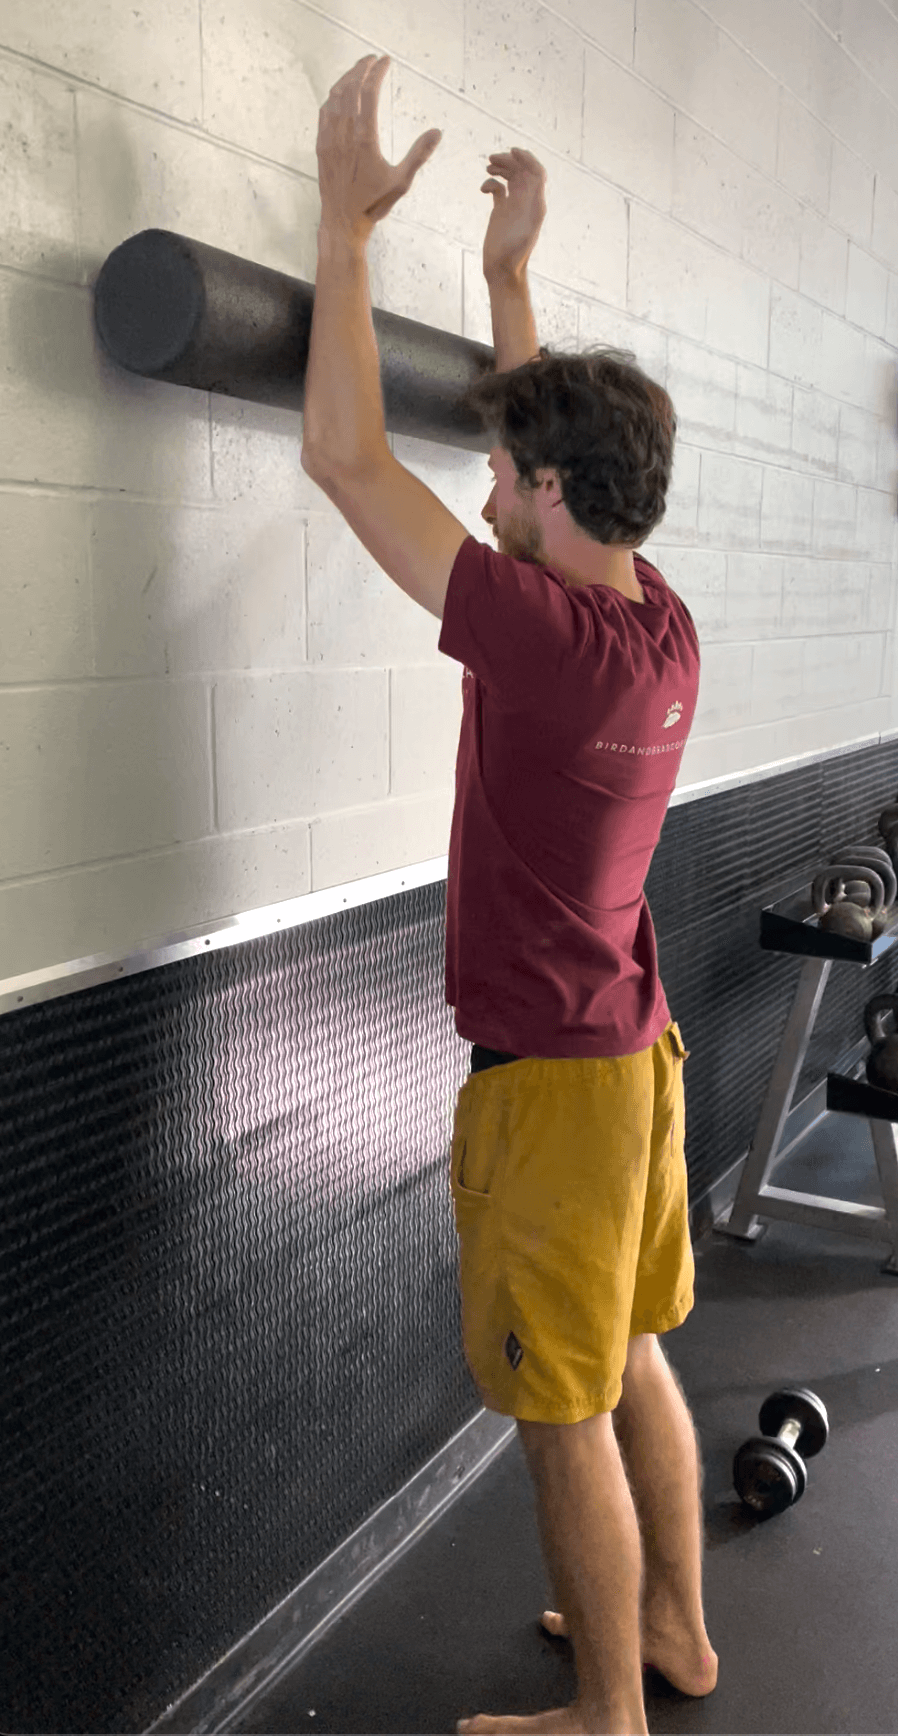
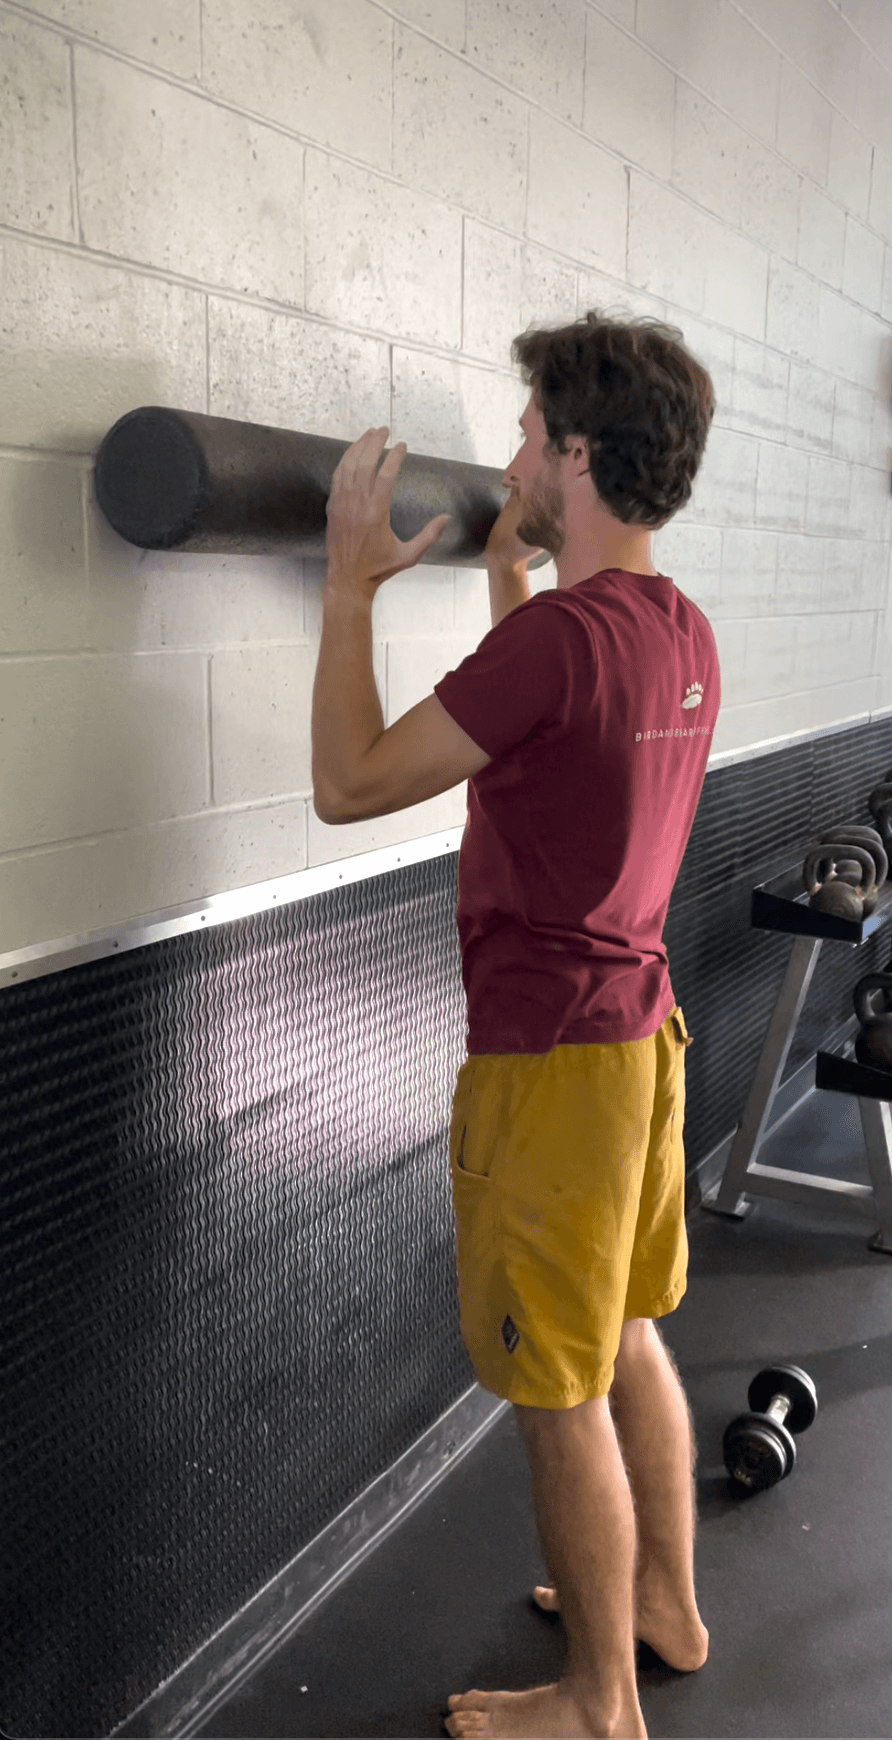
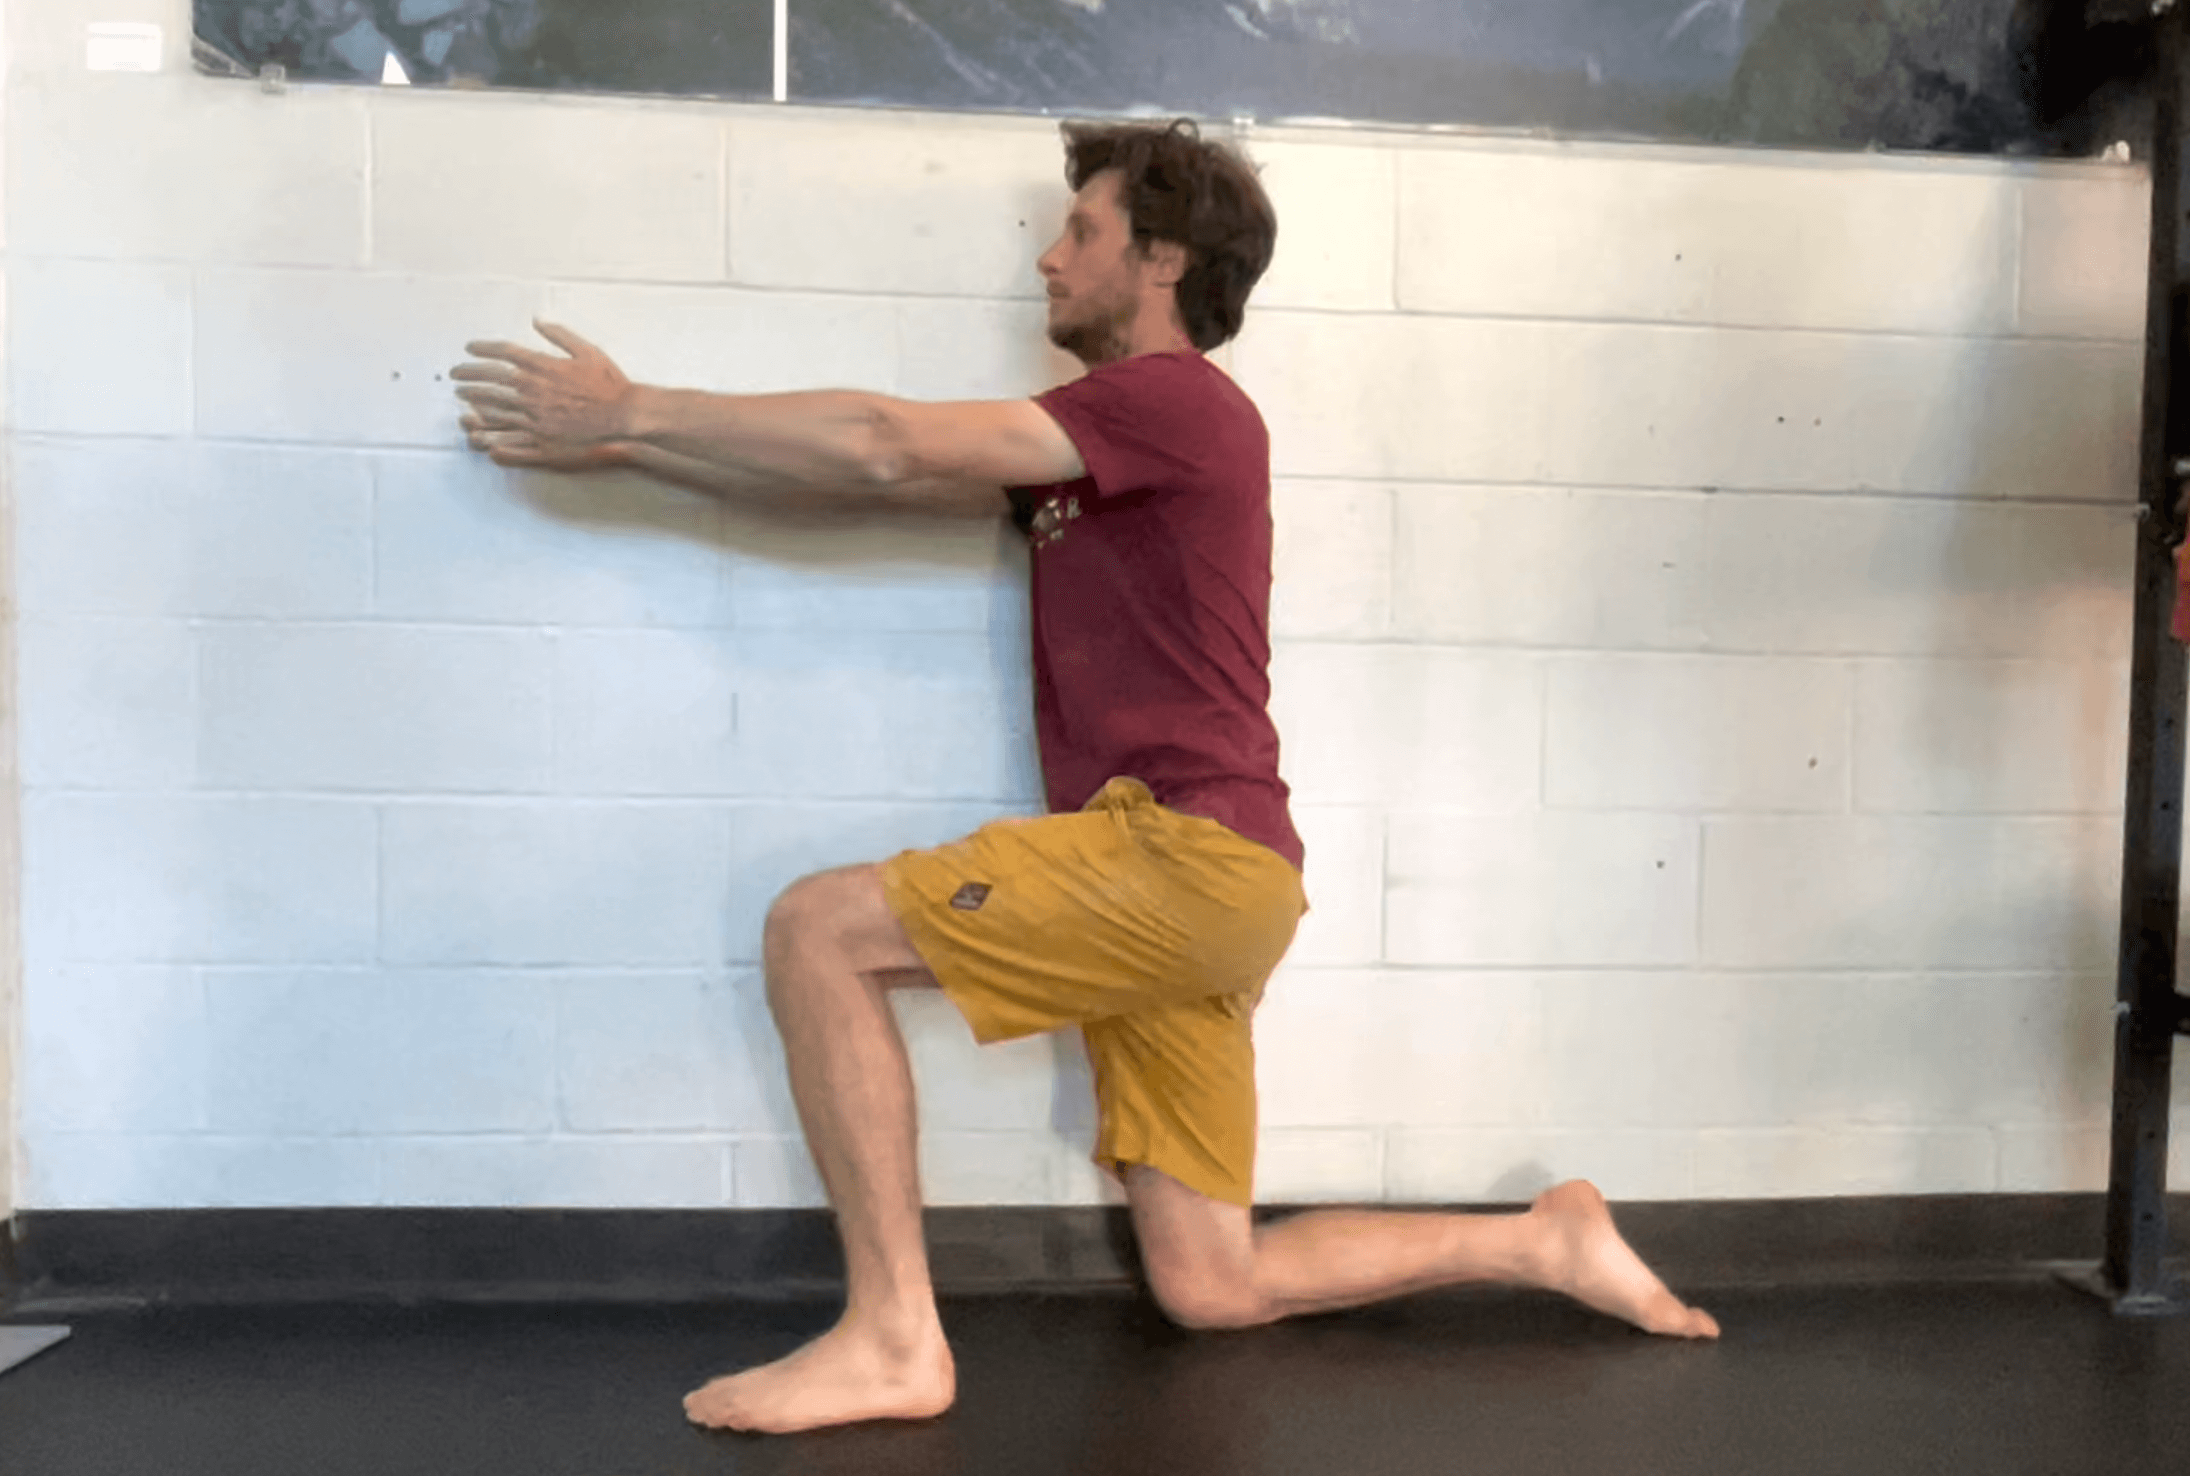
Foam Roller Wall Slides
Stand facing a wall with the foam roller horizontally, place both wrists on the foam roller pinning it between your forearms and the wall. With palms facing each other and arms shoulder width apart – slowly slide your arms along the wall, rolling along the foam roller and return to the starting position. That’s 1 rep. Make sure to keep your shoulders engaged, not letting your shoulders creep up towards your ears.
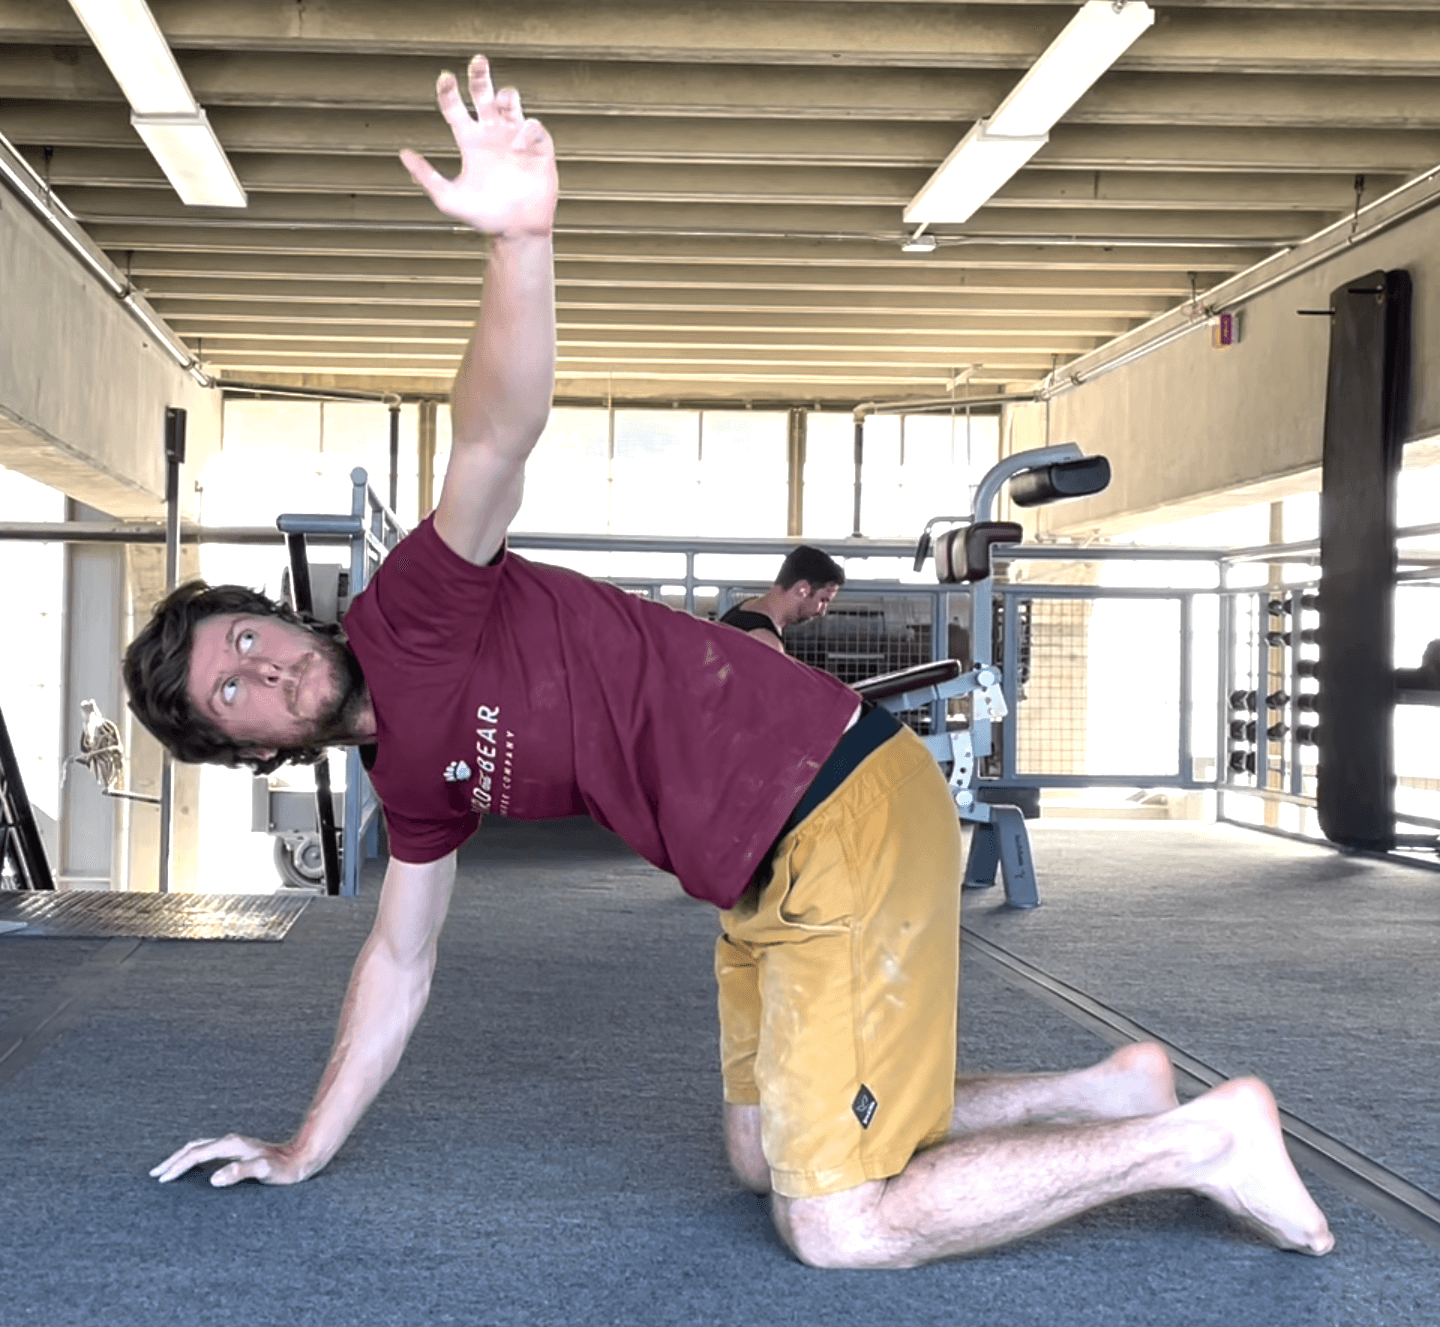
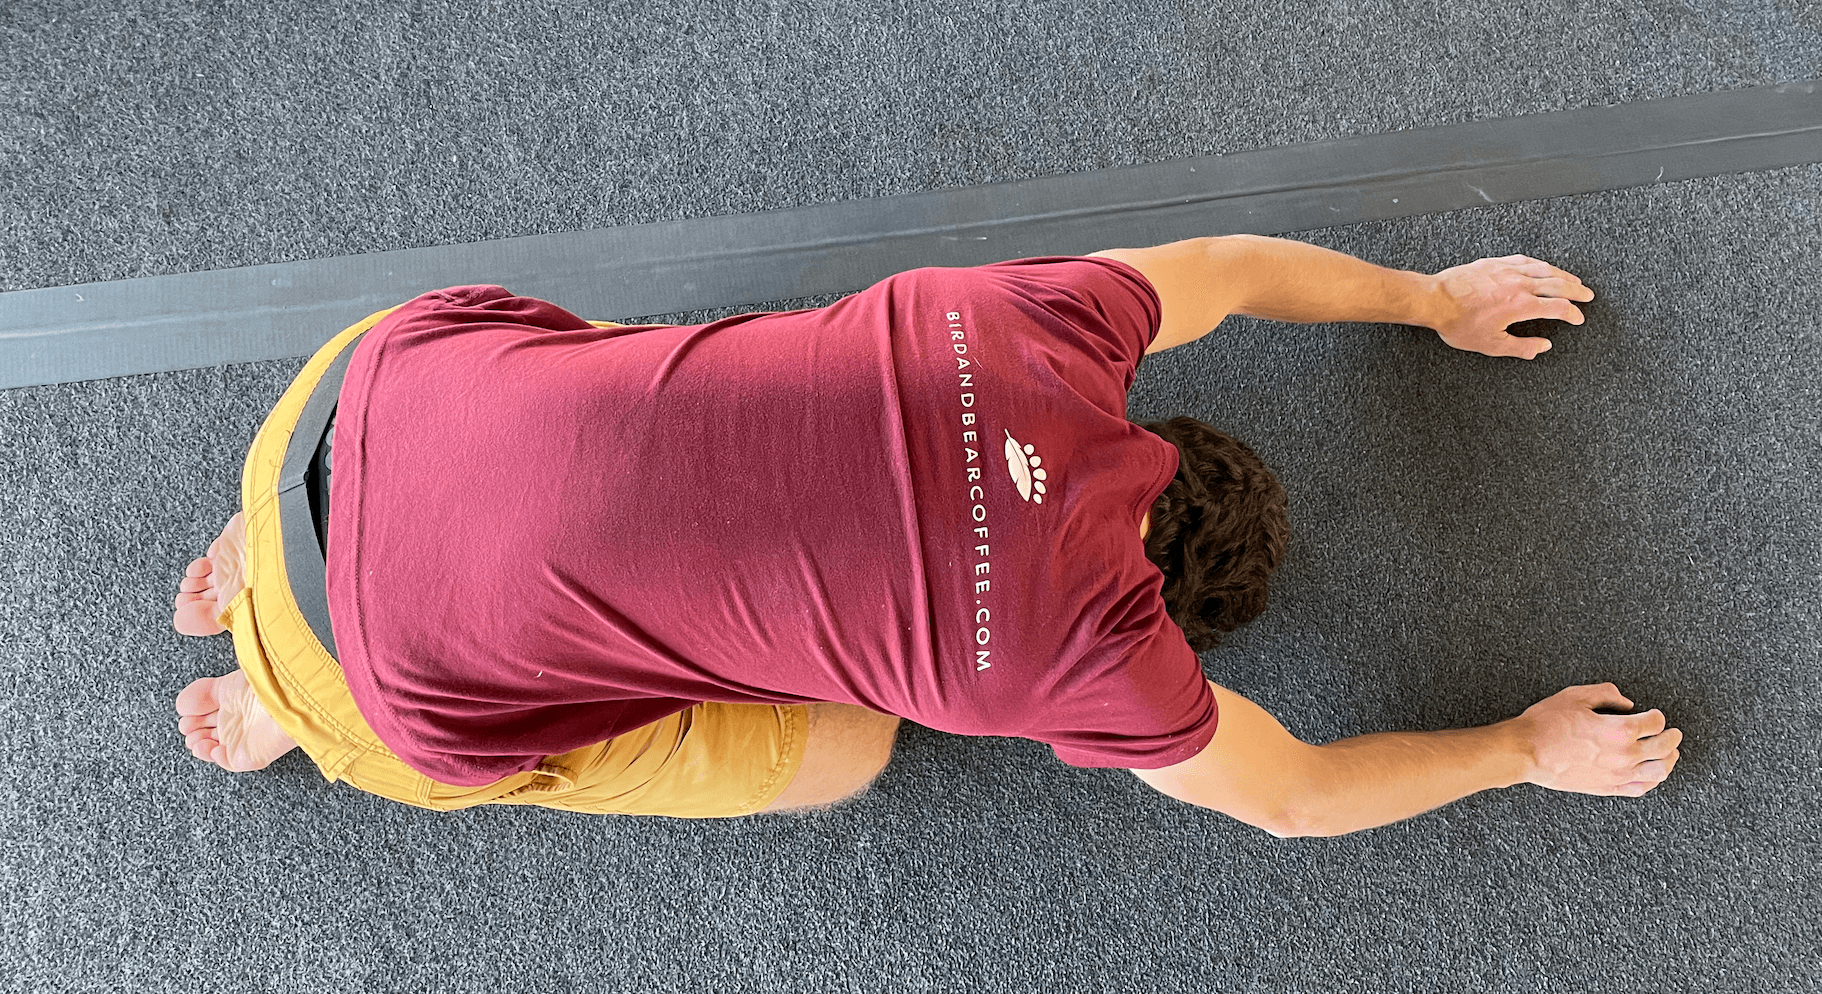
Thread the needle
Start on your hands and knees with wrists under your shoulders and knees under your hips. Next, keeping your spine neutral (not sagging into extension or bending into flexion), rotate your left arm up towards the ceiling opening the chest in that direction. Pause with your finger tips pointed towards the sky and then return past your starting position threading the left arm under the right arm, bringing the left shoulder towards the floor and reaching with your finger tips. That’s 1 rep.

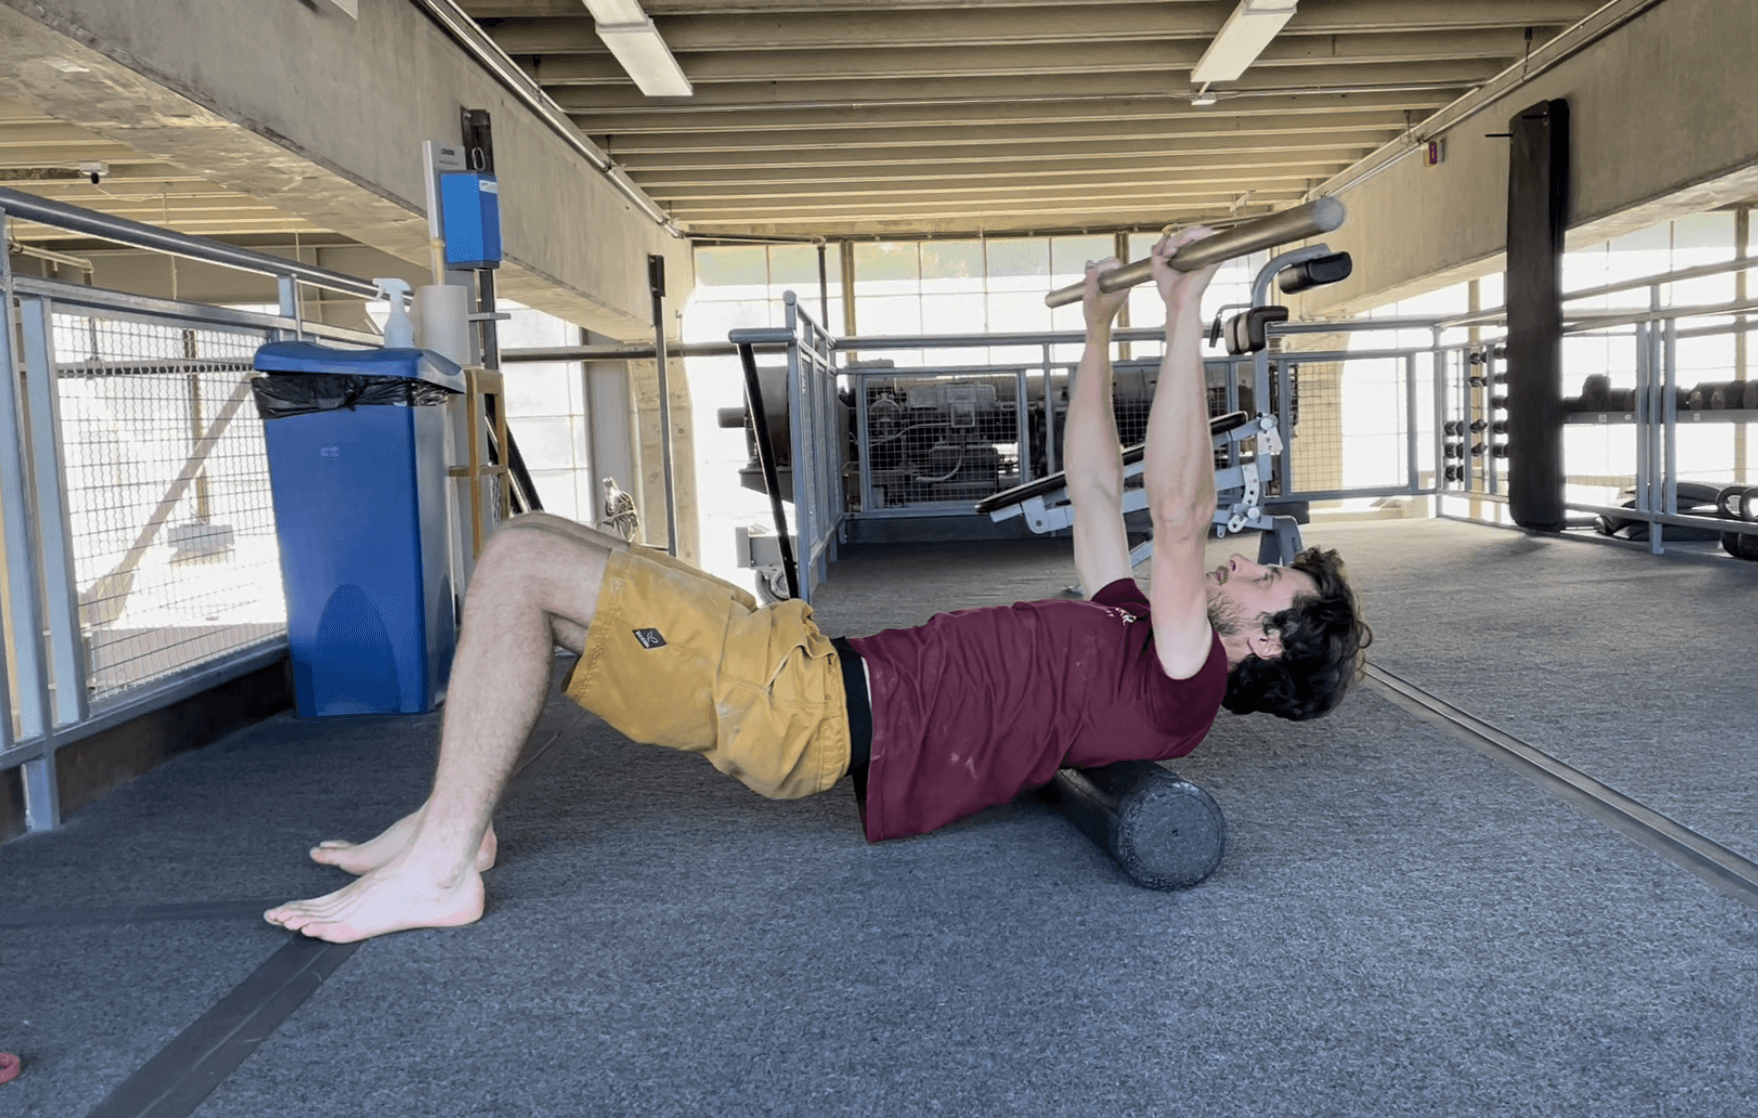
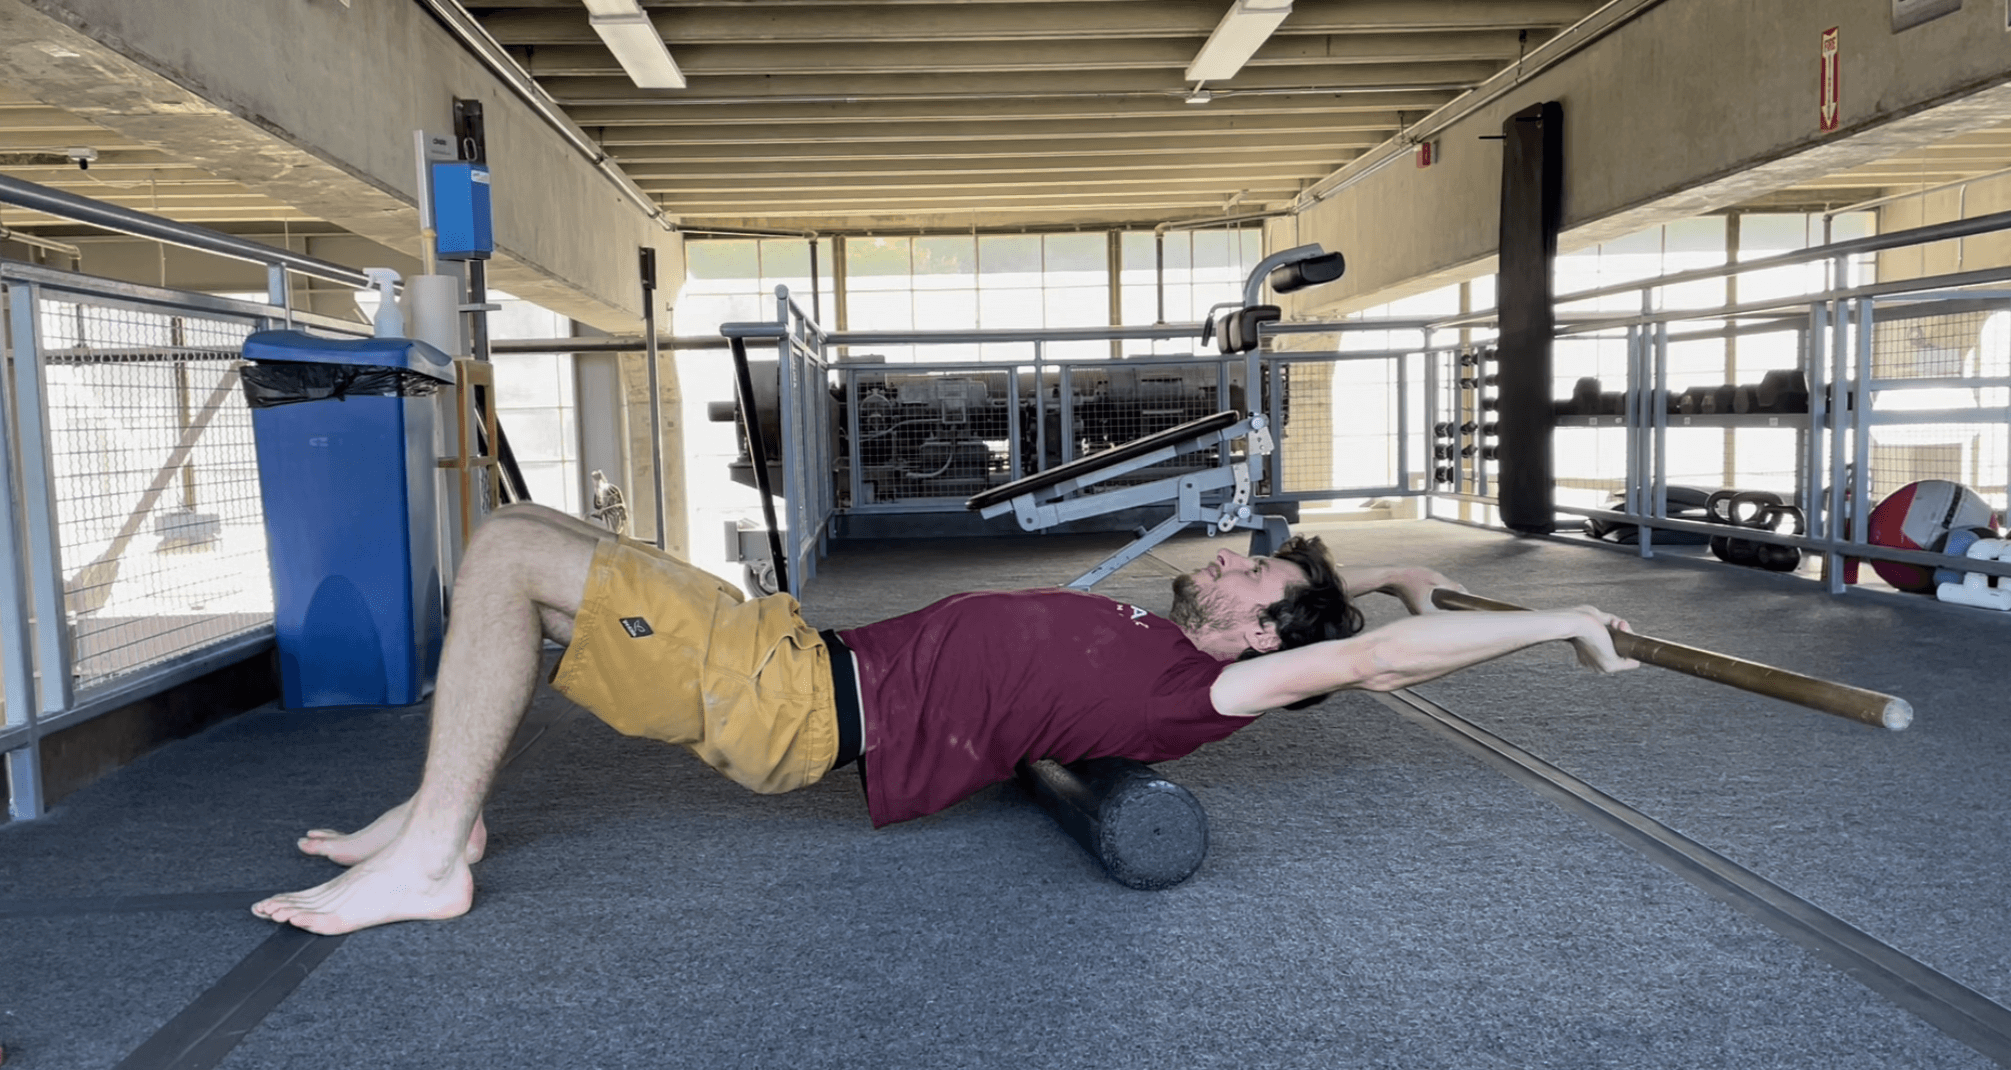
Thoracic Extension +/- weight
Lay on your back with knees bent and a foam roller horizontally across your upper-back. Lift your hips off of the floor, placing your spine in neutral. Holding a PVC pipe, wooden dowel, or medicine ball straight up from your chest, slowly bring your arms overhead towards the ground, keeping the arms extended. Return to the starting position and that’s 1 rep.
Static Stretch Circuit – Best after a workout or on rest days
- Thoracic spine foam rolling
- Child’s Pose
- Wall Windmills
- Pec Stretch
- Internal rotation Stretch
Thoracic spine Foam Rolling
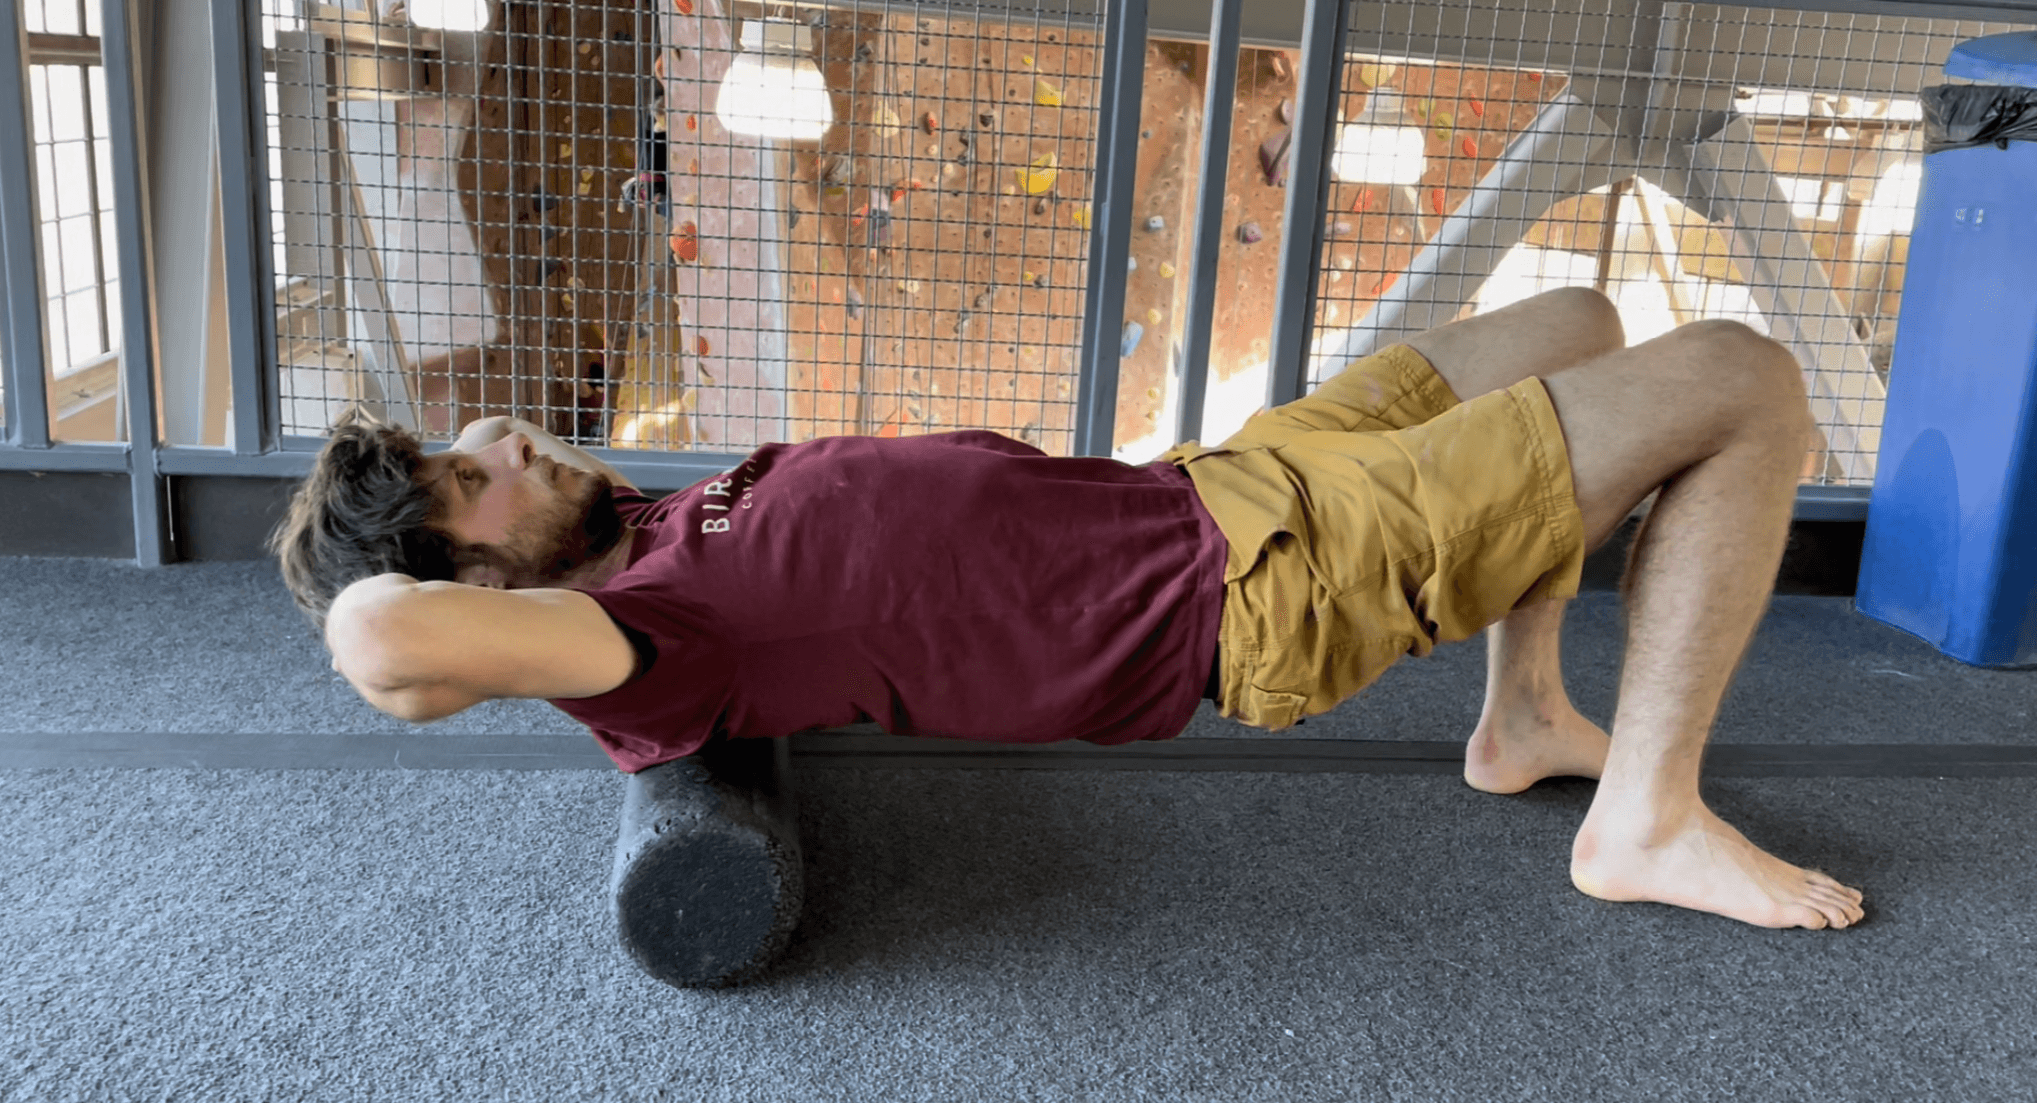
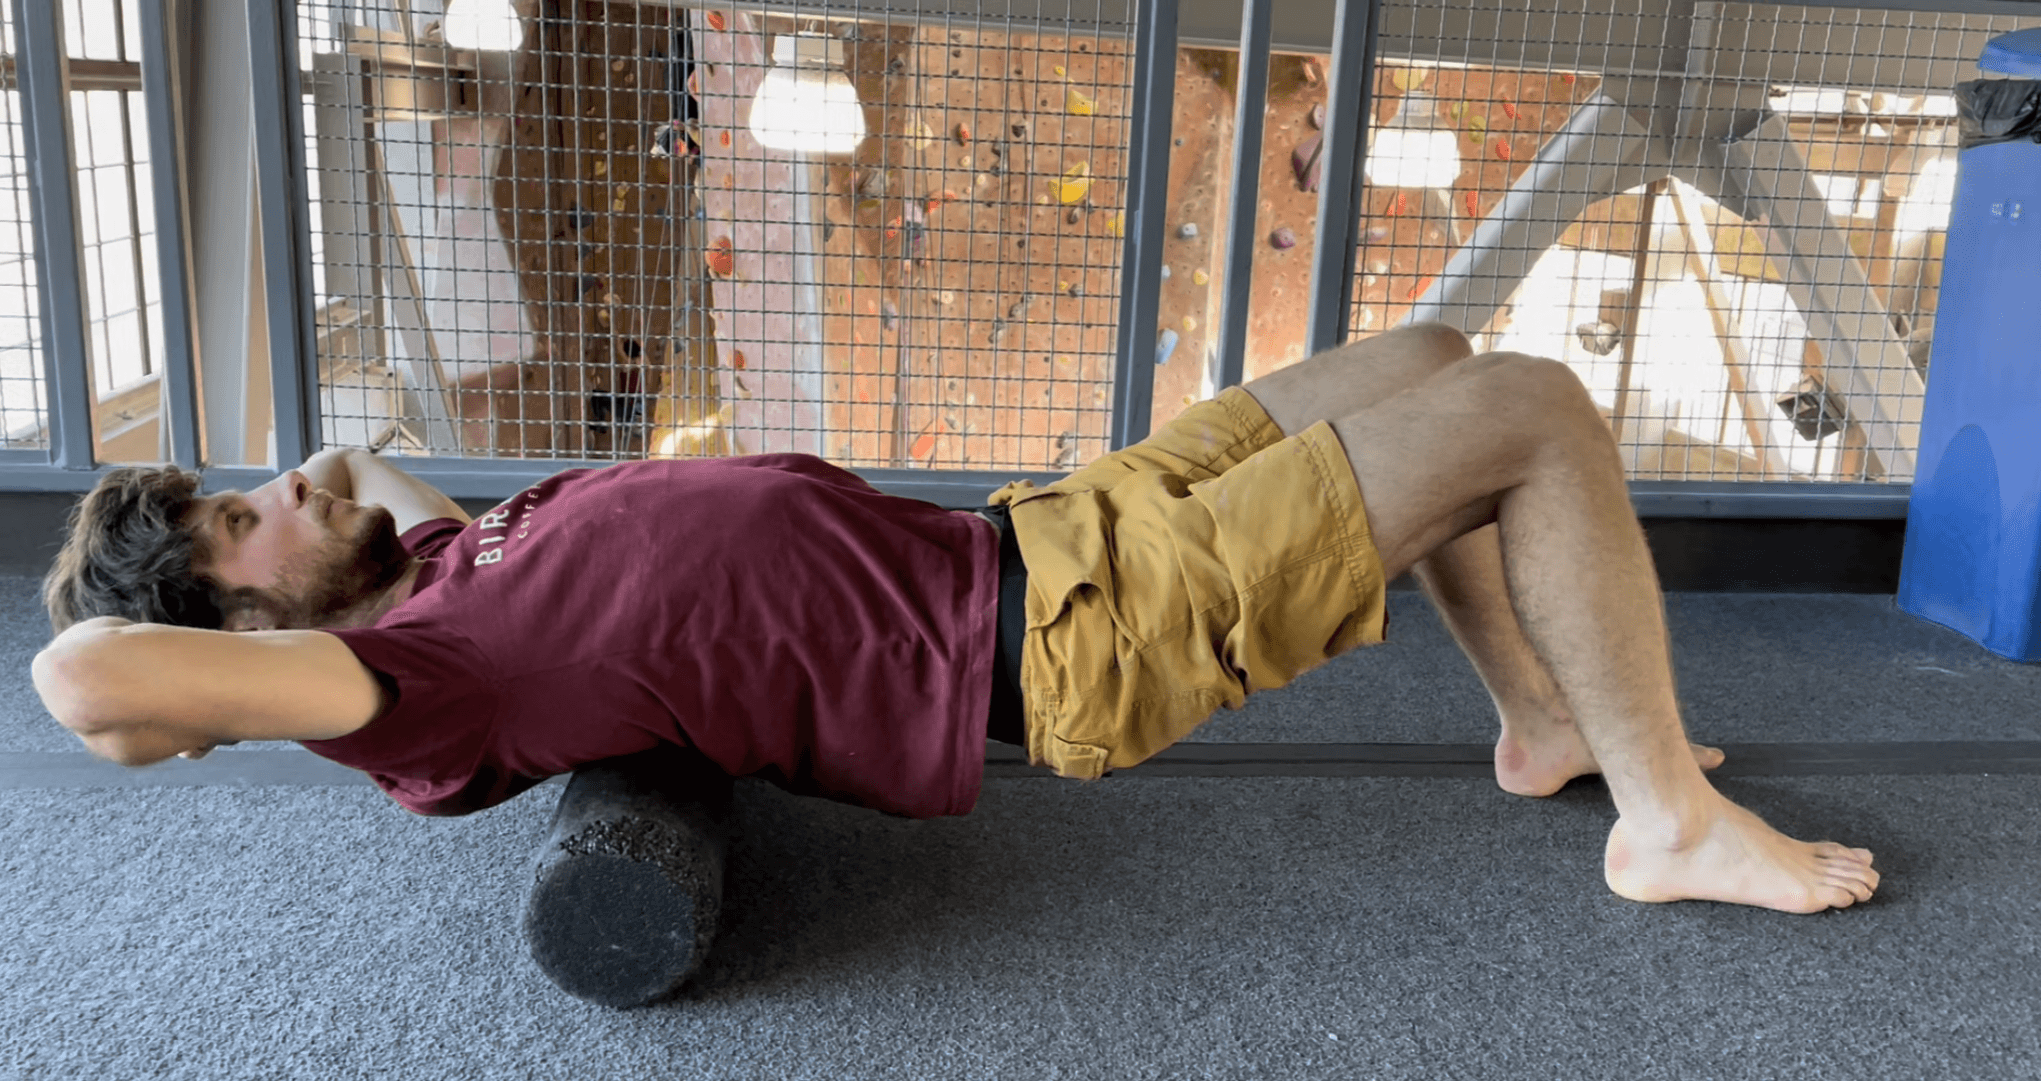
Lay on your back with a foam roller horizontally across your upper-back. Place your hands behind your head to support your head and with your knees bent, lift your hips off of the floor and roll back and forth across your upper back. Roll for 1-2 minutes.
Child’s Pose
Kneel on the ground on hands and knees, walk your hands forward and sit your bottom back towards your heels feeling a stretch along your outer shoulder and chest. Keeping this position, walk your hands to your left, increasing the stretch along the right side, hold for 30 seconds and repeat, walking your hands to your right and feeling the stretch along your left side.
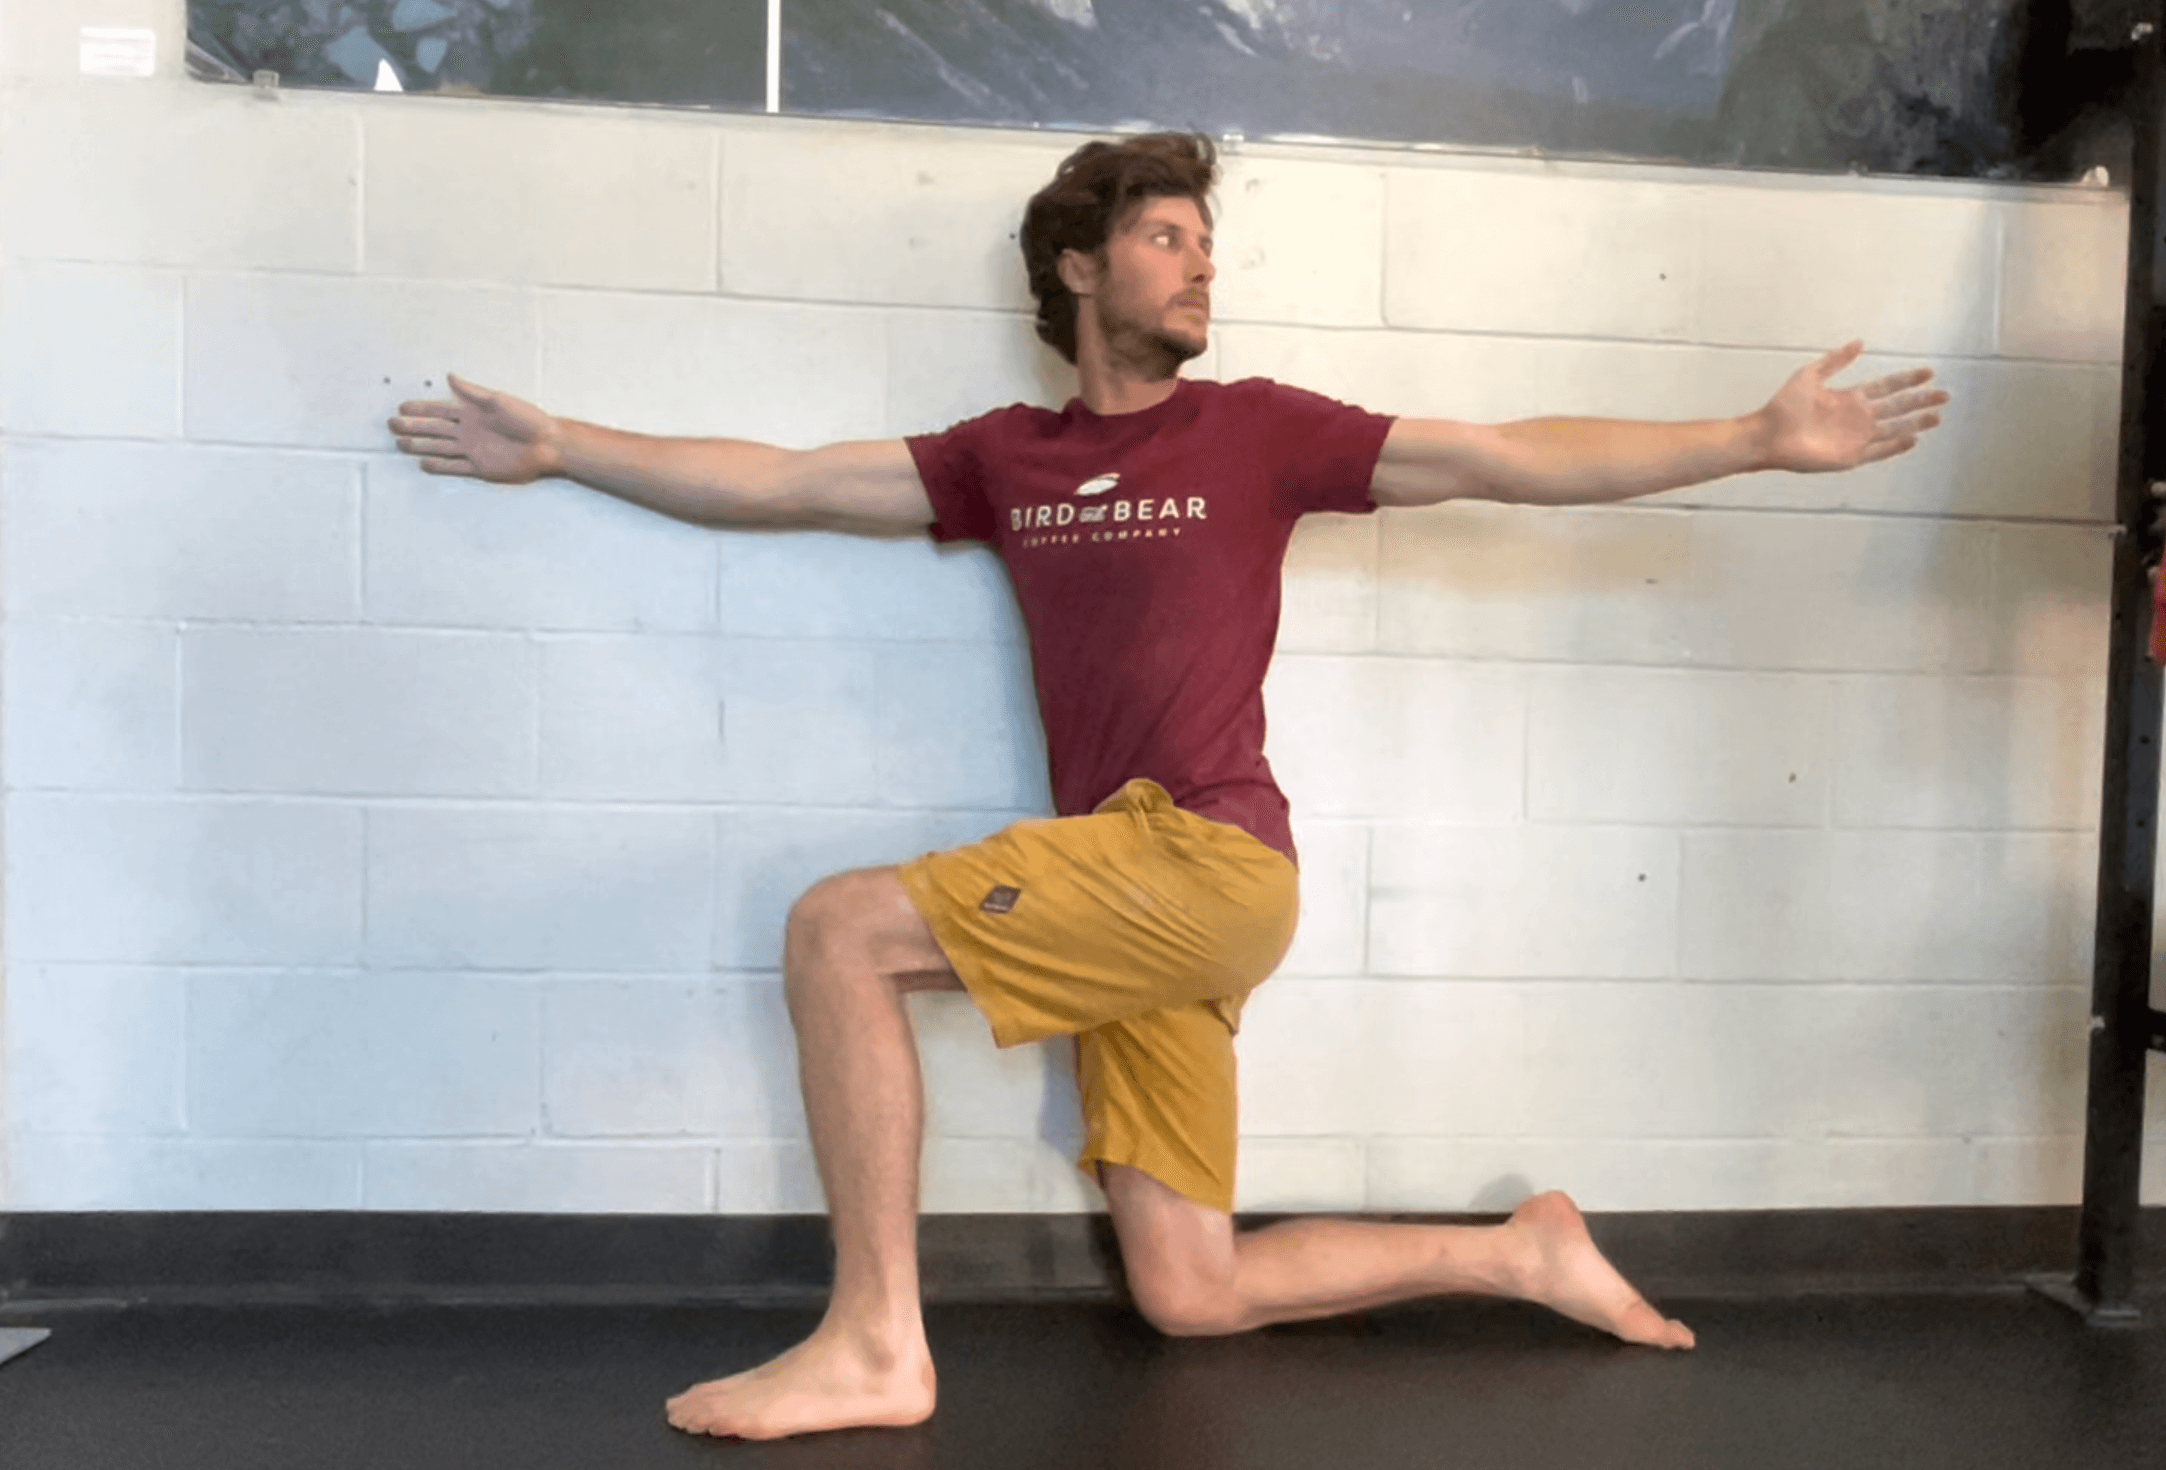
Wall WindMills
Get into a half kneeling position with the upright knee and shoulder against a wall. Extend both arms straight ahead. Rest the arm closest to the wall against the wall. Rotating through the spine, move the opposite arm away from the wall, opening your chest away from the wall. Use the arm against the wall for stability and to help increase the rotation. Be sure to move your head along with the rotating arm. Hold the end range of the rotation for 10 seconds and repeat 10 times. Switch positions and complete on the other arm.
Pectoralis Major/Minor Stretch
For both stretches stand inside a doorway. Hold each stretch for 1 minute. Careful not to extend your low back during the stretch.
-
- Position 1: extend your arms creating about a 45 angle with your armpit. In this position rest your palms on either side of the doorway and take a step forward until you feel the stretch in your chest – hold here.
- Position 2: bend your elbows to 90 degrees and bring your arms to shoulder height. In this position rest your forearms on either side of the doorway and take a step forward until you feel the stretch in your chest – hold here.
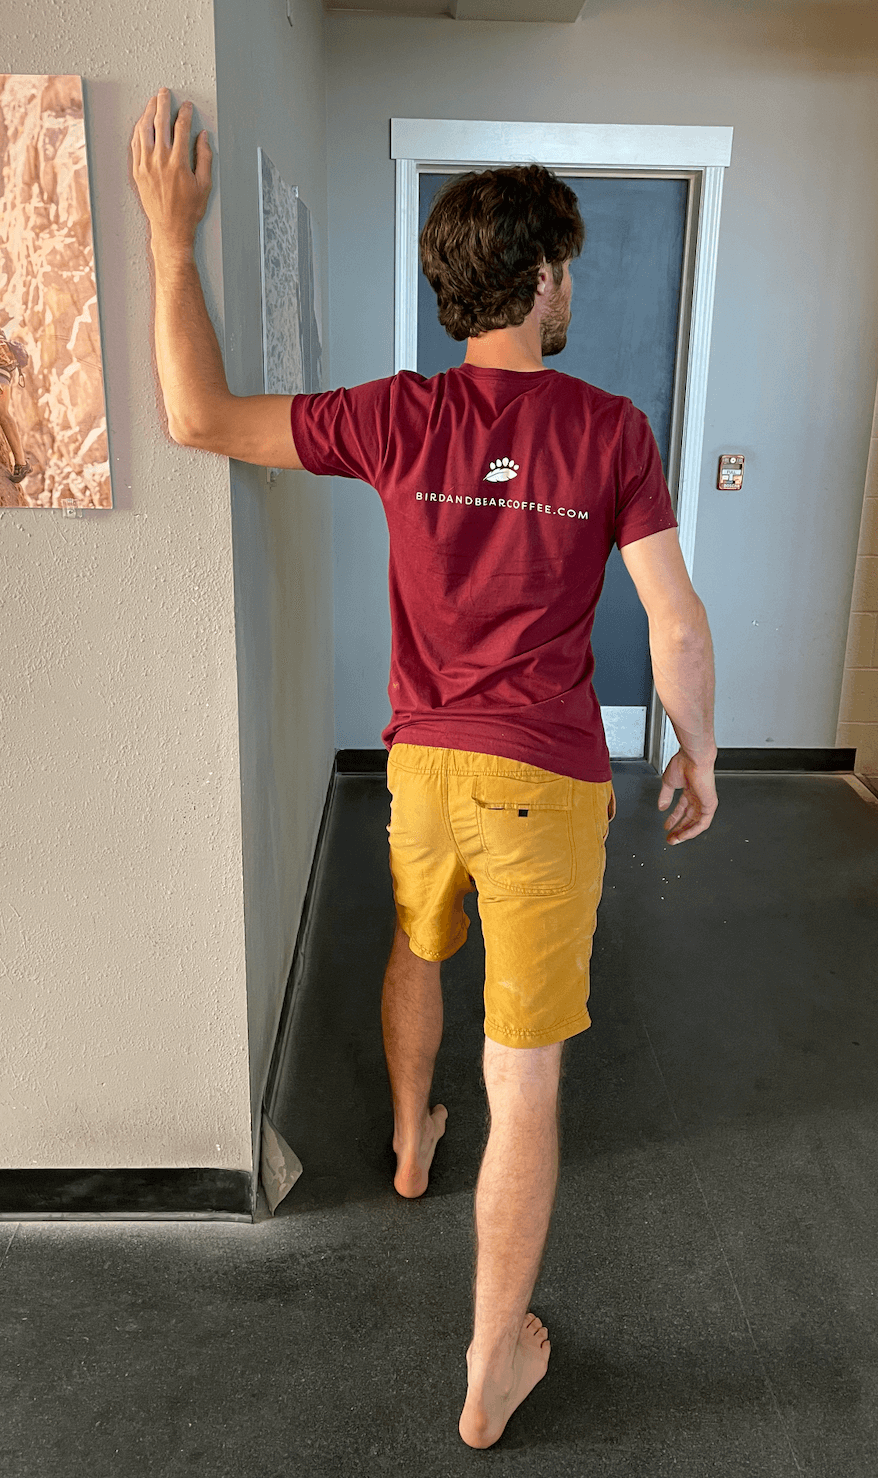
Internal Rotation stretch
Drape a strap over your shoulder anchoring in front of you by holding one end with one hand. With the other hand, reach behind your back and grab the strap. Slowly pull on the strap with your anchor hand, pulling the hand behind your back towards your shoulder blades. Stop when you feel a gentle stretch and hold for 1 minute.

About The Author
- Disclaimer – The content here is designed for information & education purposes only and the content is not intended for medical advice.

Related Posts