Ouch! I Feel A Pinch In My Shoulder!
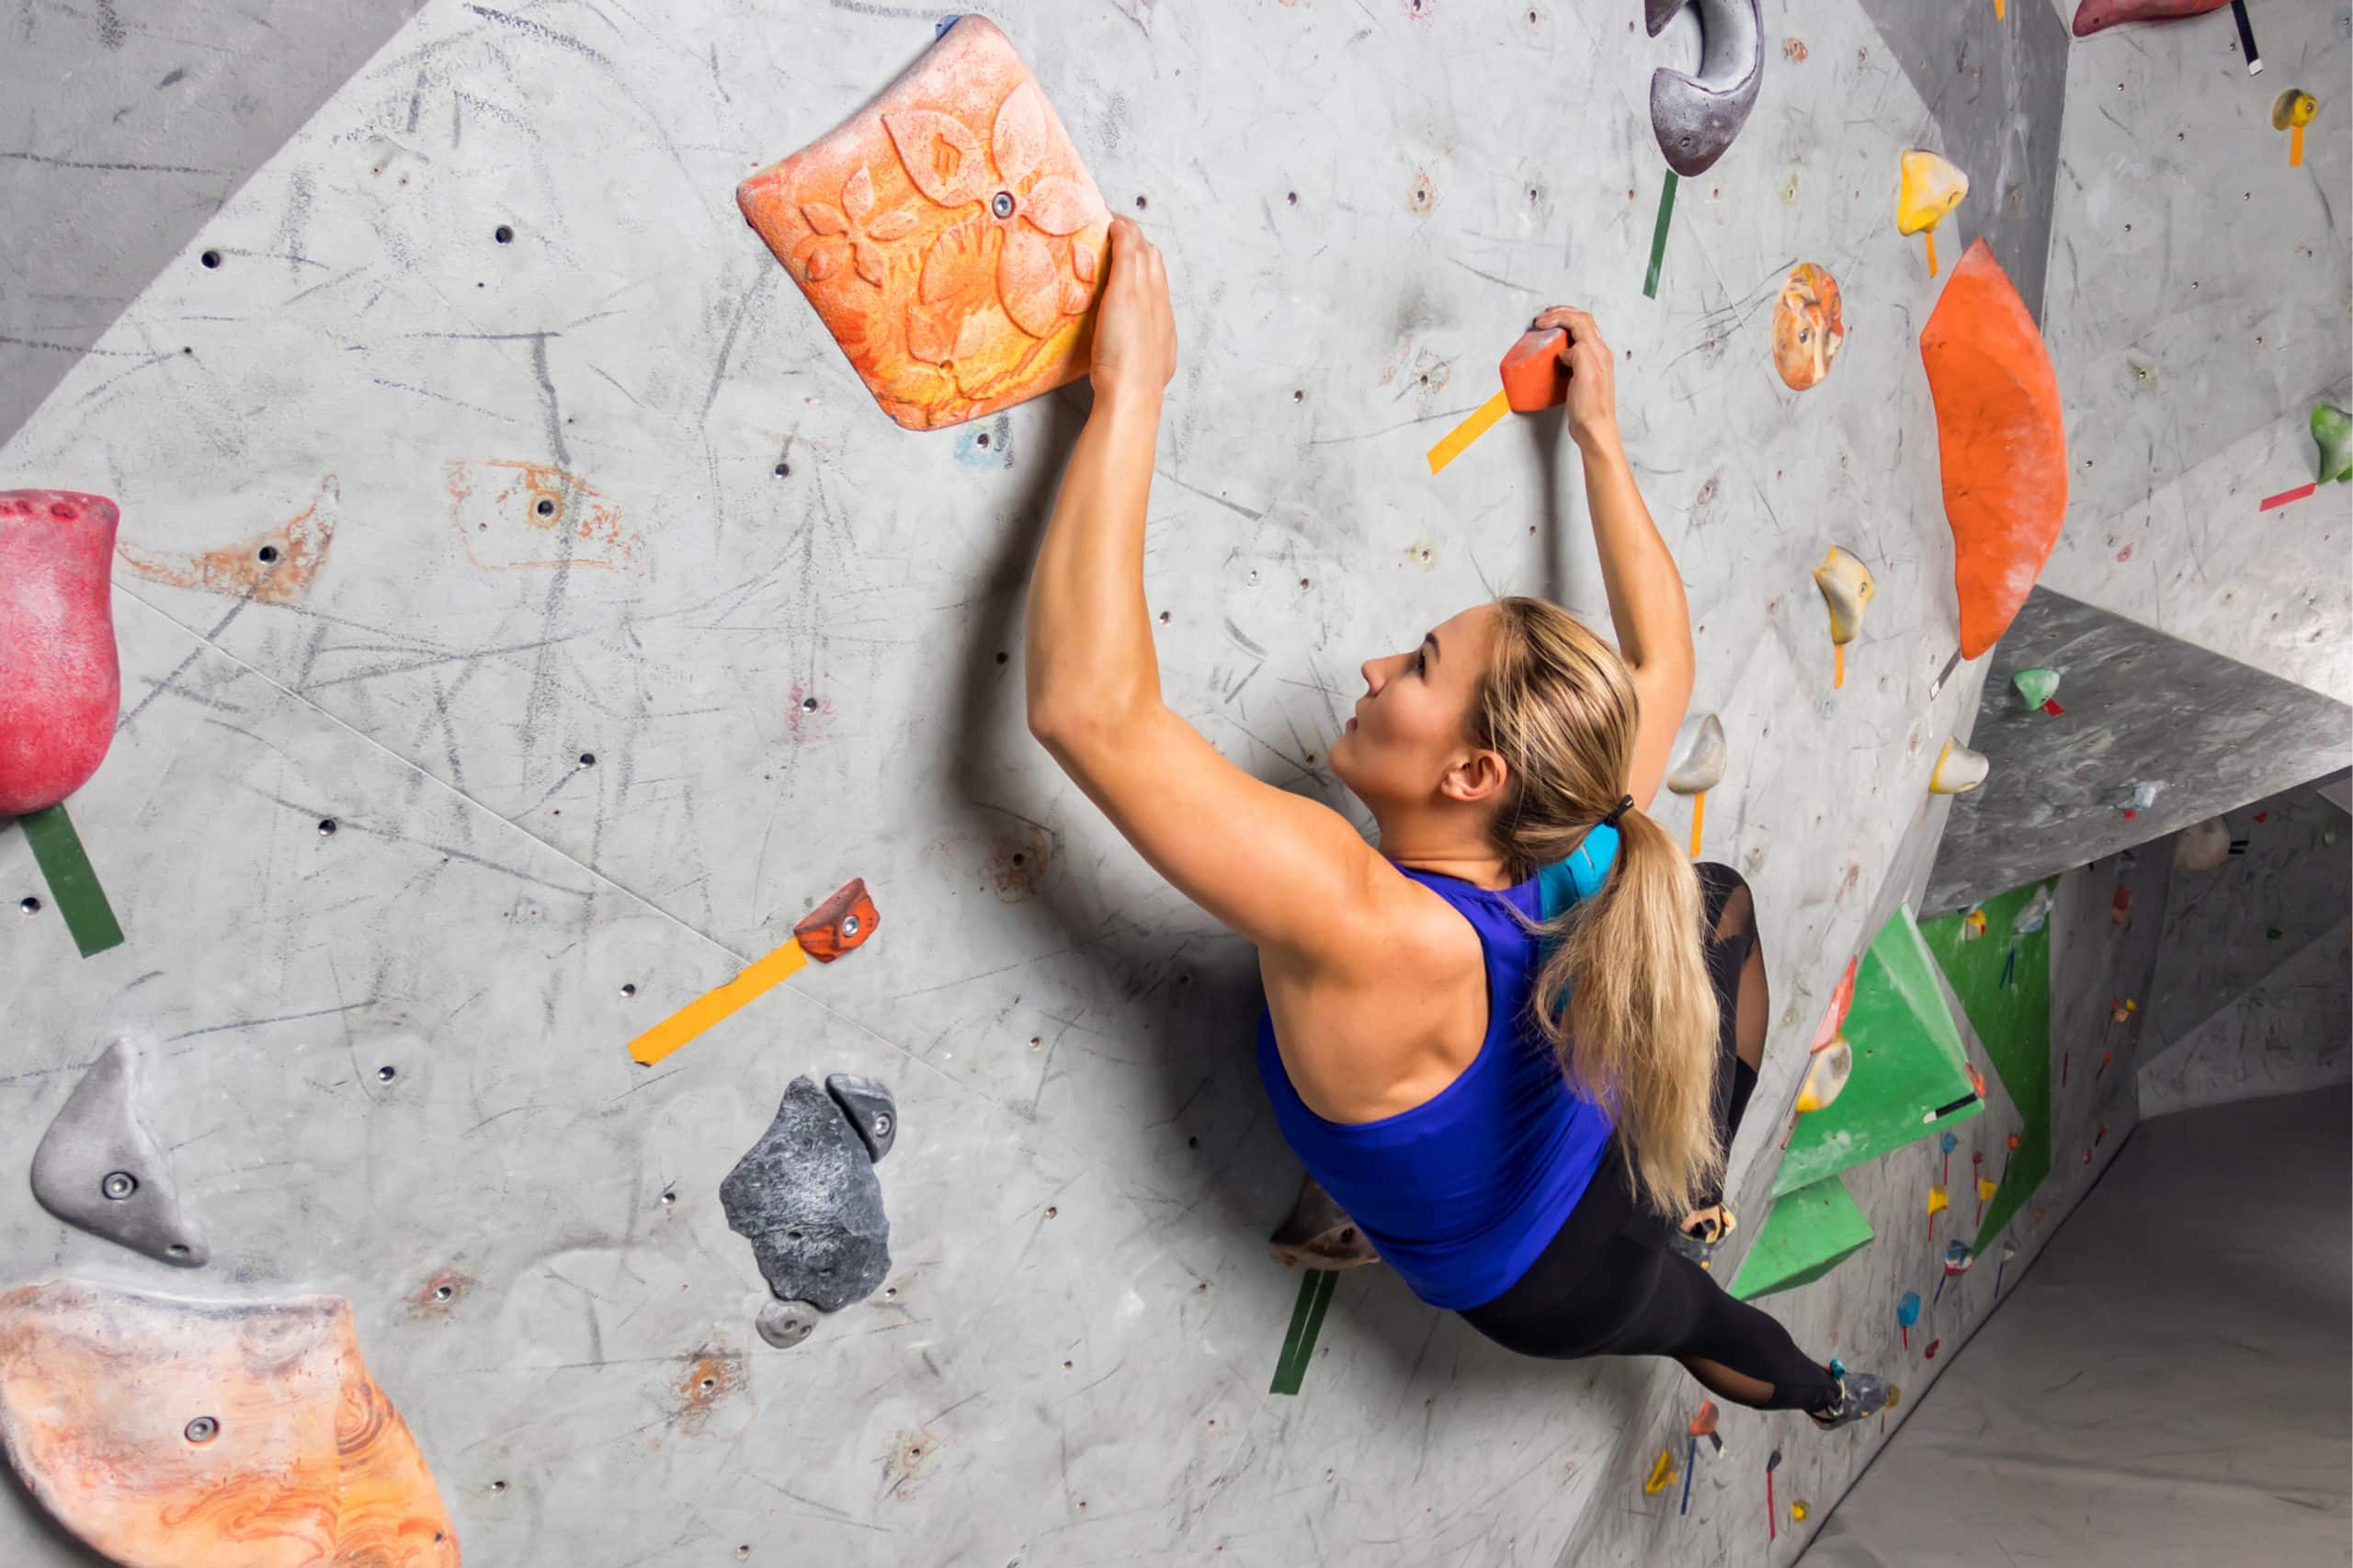
You’re almost to the top of a boulder problem that you have been projecting all week at the gym. You just need to overcome a tricky mantle to top out. You pull the move and hoist yourself up over the top. But before you can celebrate your send, you become aware of a tiny nagging sensation at the top of your shoulder. You decide to shrug it off.
The next day, you decide to attempt the same boulder problem, but smoother than you did the previous day. As you mantle to top out, that nagging sensation reappears. Except this time, it feels more intense. You climb a few easier boulders and decide to call it a day and head back home. Over the next few days, the intensity grows and starts to affect your daily functions. You feel a pinching sensation when merely opening the car door or changing your shirt. What is going on?
If this sounds like you, it is possible that you are experiencing subacromial pain syndrome. Provided are some tools and a framework to help you potentially self-assess and navigate your injury.
Signs & symptoms
- Gradual onset
- Dull aching, soreness, or sharp pinching in the top or side of your shoulder or upper arm
- Worse with repetitive arm movements e.g. reaching or lifting of the arm, whether it be overhead, out to the side, across the body, or clipping the next bolt, could aggravate symptoms.
- Climbing moves such as gastons, sidepulls, overhangs, and mantling may aggravate symptoms.
- During the day, you may feel symptoms with routine activities e.g. slipping on a shirt, opening a door, or lifting items to put on the top shelf.
- Weakness
- Pain at night when sleeping on the painful shoulder.
If you have some of these symptoms, you may be experiencing something called subacromial pain syndrome (often referred to as shoulder impingement). Subacromial pain syndrome is a general term that describes pain that is localized in the space between the acromion and humeral head of the shoulder. It is usually characterized by non-traumatic injury, occurs on one side, and worsened with repetitive arm activity. With reaching, for example, the tissues in the space can become squished by the humerus repetitively abutting against the acromion. Tissues that can be commonly irritated or inflamed include:
- Labrum
- Biceps long head tendon
- Supraspinatus muscle or tendon
- Bursa
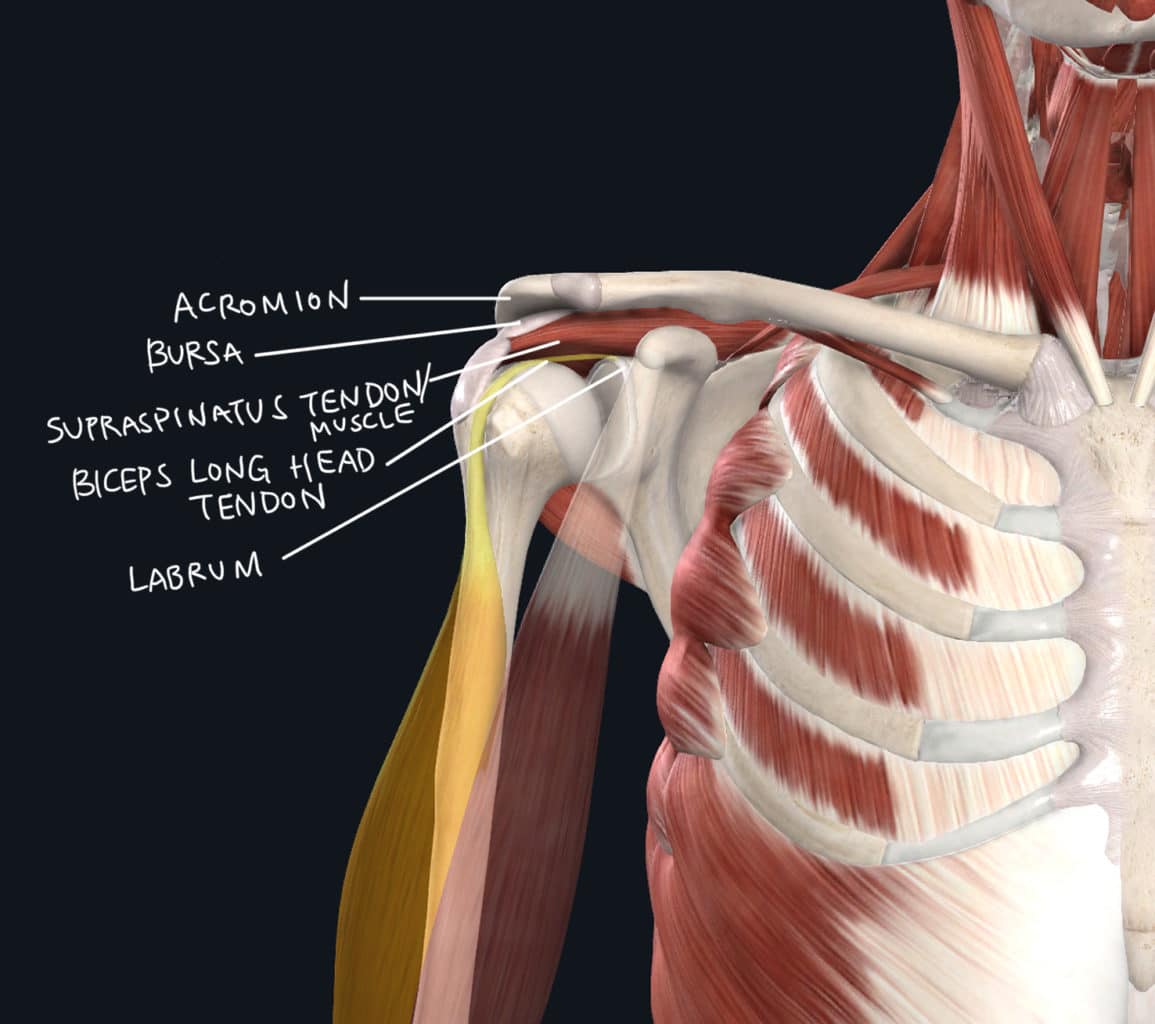
Part of the cause may be structural and not your fault. For example, your acromion may be more of a hook shape, and that may predispose you to pain. Other factors may include muscle imbalance, bony morphology, or poor ergonomic posture.
The Research
The shoulder is one of the most common locations to be injured in climbing athletes, namely subacromial pain syndrome in older athletes (Lutter, Schoffl). It is preferable to manage this condition with conservative, non-operative treatment initially (Diercks). In the first phase of symptoms, a period of relative rest is recommended. You may supplement that relative rest with taking NSAIDs, or non-steroidal anti-inflammatory drugs, and icing the affected area, followed by performing exercise therapy (See Unload section). Studies have shown that exercise can be therapeutic and that specific exercises (See Exercise section) that target the rotator cuff and shoulder blade, are more beneficial than general exercises of the shoulder and neck (Diercks). Some other treatment options that are considered in later stages may include corticosteroid injection. When all conservative options have been exhausted, surgery may be considered.
Assessment
Here are some screening tools you can use to self-assess. It is best to start with the uninjured shoulder first, so you can compare results and symptoms.
Painful arc in arm abduction: With thumbs pointing up, actively raise both arms out to the side towards your ears.
Positive test: symptoms in the range of 60-120 degrees (slightly below to slightly above arm parallel to the ground) of the affected arm.
Neer’s test: Start with the affected arm in a thumbs down position. With the unaffected arm, grasp the affected arm and bring it straight up in front of you towards your ear. Make sure the arm you are testing stays completely relaxed.
Positive test: reproduction of your symptoms at the top.
Neer’s Test Method 2: At a table or countertop, place the forearm of your affected arm thumbs pointing down. Anchor it in place with your unaffected arm, and slowly stick your hips back, increasing the angle of your shoulder. Make sure not to rotate the body as you go back.
Positive test: reproduction of your symptoms.
Hawkins-Kennedy test: Start by standing next to a wall on the opposite side of your affected arm. Completely support your affected arm the entire time in a bent elbow position straight in front of you. Rotate your body to allow your hand to slide down the wall.
Positive test: reproduction of your symptoms.
Hawkins-Kennedy test Method 2: Support the upper part of your affected arm on the corner of a table or countertop. Start in a bent elbow position straight in front of you. With your other hand, apply pressure slightly above the wrist of your affected arm.
Positive test: reproduction of your symptoms.
Empty Can Test: Bring your affected arm up to 90 degrees and slightly out to a diagonal position. Turn your thumbs down. Using your unaffected hand, push down at your forearm and try to resist the force.
Positive test: reproduction of your symptoms.
External Rotation Resistance Test: Stand right next to a wall with your elbow at your side bent to 90 degrees. Without moving your body or your arm, push your wrist into the wall and hold for 5 seconds.
Positive test: pain and/or weakness compared to the uninjured arm.
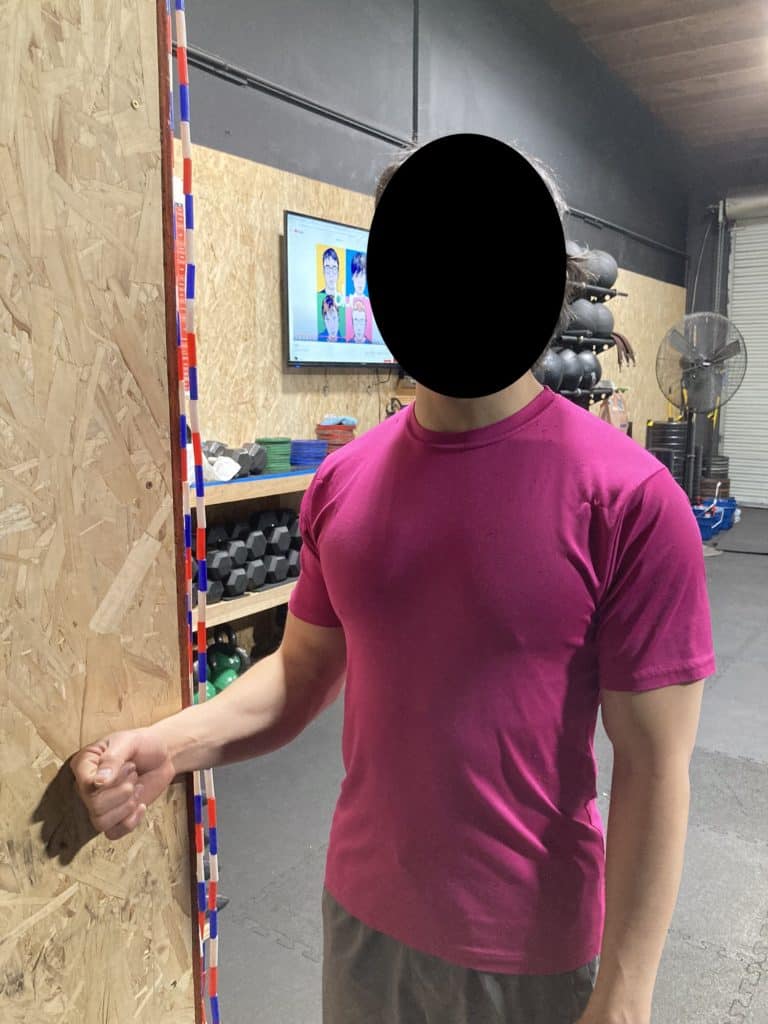
If you experience your symptoms with three or more of these tests, you may have subacromial pain syndrome (Michener 2009).
Rock Rehab Pyramid
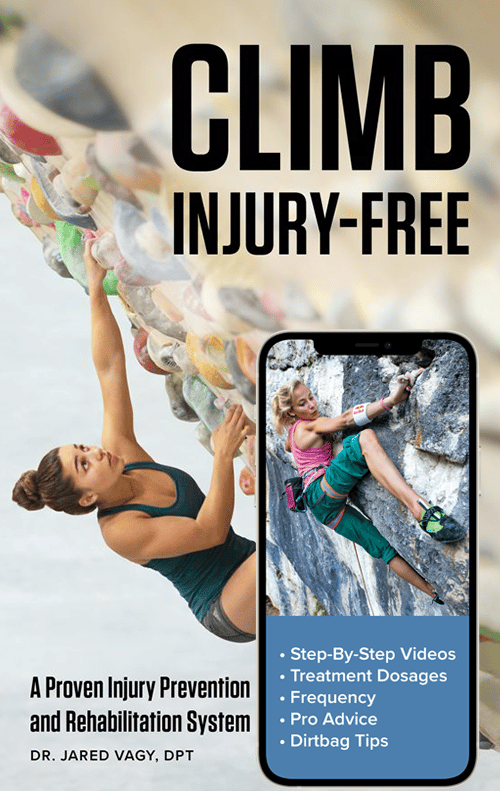
The Rock Rehab Pyramid was developed by Physical Therapist, Dr. Jared Vagy in his book Climb Injury-Free. This pyramid aides in the rehabilitation of climbing injuries by providing a system of four major categories that will guide the climber’s recovery process. Following an injury, one will start at the bottom of the pyramid and work upwards using general guidelines to determine appropriateness for progression to the next level. A decrease in pain/soreness allows advancement to the next level. With no change in symptoms at a particular level, a climber should stay at the current level for one week and then progress to the next level. An increase in soreness should have the climber regress down one level.
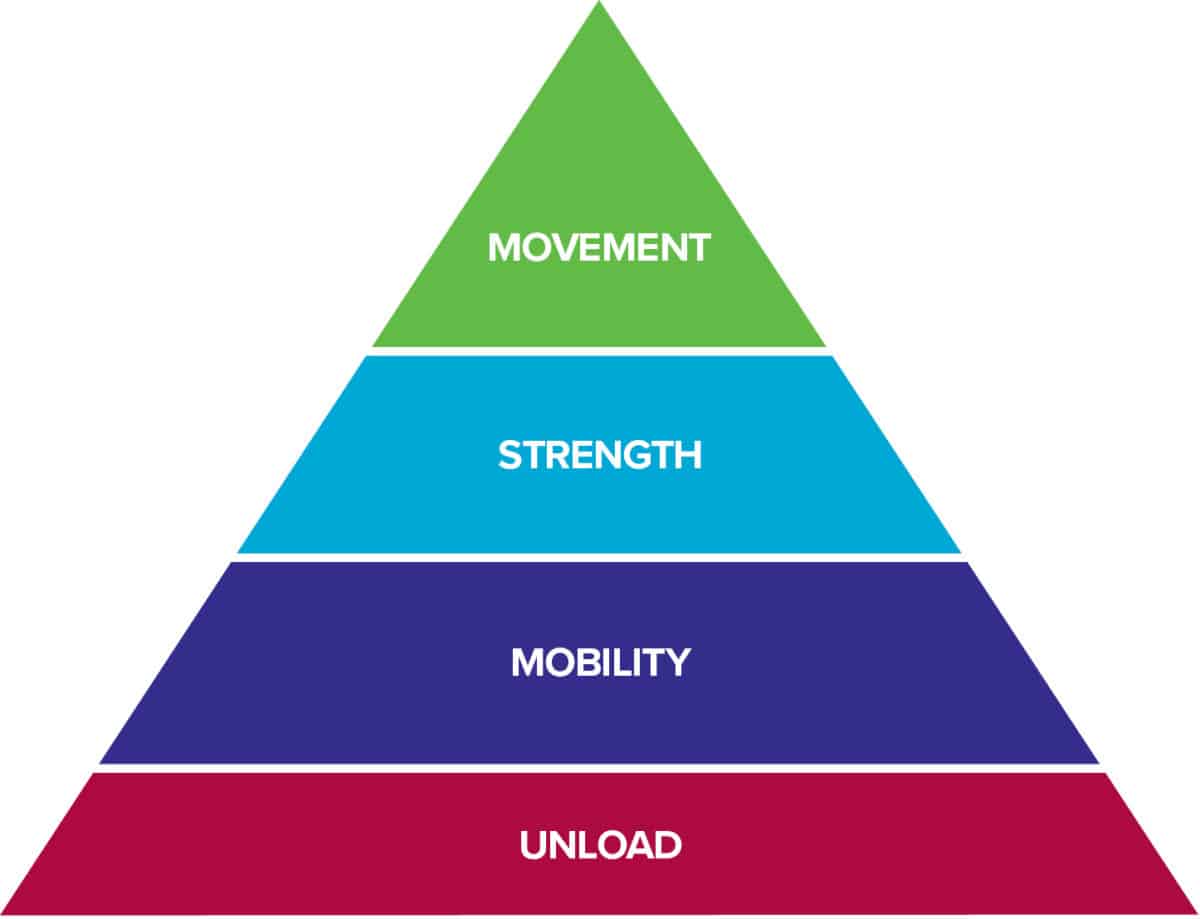
The bottom level of the pyramid aims to Unload the tissues in the body so that they have the best healing environment. Often times, after an injury there is some sort of change in Mobility. After the tissues have calmed down from the previous level, this stage will look to reestablish normal, pain free range of motion. Once the injured area restores its mobility, it is time to increase the Strength of the surrounding muscles so that Movement in the following level can be coordinated and optimized. Click here to learn more about the rock rehab pyramid structure.
Phase I Unload
When you start to feel pain, that’s your brain’s way of telling you that there may be impending tissue stress or damage. The purpose of the unloading phase is to de-stress the tissues and ultimately calm the inflammation. The timeframe may look slightly different for each person, but if you are healthy with no serious underlying medical conditions, tissue inflammation typically should subside within 7-10 days. The longer you stay in this phase without addressing your injury, the further you may damage the tissues and the longer it may take to fully recover. Below are helpful tips in this phase.
- Decrease pain by icing: Apply a wrapped ice pack or a bag of frozen peas to the affected area 10-15 minutes at a time, up to every 1-2 hours of the day, for up to 1 week. Make sure the ice pack is not directly touching your skin.
- Decrease stress to the tissues by performing “relative rest:” This does not exactly mean “stop climbing completely.” For each climber, relative rest may look slightly different. It may mean decreasing how many times you attend the gym per week, or decreasing the level that you climb. For example, a novice level climbing 4-5 times a week may benefit from attending the gym 2-3 times a week. For an expert climbing 5.12s or V8s, it may look like climbing V4-5s for this time.
- This phase should be pain-free. Minimal discomfort is acceptable (no more than 3/10 on a pain scale of 0 = no pain, 10 = “send me to the ER”).
Phase II Mobility
The purpose of this phase is to increase range of motion by releasing adhesions in stiff muscles and/or increasing joint mobility. This phase should be pain-free. Depending on your symptoms, this phase may last 2-4 few weeks. If you are still experiencing pain in this phase beyond that time frame, for example 6 weeks, it is advisable to consult a medical professional.
- Soft tissue release: Pectoralis Minor. Find your collarbone at the base of the neck, follow it away from the center, and move your fingers slightly below the bone until you feel a stiff muscle on your chest. In different directions, roll a tennis or lacrosse ball between the wall and that muscle until it feels less stiff. Use as much pressure as necessary. Another option is to self-massage with a retired carabiner.
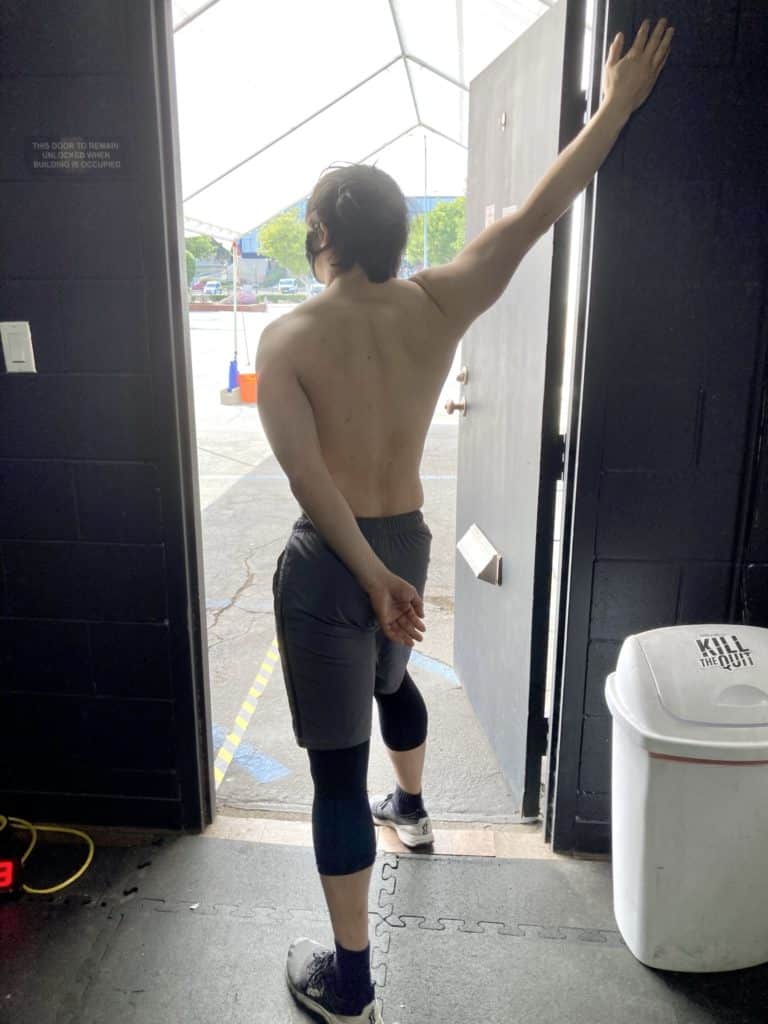
Pec doorway stretch. Stand in between a doorway with one hand next to the doorframe, with your shoulder at about 120 degrees. Step with the same foot forward until you feel a stretch in the front of your chest and shoulder. Rotate your body away from your arm for a more aggressive stretch.
Dosage: Hold 20-30 seconds x 3 reps, at least 2x/day.
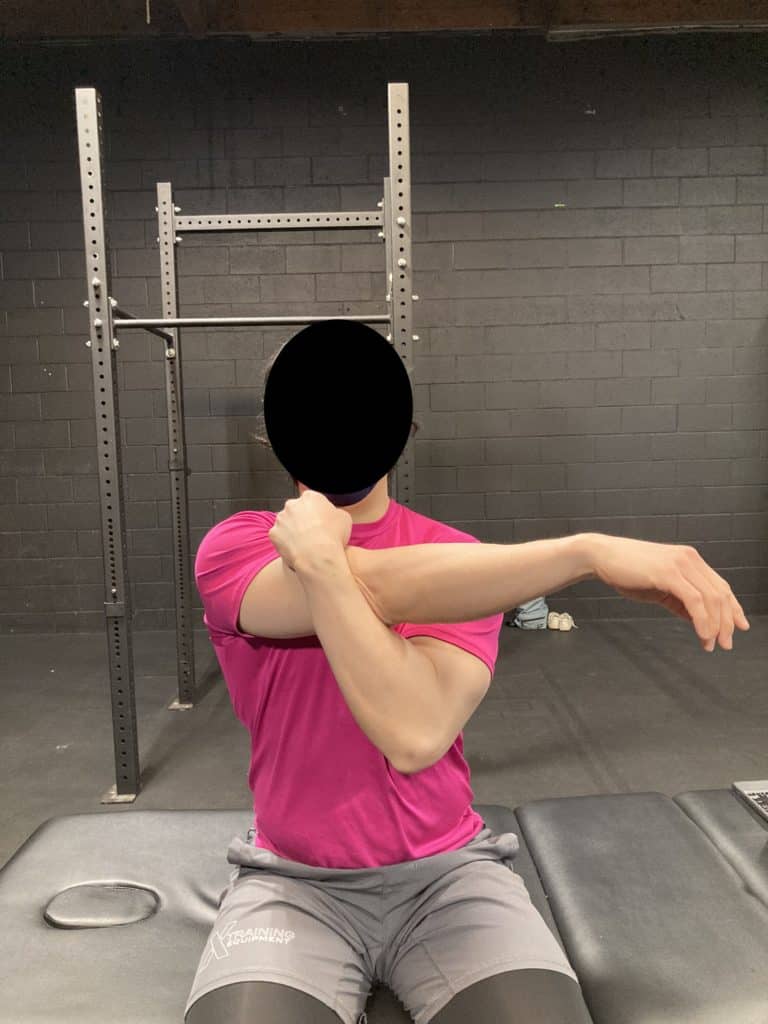
- Post-cuff stretch. Stand next to a wall on the affected side to pin the shoulder blade. Start with your arm in front of you and bring it across your chest. Use your other arm to assist and pull your arm closer to your chest. Feel a nice stretch on the back of your shoulder.
Dosage: Hold 20-30 sec x 5 reps, 2x/day.
Note: Make sure to keep your shoulder blade still and to not rotate your body.
- Body-on-arm shoulder flexion. Starting position: forearms or palms up on a table or countertop. Movement: Slowly send your hips backward to move your shoulder into relative flexion, feeling a stretch in your shoulder, sides, and back. Hold briefly. Return and repeat. Note: You can stretch a little further with each repetition as long as it’s pain-free.
Dosage: 20 reps, 1 set, 2x/day.
Phase III Strength
Once you have gained proper range of motion, you can start to gain strength in that range of motion. In this phase, the key is to use your symptoms as a guide. Exercises should be done in pain-free range; minimal discomfort is acceptable. For example, if you experience more than a 3/10 on a pain scale (0 = no pain, 10 = “send me to the ER”), back off and proceed with a lower intensity. In general, the pain or discomfort should relieve as you back off from the movement. Depending on your symptoms, this phase may last up to 6-8 weeks (true strength gains happen in this time frame!) If pain lingers or increases, stop the exercise, and see your medical professional.
Note: For all exercises maintain a slight chin nod to promote proper alignment. This helps to promote proper posture, which could in turn help relieve shoulder symptoms.
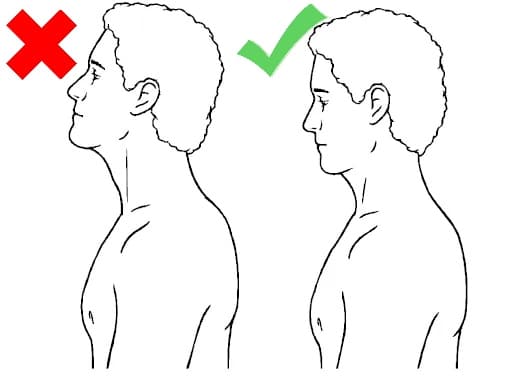
Goertzen, Matt. “5 Exercises Everyone Should Be Doing.” Matt Goertzen’s Blog. 1 April 2016, https://mgoertzenpt.wordpress.com/2016/04/01/5-exercises-everyone-should-be-doing/
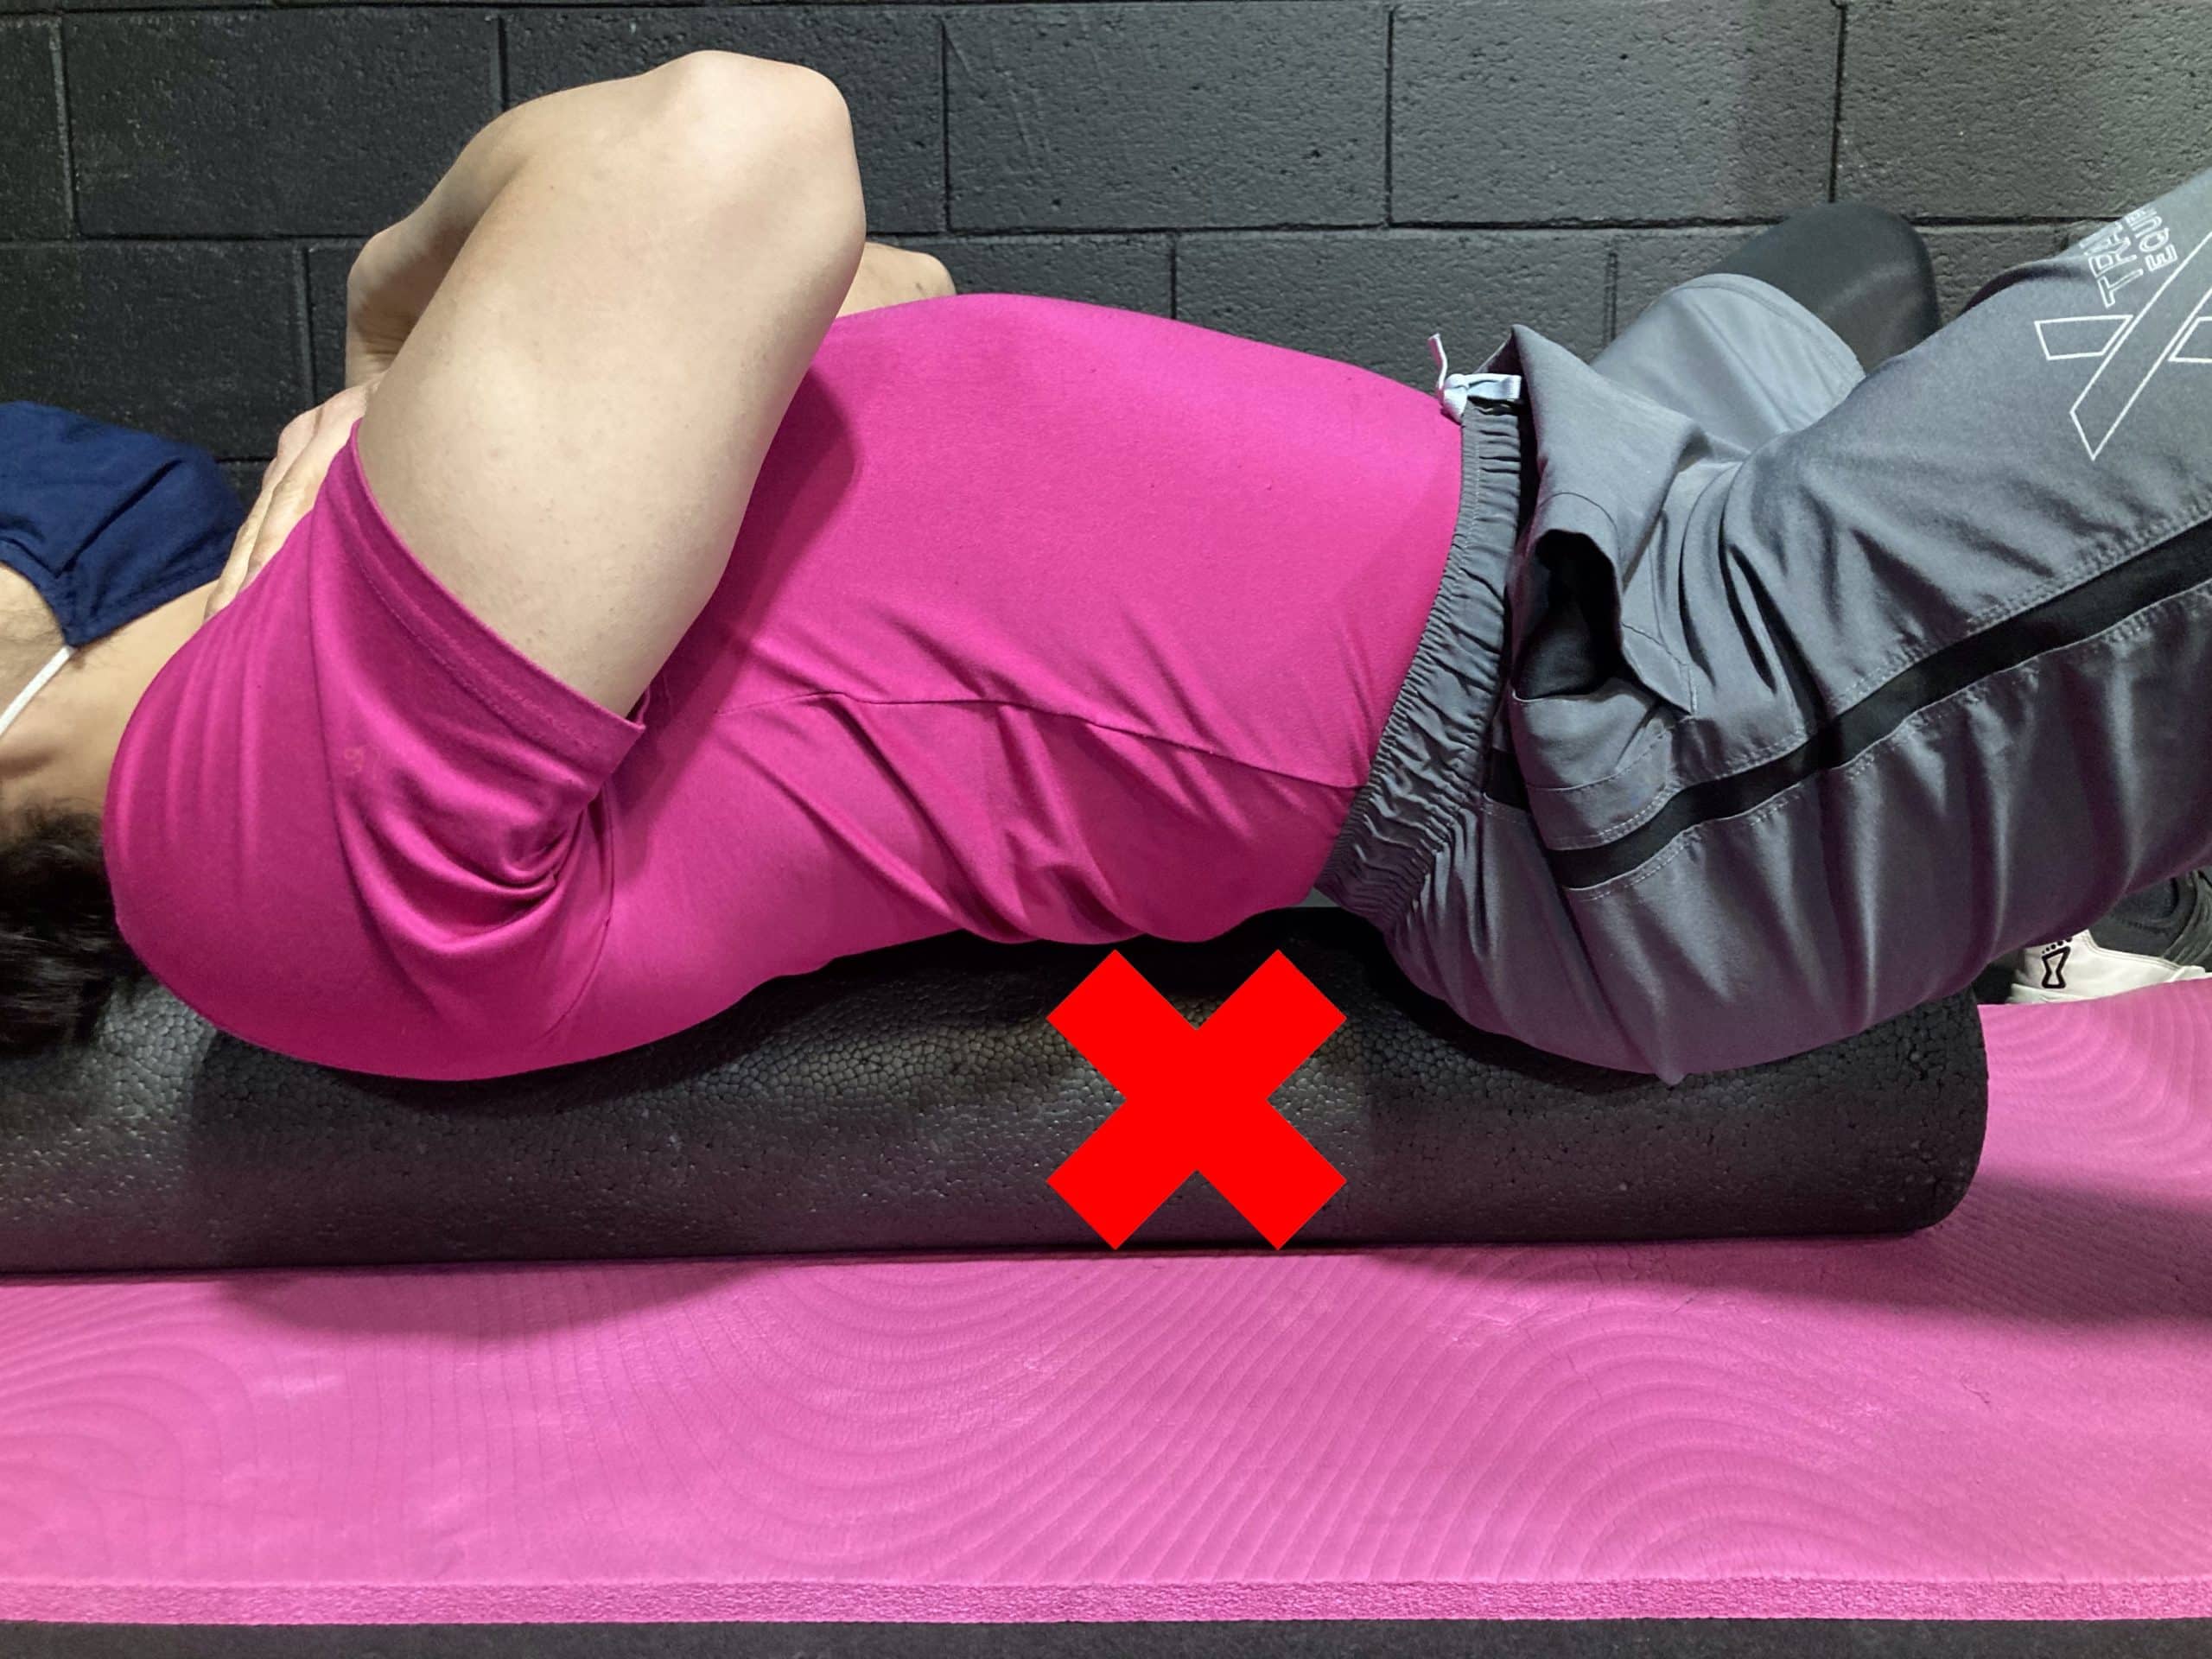
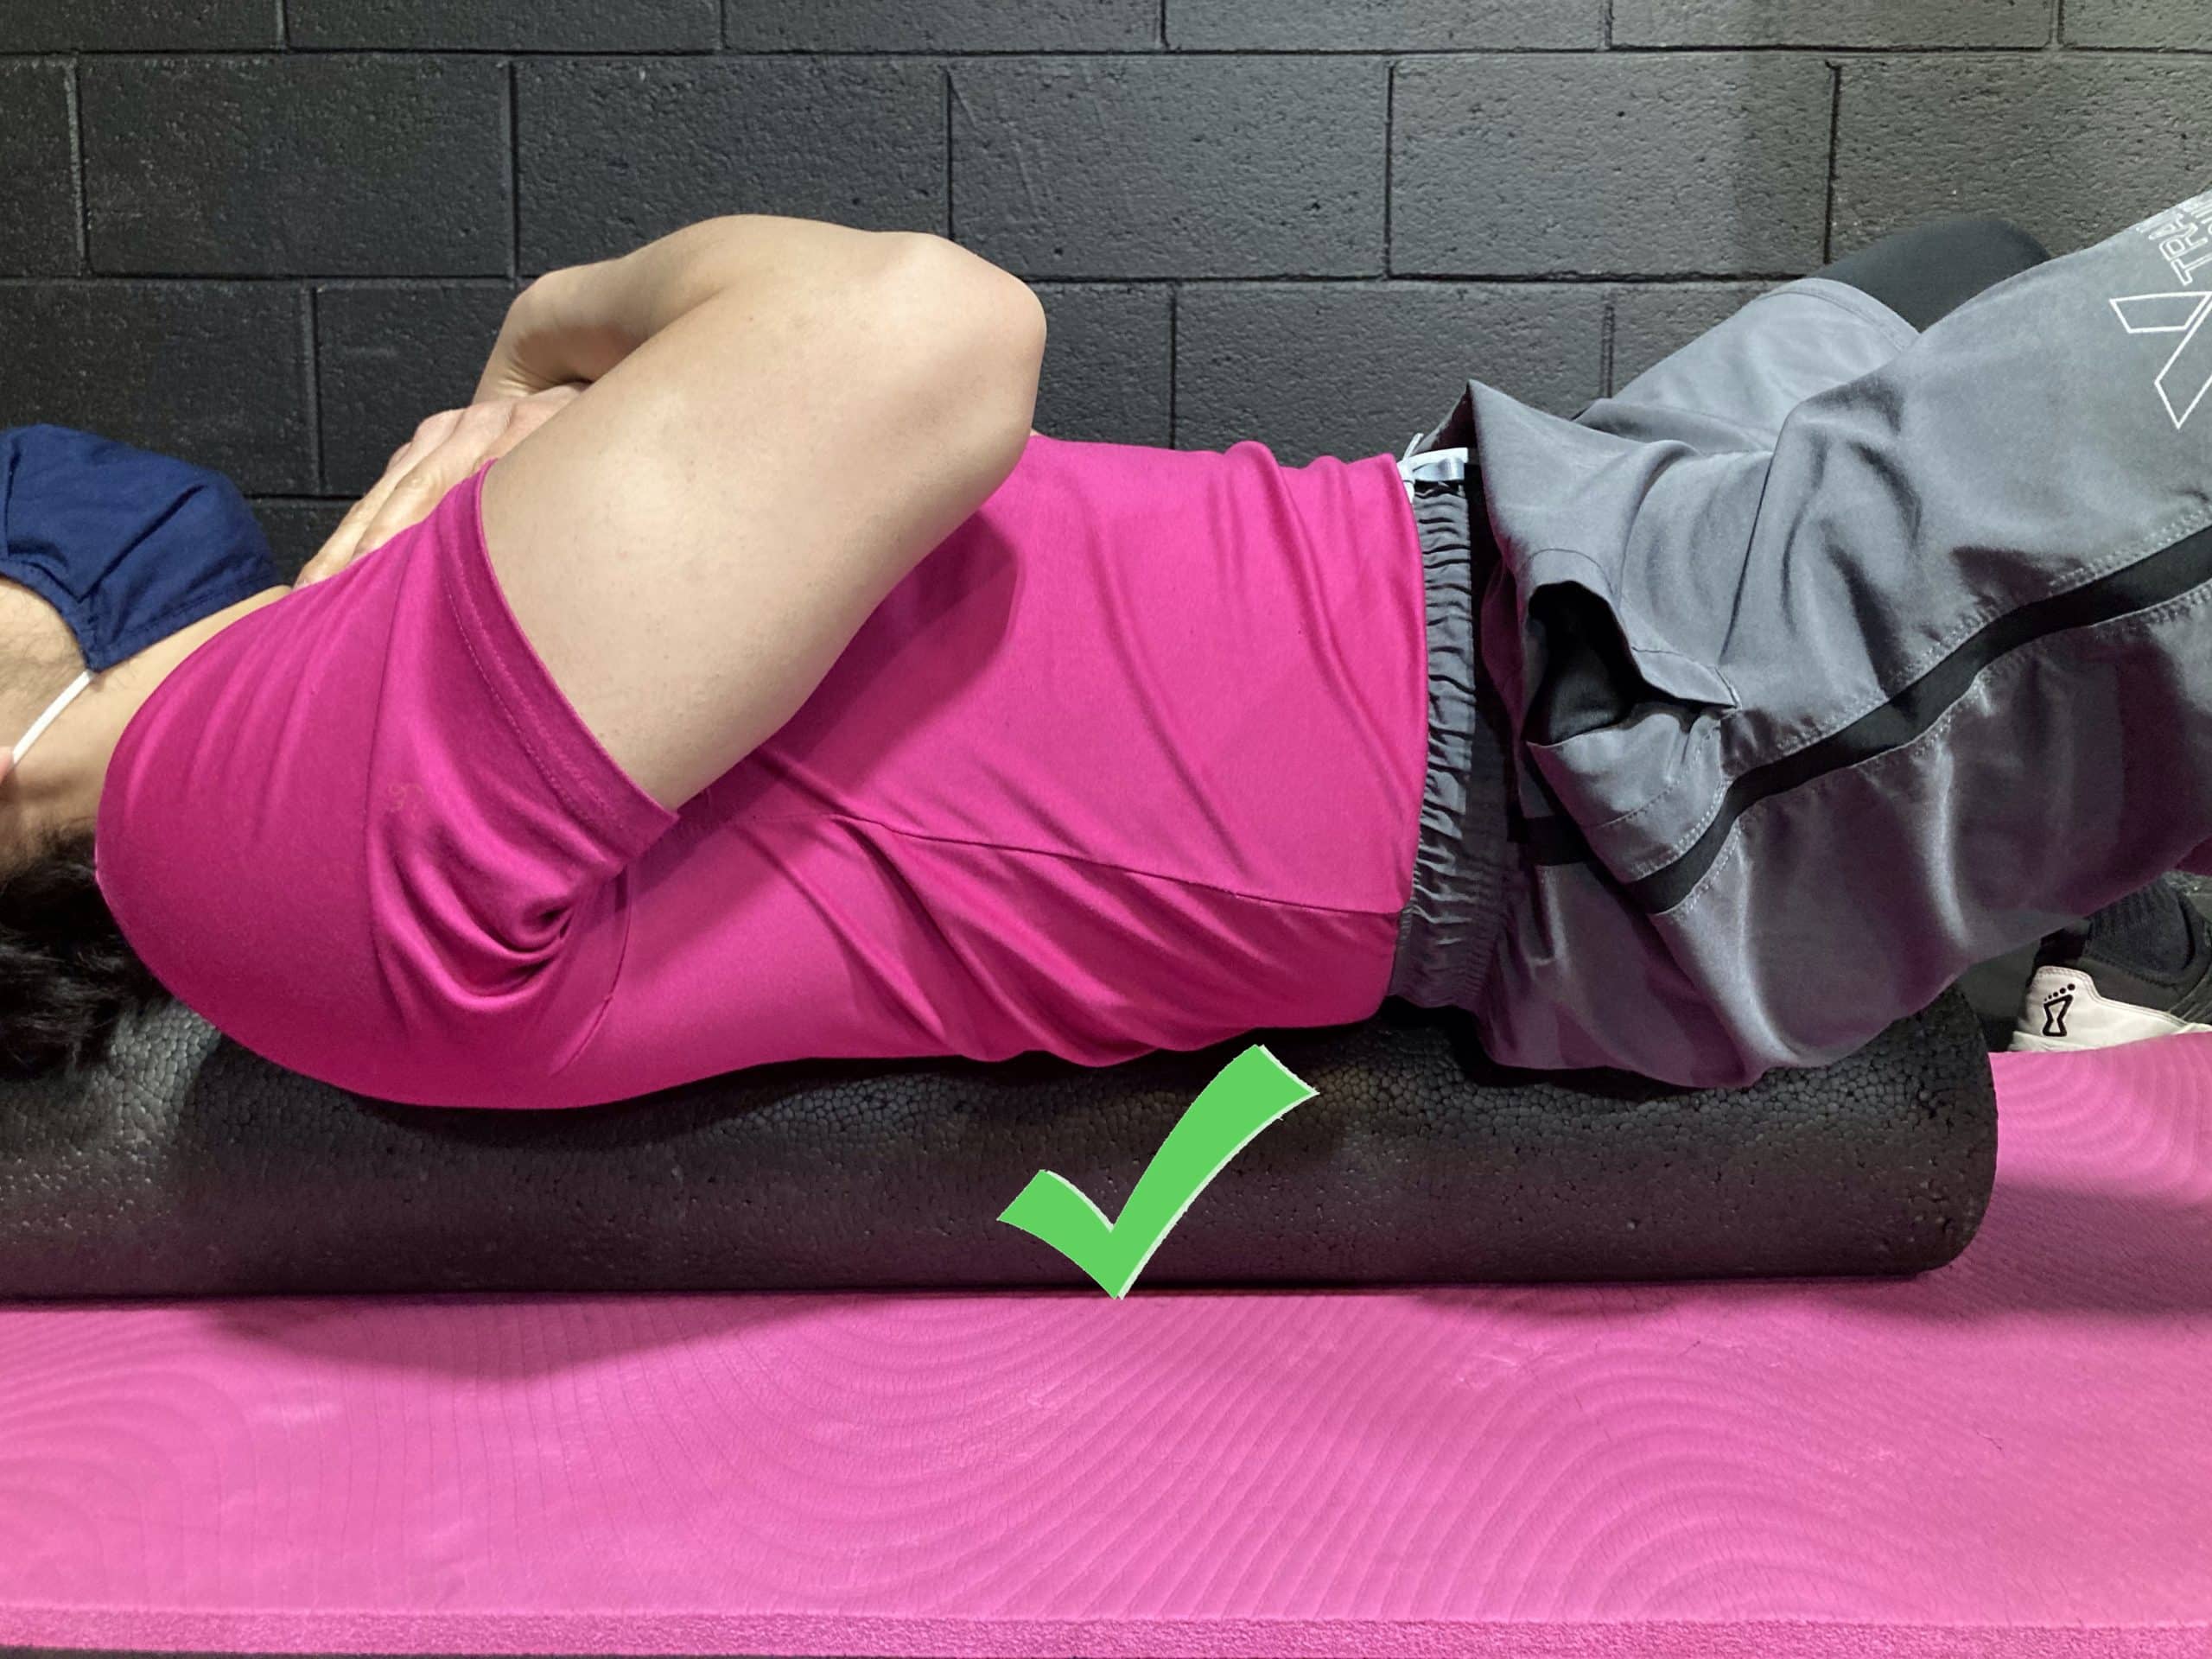
- Vertical foam roller series. In a hooklying position, lie on top of a foam roller oriented vertically from head to tailbone. Perform this series of low-level strength exercises in this position. Note: For both foam roller exercises, make sure to keep your trunk flush to the roller (do not arch back) and keep your shoulders away from your ears the entire time. Use a thick rolled towel if you don’t have a foam roller.
- Serratus punch
Starting position: Straight elbows with fists pointed towards the ceiling. Movement: Maintaining straight elbows the entire time, slowly punch upwards towards the ceiling. Hold briefly (5-10 seconds). Slowly return to starting position, squeezing the shoulder blades. Repeat.
Dosage: 8-15 reps, 1-3 sets, 3-4x/week.
-
- Snow angel
Starting position: Arms starting at your side and palms face the ceiling.
Movement: slowly raise your arms out to the side towards your ears. Return and repeat 15-20 times.
- Snow angel
- Serratus wall slide with end shrug
Starting position: Forearms shoulder-width apart on the wall with elbows at shoulder height, palms facing you. Movement: Slowly slide forearms up the wall. Shrug your shoulders only at the very top. Hold briefly. Slowly return to starting position. Note: Make sure to keep the trunk tight the entire time, do not let ribs flare. Try to keep elbows close together without moving your hands closer.
Dosage: Hold 5-10 seconds, 20 reps, 1x/day.
Progression: Slip a resistance band loop around your wrists, and keep tension in the band as you slide your arms up the wall.
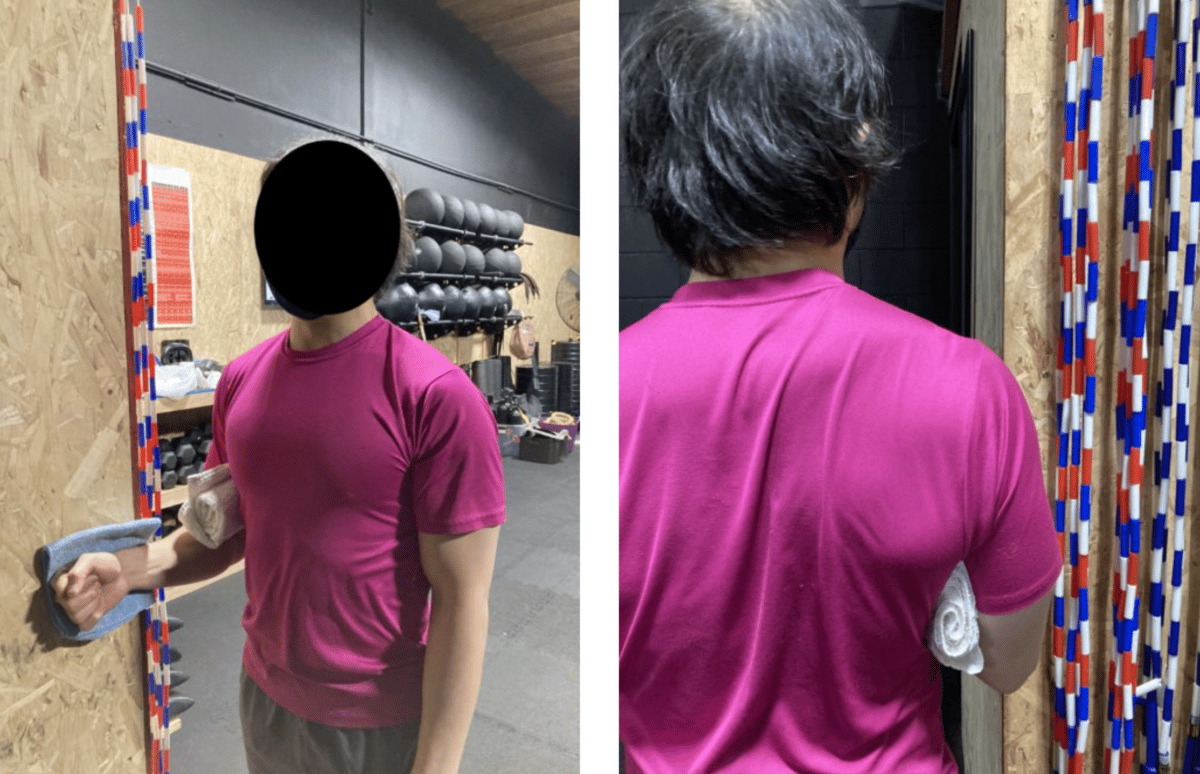
- Scapular activation with Resisted Isometric ER.
Starting position: Stand next to a wall. Elbow is bent at 90 deg at your side, with a towel between your wrist and the wall, and a towel in your armpit so that your arm stays close. Bring your shoulder blade down and back like you are sticking it into your opposite back pocket and maintain this for the entirety of the exercise. Movement: Without moving your body or your arm, push the towel into the wall and briefly hold (5-10 seconds).
Dosage: 8-15 reps, 1-3 sets, 3x/week
Note: make sure that you are not pushing with your hand but instead with the wrist; the intensity of force with which you push depends on your symptoms.
- Wall Serratus anterior pushup
Starting position: Arms shoulder width apart straight in front of you with palms on the wall. Chest starts sunk in towards the wall and shoulder blades together.
Movement: Slowly push your shoulder blades away from each other, or push your chest towards your spine. Hold for 5-10 seconds. Return to starting position.
Dosage: 5-10 sec hold, 15 reps, 2-3 sets, 1x/day.
Note: Keep elbows straight, trunk engaged, and shoulders over hips the entire time.
Regression: Instead of palms on the wall, perform with forearms on the wall making sure elbows are in line with shoulders.
Progression 1: Perform the same exercise on an incline, such as a countertop.
Progression 2: Perform the same exercise in a pushup position on the floor. Note: Make sure to keep your head in line with your spine.
Phase IV Movement Re-education
It is best to perform optimal movements during climbing, especially while you recover. Sometimes it is impossible to avoid a certain movement, but try to minimize the repetitive use of suboptimal movements. If you have pain with such suboptimal movements, you can try to perform the optimal movements listed in the table below.
| Suboptimal Movement | Optimal Movement |
| Thumbs down jam | Thumbs up jam |
| Mantle over the lip of the boulder | Utilize a pivot foot. Or make sure to stretch shoulder internal rotation prior |
| Gaston | Lower your elbow and bend your wrist towards your thumb side |
| Chicken wing, or elbows flaring out above and behind the level of your shoulders | Keep elbows close to your body and aligned with wrists and shoulders. |
When to See a Medical Professional
If pain persists or increases with any of the phases, it is recommended to consult an orthopedic physician or physical therapist for further examination. They can help to figure out the source of pain, analyze your movement, and provide options for treatment.
About the Author
My name is Victoria Lu, and I am a third year Doctor of Physical Therapy student at University of Southern California (USC).
I was a competitive figure skater for 6 years as a child and currently I do so recreationally. I like to stay active by working out, hiking, snowboarding, and inline skating. I also like to play musical instruments, such as piano, drums, and currently learning guitar. As an aspiring physical therapist, my dream job is to work with performing artists, Olympic athletes, and rock climbers.
References
Diercks R, Bron C, Dorrestijn O, et al. Guideline for diagnosis and treatment of subacromial pain syndrome: a multidisciplinary review by the Dutch Orthopaedic Association. Acta Orthop. 2014;85(3):314-322. doi:10.3109/17453674.2014.920991
Hegedus EJ, Goode AP, Cook CE, et al. Which physical examination tests provide clinicians with the most value when examining the shoulder? Update of a systematic review with meta-analysis of individual tests. Br J Sports Med. 2012;46(14):964-978. doi:10.1136/bjsports-2012-091066
Kebaetse M, McClure P, Pratt NA. Thoracic position effect on shoulder range of motion, strength, and three-dimensional scapular kinematics. Arch Phys Med Rehabil. 1999;80(8):945-950. doi:10.1016/s0003-9993(99)90088-6
Kibler WB, Sciascia A, Wilkes T. Scapular dyskinesis and its relation to shoulder injury. J Am Acad Orthop Surg. 2012;20(6):364-372. doi:10.5435/JAAOS-20-06-364
Lutter C, Hotfiel T, Tischer T, Lenz R, Schöffl V. Evaluation of Rock Climbing Related Injuries in Older Athletes. Wilderness Environ Med. 2019;30(4):362-368. doi:10.1016/j.wem.2019.06.008.
Michener LA, Walsworth MK, Doukas WC, Murphy KP. Reliability and diagnostic accuracy of 5 physical examination tests and combination of tests for subacromial impingement. Arch Phys Med Rehabil. 2009 Nov;90(11):1898-903. doi: 10.1016/j.apmr.2009.05.015. PMID: 19887215.
Sahrmann, S. Chapter 5: The Shoulder Girdle. In: Sahrmann, S. Movement Impairment System
Schöffl V, Popp D, Küpper T, Schöffl I. Injury trends in rock climbers: evaluation of a case series of 911 injuries between 2009 and 2012. Wilderness Environ Med. 2015;26(1):62-67. doi:10.1016/j.wem.2014.08.013.
Vagy, J. Chapter 4: Neck and Shoulder Rehabilitation. In: Vagy, J, ed. Climb Injury-Free. The Climbing Doctor, 2020: 102-118.
- Disclaimer – The content here is designed for information & education purposes only and the content is not intended for medical advice.

