More For Less: What Every Climber Wants
This articles explores using blood flow restriction training to improve forearm capacity. Blood flow restriction training (BFRT) is a technique originally created in Japan under the title Kaatsu by Yoshiaki Sato in the 1970’s. Since that time the therapy has accumulated hundreds of research papers supporting its effectiveness. There are a dozen or so systematic reviews in the literature supporting the conclusion that adding BFRT to your training improves muscular strength and size at approximately 20-30% the usual intensity. This loading intensity is essentially the metabolic equivalent of regular activities of daily living. Because of its ability to increase muscle size at such a reduced load, it is now gaining considerable attention in a rehabilitative setting. In addition to these benefits, there is little-published evidence to suggest that this type of training offers any greater health risk over typical dynamic exercise training with higher intensities. It has yet to make a considerable impact on rock climbers and how they train so the goal of this article is to introduce the training technique and how we can apply it to improve climbing performance.
The other name you might hear that is commonly used for this training is blood occlusion training, which I believe is a mischaracterization of the method. Occluding (blocking) blood flow is dangerous and not advisable under normal circumstances. The goal with BFRT is to restrict only the venous return of blood from a limb by the arm or leg bands. It is never intended to restrict or occlude any of the arterial blood supply to those limbs. It is also highly advisable to use a system that allows you to measure the pressure, in millimeters of mercury (mmHg), during your training session for safety reasons. Also, being able to quantify the pressure allows you to document and progress your training protocol. This is next to not impossible without a good system.
Band Placement, Pressure, and Time
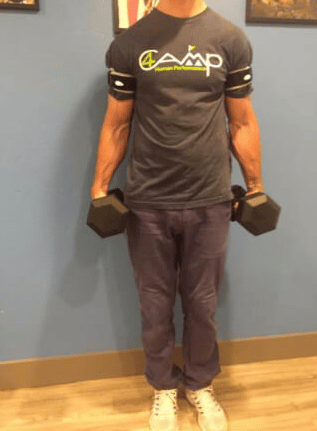
The two locations where BFRT bands are placed when training are between the deltoid and the bicep muscles for the upper extremity and the proximal thigh just below the greater trochanter for the lower extremity. Generally, the bands on the arm are used for 15-20 minutes and the bands on the legs are used for 20-25 minutes. The research does show that blood flow restriction training has been beneficial with as little as 120 mmHg and I personally know athletes that have used them up to 500 mmHg which is not advisable, or necessary in my opinion. I think the sweet spot seems to be somewhere between 150 and 250 mmHg which should be slightly uncomfortable to the individual. In regards to the bands used to create this internal resistance, there are a few good options out there. Unfortunately, many people choose to wrap a belt or elastic band around their limb to a perceived level of pressure, which is less effective. It is also important to make sure both sides are at the same pressure while you are training. This is hard with elastic wraps.
The most expensive band on the market created by the founder are the Kaatsu bands and run in the $2,000-$5,000 price range. They are a great product and have supplied much of the science to date but are much less feasible for individual non-professional athletes. The bands that I use and suggested to my clients are the Bstrong bands created locally in my home state of Utah. These bands can be purchased for $300-$500 dollars and can be found here https://www.gobstrong.com/ref/38/. While writing this article I contacted them and they allowed me to include a coupon code for anyone interested in purchasing these bands from the link above. Just use the code camp4 and you can get an additional 15% off your order.
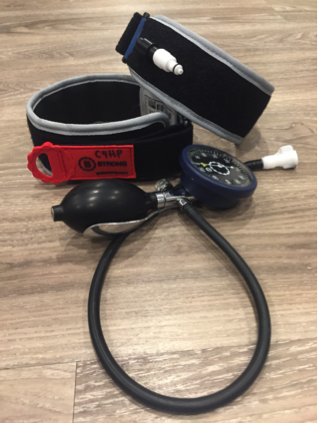
Photo of BFR Bands
The Physiology Behind Blood Flow Restriction Training
Generally, at your capillary beds, you want a nice flow of molecules entering and exiting without any “congestion”, or buildup. Blood comes into this capillary bed through arteries delivering the products necessary for muscle work. At the opposite side are the veins, which are responsible for removing any waste materials. As soon as you get congestion in this capillary bed, when working at too high an intensity, your muscles cannot sustain their power output and you loose the ability to maintain the contractile force. You’ve likely felt this congestion before as the pump in your forearms that disallowed you from gripping the rock on an all out effort or crux sequence. Usually, in order to reach that point in climbing, we need to be exercising at a high enough intensity that we switch to a purely anaerobic energy system where the chemical buildup outpaces the local muscle’s ability to clear it. It’s usually the responsibility of the smaller type I muscle fibers that create this clearing effect locally but they cannot function well in this acidic and hypoxic environment. Under normal conditions, it usually requires moderately high to very high-intensity muscle contractions to create this imbalance of production and clearance at the capillary bed causing a pump.
By restricting the venous return with BFRT bands we are intentionally congesting these capillary beds, creating similar conditions to high-intensity exercise, minus the high intensity. By blocking these molecules from being removed from the capillary beds we create a much more acidic and hypoxic environment for the local muscles to work under. When we reduce oxygen delivery to those type I fibers we switch to the anaerobic system forcing the type II fibers to pick up the load, literally. If you recall these fibers are the larger, more powerful, anaerobic, and quick to fatigue fibers that grow in size (hypertrophy) when stimulated adequately. To put it simply, this training method selectively “shuts off” type I muscle fibers by reducing tissue pH and creating hypoxia in working muscles.
It has been known for quite some time that these chemical “leftovers” promote activation of an intrinsic volume sensor in your cells that stimulate the hormonal release of chemicals (testosterone and growth hormone) responsible for rebuilding the proteins lost during regular high-intensity exercise. If we can target type II muscle fibers and create this increased anabolic response there is no question this is a good thing for any athlete, including rock climbers. Remember, type II muscle fibers are usually only recruited at the beginning of all exercise and during high intensity, near maximal loading. For obvious reasons, we can’t only train at high intensity because with that increased intensity comes an increase in cell breakdown and long recovery periods. That’s why you can’t just train at maximal loads on a daily basis. Your cellular breakdown outpaces your cellular recovery leading quickly to injury. Another intrigue about the BFRT literature is the absence of markers of cell injury and protein degradation generally present with high-intensity training. There have been few published papers showing a downside to this type of training.
What’s The Benefit To Hypertrophy: Specifically Forearm Size
Creating more muscle creates a type of resiliency to work that every climber needs. It helps with stabilizing the joints around the elbow, wrist, and fingers but also provides more fibers from which to cycle through when trying to pull a long crux. Whether you’re into cranking hard on boulders or climbing all day in Zion your forearms need the ability to sustain intermittent contractions for extended periods of time. Without getting into the energy systems in detail remember that building size in muscle builds work capacity. This comes in the form of increases in energy substrates and also cellular organelles that generate ATP locally, specifically mitochondria. If we have more muscle cells in a given group we now have more contractile and energy potential. And if we now have more potential than we did previously we can now use fewer fibers for the exact same effort. An important note to make is that for rock climbers we are talking about the forearm muscles mostly. It is highly debatable whether there is much use in climbers creating hypertrophy in other muscle groups to improve climbing specific performance.
What To Do With The Bands
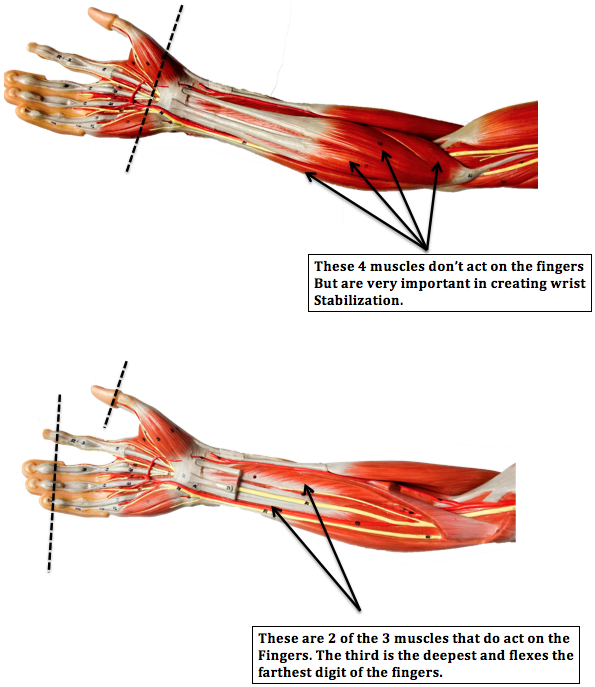
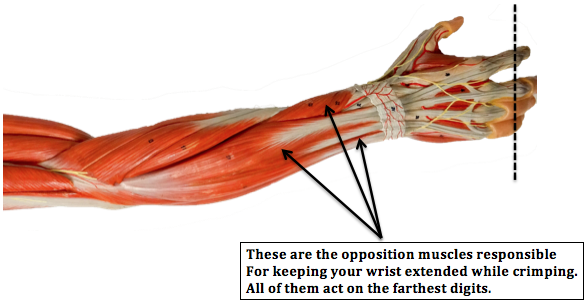
In order to make the most out of your training, you want to prioritize your time by targeting the most important muscle groups for climbing because we only have 15-20 minutes. For climbers, we want to target the forearms on both sides and the thumb flexors. An important thing to note about anatomy is that not all the muscles of the forearm cross the wrist and act on the fingers. Only three muscles deep in the forearm, on the palmar side, act on the digits of the hand. With a few exceptions, almost all the muscles on the opposite side act on the digits. So we want to build general work capacity in the muscles that flex the wrist, extend the wrist and fingers, and flex the fingers and thumb. This can be accomplished with four basic isotonic (concentric/eccentric or shortening/lengthening) movements.
- Wrist flexion (palm towards elbow)
- Wrist extension (palm away from elbow)
- Finger flexion (curling fingers into palm/index to pinky)
- Squeezing the intrinsic muscles of the hand and thumb (as in making a fist)
Some of you might be thinking that when we train the wrist and hand like this it is unlike how we climb, which it is. Most of the literature points out that in order to get the benefits from BFR training we need to promote blood flow to the working muscle and this is achieved better with isotonic exercise. What we do as climbers are mostly isometric contractions (muscle contractions with no shortening or lengthening) that create a reduction in blood flow to the working muscle. But don’t fall into the trap of hyper-specificity. Only training like your sport is a great way to get injured. All sports train general muscular strength during certain phases then transition all that work into something more specific. That being said, this is a good place to put in that I don’t believe that BFR training is at all a replacement for regular fingerboard training in sport specific hand positions, it is a supplement to it. Where it fits into a larger training program is also debatable but I believe it could be done year around when you’re trying to rest the fingers or rehab an injury.
Also, by using isotonic exercise and weights we can create more metabolic stress and better manage training loads than with a fingerboard. I’ve personally tried a few separate protocols that included the use of a fingerboard with my feet on, and also with the use of the grippul (Beast Fingers Climbing) to try and replicate climbing specific hand and wrist positions while under blood flow restriction. I am also in the early stages of a research paper that will compare fingerboard training to BFR fingerboard training. That being said I have seen nothing in the literature that suggests the use of isometric muscle contractions with blood flow restriction training.
The next thing we need to cover is the work to rest ratios (W: R) commonly used. This is how we try and predict energy system usage and metabolic stress. In order to increase the metabolic demand on the forearms during BFRT we want this ratio to be no smaller than 1. It can be 1 but we generally want the work to at least equal the rest. That simply means that 30 seconds of work should equal at most 30 seconds of rest, equaling a ratio of 1, and not more. This is very different than the typical ratio used when training type II fibers in which the ratio is much less. For example, typically 5 seconds of work would equal a 50-60 second rest period creating a work to rest ratio of .1. In BFRT we want the work to at least equal the rest so we can maintain the muscle pump, not reduce it. Some commonly used protocols of W: R is as follows.
(The notation I’ll use will indicate repetitions:rest in seconds x sets of a given exercise.)
So an exercise of 30 repetitions (approximately 35-45 seconds) with 30-seconds of rest and 3 total sets will be written as 30:30×3. Another important question I get often is whether exercise should be performed with one arm at a time or whether it is better to do both arms at the same time. You can get more exercise accomplished in 20 minutes with both arms and it is also metabolically more demanding on the vascular system, which in this case is desirable.
General (Non-specific) Strength Interval Training Protocols
I usually suggest starting with a 30:30×3 protocol with 4 exercises at 15 minutes. You can try to increase the intensity (weight) over a 4-5 week period but I am not convinced that using a slow increase in weight is more helpful than increasing the repetitions with the same or less weight. One thing that you want to take into account is the importance of finishing the repetitions. It is no problem if you need to drop the weight by 5-pound increments in order to finish the set. It’s more important you keep the muscle working through the whole set.
Another commonly used protocol I have seen in the literature uses a 30x15x15x15 protocol with 30-second rest between each set W: R. I don’t use this protocol due to it reducing the work to rest ratio on the 15 repetition sets. I’ve tried this in comparison to the 30:30 protocol and am unsure of the metabolic rationale besides getting the first set of 30 as a “pump set” to stimulate blood flow then reduce the reps so you can finish the sets with the same weight? Other protocols have used 30 seconds as a time in seconds instead of a repetition goal. So 30:30 would mean 30 seconds work and 30 seconds rest like traditional interval training. I find this harder to track and progress given that you have to try and remember how many reps you did and quickly document it before you forget in 30 seconds before your next set starts. This seems like a great way to create too much variation on separate training days.
Now you can see that there are many ways in which to make these intervals more metabolically stressful and that ultimately depends on your goals. If you’re looking to boost your endurance and ability to hold onto the wall for extended periods you could potentially increase the repetitions to 40 per set, then 50 per set with the same amount of rest. You could also reduce the rest from 30 seconds to 25, to 20 etc. Lately, I have been doing sets of 50 repetitions with 30 seconds of rest, which I have progressed from an initial 30:30×3 protocol.
There is some information out there that suggests by simply putting the restriction bands on and doing activities of daily living can create a similar response. Most of this data has been demonstrated in elderly populations and in a rehabilitation setting but it’s important to note that little load is actually required. By little I mean muscle contractions in the form of typing on a keyboard or walking. There is also some data suggesting that you could perform inflation/deflation cycles to stimulate blood flow and get a response. In this case, you would inflate the cuff for a 2-5 minute period and deflate it for 2 minutes then repeat the inflation/deflation cycle for 15-20 minutes. This is quite appealing given the desire for athletes to get more out of doing the least amount of biomechanical stress to already stressed tissues.
As far as how many days per week the bands can be used I have seen some of the Kaatsu literature stating that the bands can be worn daily, or even twice daily during activities of daily living. So, potentially instead of adding something new to your regular workout routine, you could simply put the bands on after you’ve done a regular fingerboard or bouldering workout and get an increased metabolic response by using a stress gripper or finger extension band to promote blood flow. I have started using the Bstrong bands in this fashion commonly on clients in my clinic for finger tendon, finger pulley, forearm, and elbow injuries which has been very effective. I usually will have them put the bands on their arms and have them walk around for 15-20 minutes while manipulating a foam ball that is easy to squeeze or complete a 30:30×3 forearm protocol with very light weights. They generally note a “swelling” sensation into the digits and the injured tissue. The hope here is congesting the capillary bed to get some hormone release and an anabolic effect for healing. I usually have clients do this daily a few times per week until they can get back to a regular loading program.
Beginner BFR Forearm Hypertrophy Protocol
I’d recommend starting this protocol 2-3 times per week on supplemental training days. Those are the days when you’re doing the important extra stuff to train pulling hard and making your fingers strong. Make sure to document cuff pressure, weights used, repetitions per set, and rest.
1. Once you get your bands it is suggested to inflate them to 50 mmHg prior to putting them on the limb. I’ve learned as well that putting the hose attachment pointing towards midline is convenient if you need to check the pressure, or increase/reduce it during your workout.
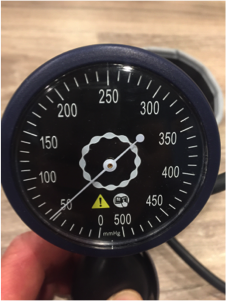
Photo of Pressure Gauge
- Next thing is to inflate to the desired pressure, I’d suggest 150-180 for first-time use, and do some elbow flexion/extension to get rid of any tissue pinching or discomfort. I’ve noticed that I get a more consistent pressure by placing the cuffs over a T-shirt instead of directly on the skin. I’ve noted this with my clients as well and is probably nothing more than a feel thing.
- Get a good interval timer that can track 30 seconds of rest and set a timer to 15 minutes at the beginning. You’ll want to take the bands off after 15 minutes and note how much you got done to gauge your next workout.
- Start with a 30:30×3 protocol with 4 non-specific exercises
Exercises:
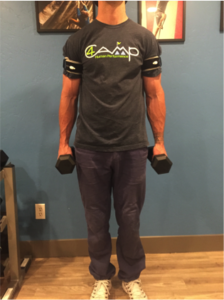
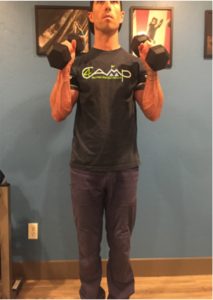
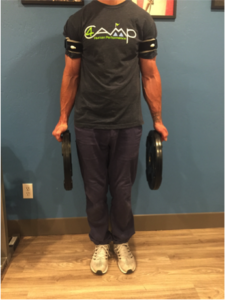
- Bicep curls with dumbbells (this weight will be low so don’t let your ego get hurt)
- 30 reps, 30 sec rest x 3
- Males start with 10 lbs. and females start with 5
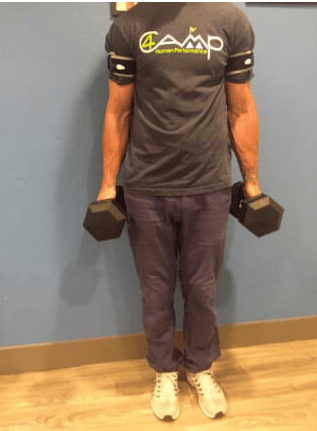
- Wrist flexion with dumbbells (standing with arms at side, keep the thumb on the side of the fingers so as to not “jam” your thumb)
- 30 reps, 30 sec rest x 3
- Males start with 20 lbs. and females start with 10
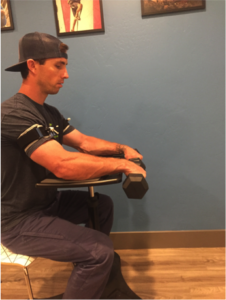
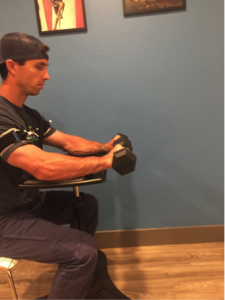
- Wrist extension over a bench with a bent bar or two dumbbells side-by-side
- 30 reps, 30 sec rest x 3
- Males start with 8 and females start with 5
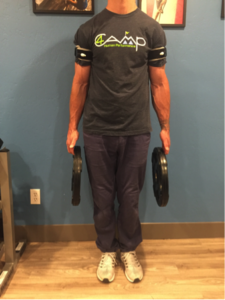
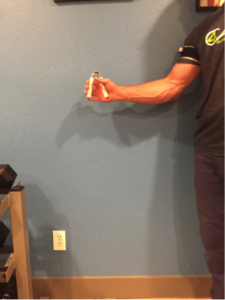
- Finger flexion with plates (with spaces) or a Grippul by Beast Fingers climbing with weights
- 30 reps, 30 sec rest x 4-5 (these muscles are important)
- Males start with 20 or 25 and females start with 10
- Grip strengthener I like the Captains Of Crush by Iron Mind
- 30 reps per hand (unless you have 2)
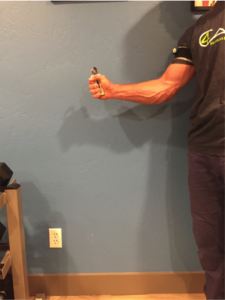
- Don’t be surprised if it’s uncomfortable at first because it will be.
- Remove the cuffs and drink some water after 15 minutes.
** Remember that if you cannot finish the repetitions simply reduce the weight by 5-pound increments until you can finish the desired repetitions. Simply keep track of your initial weight and reduce the starting weight next time.
Feel free to contact me with any questions at camp4performance@gmail.com or Instagram message me @C4hp.
Author Bio:

Tyler Nelson owns and operates a chiropractic sports medicine clinic and strength & conditioning business in Salt Lake City. While earning his doctoral degree, he completed a dual program masters degree in exercise science at the University Of Missouri. While in graduate school he worked with the University of Missouri athletics department and currently is employed through two colleges in Utah. He teaches anatomy and physiology at a community college and works as a team physician for the Brigham Young University athletics department. He is certified through the National Strength and Conditioning Association as a Certified Strength and Conditioning Specialist and spends any extra time in his life with his three kids or trad climbing in Zion National Park. He has been climbing for 17 years and gravitates toward all day adventure climbing. His expertise in human physiology and cutting edge knowledge of strength and conditioning science is what drives him to always challenge the norms in training.
References:
– Dankel, S.J., Jessee, M.B., Abe, T. et al. Sports Med (2016) 46: 23. The Effects of Blood Flow Restriction on Upper-Body Musculature Located Distal and Proximal to Applied Pressure
– Scott, B.R., Loenneke, J.P., Slattery, K.M. et al. Sports Med (2015) 45: 313. Exercise with Blood Flow Restriction: An Updated Evidence-Based Approach for Enhanced Muscular Development
– Loenneke, J P, Thiebaud, R S, Abe, T. Scandinavian Journal of Medicine & Science in Sports (2014) 24:6 415-422. Does blood flow restriction result in skeletal muscle damage? A critical review of available evidence
– Loenneke, J.P., Wilson, J.M., Marín, P.J. et al. Eur J Appl Physiol (2012) 112: 1849. ow intensity blood flow restriction training: a meta-analysis
– Slysz, Joshua et al. Journal of Science and Medicine in Sport , Volume 19 , Issue 8 , 669 – 675. The efficacy of blood flow restricted exercise: A systematic review & meta-an
– Wilson, Jacob M., Lowery, Ryan P., Joy, Jordan M., Loenneke, Jeremy P., Naimo, Marshall A. Journal of Strength and Conditioning Research. Practical Blood Flow Restriction Training Increases Acute Determinants of Hypertrophy Without Increasing Indices of Muscle Damage
- Disclaimer – The content here is designed for information & education purposes only and the content is not intended for medical advice.

Related Posts