Rock Climbing Hunchback
It is difficult to avoid the dreaded climbers hunch back. Years of climbing takes its toll on the body.
You get lazy while belaying and round your shoulders.
You sit slumped while watching your friends boulder.
You slouch in your chair while working at your desk.
The spine begins to curve and the shoulders round forward and you begin to take on the appearance of Quasimodo. But fear not, the dreaded hunchback is avoidable with some simple mobility, strength and movement exercises. Check out the article below to learn more.
Assessment
Before you learn how to treat the climber hunchback, you need to identify whether you have it. So how do you know whether or not you have a climber hunchback? First, it is important to know that the thoracic spine has a natural curvature. The image to the left represents the typical curvature of the spine and the image to the right represents excessive spinal curve, known as kyphosis.

The degree of thoracic spine kyphosis can be visualized and measured with an X-ray. But why expose yourself to unneeded radiation or pay hundreds of dollars when you can perform a simple assessment on your own? To determine if you have thoracic kyphosis, stand with your back against a wall and attempt to press the back of your head into the wall while keeping your chin level to the ground. If you have excessive thoracic kyphosis it may be difficult for you to press your head against the wall without lifting your chin and extending your neck.


If you have identified yourself as having thoracic kyphosis or a climbing hunchback, or if you are afraid of developing one, there are a series of exercises that you can perform to counteract it. Also, there are a set of rules to guide you when to progress to the next level of exercise. The exercises and rules follow the Rock Rehab protocol developed by Dr. Jared Vagy. The Rock Rehab Pyramid (image 1) is a four-phase system that takes you from unloading the tissue to gaining full mobility, strength, and eventually efficient climbing movement. To learn more about this progression, you can check out his book “Climb Injury-Free.” The criteria that Dr. Jared Vagy developed to progress through the levels of the pyramid is below (image 2) and is based on how you feel the day after you have performed the exercises.


Unloading:
The first stage of rehabilitation is about taking the stress off of the tissue. A hunched posture can stress muscles in the neck and shoulder, and if your muscles are not strong enough to reverse the hunched posture, you can use a support or brace temporarily to facilitate the process of unloading the tissue and spine. Below is an example of how to use a brace to pull your shoulders back while sitting or standing throughout the day.


http://www.spinesurgery-wecareindia.com/Kyphosis/bracingt_treatment_kyphosis.html
Mobility:
You will need to increase the pliability of the tissues that pull your body into a hunch. The three most important areas to address are the pectorialis major, pectorialis minor, and the midspine (thoracic spine). You can have a skilled therapist mobilize the tissues or you can use a small round ball (tennis or lacrosse ball) or foam roll against the desired restricted tissue. After the tissues are mobilized, you should perform stretches to maintain the flexibility that you just gained. Below are a series of mobility exercises to combat the restricted tissues.
Soft Tissue Mobilization of Pectoral (major and minor)
Pectorialis major tightness will cause the arms to rotate inwards due to the muscle attachment between the thoracic cage and the arm. You can use a tennis ball against the wall and apply pressure on the pec major muscle in the direction of maximal restriction or in a circular fashion to improve mobility in this muscle. You can also use an old carabiner to apply more aggressive pressure. The image below shows the Pectorialis Major with its origin, insertion, and action. Soft tissue mobilization will decrease the likelihood that your arms will rotate inward in a climber’s hunch.

Pec minor is another muscle to address in case of climber’s hunch. Tightness of the Pectoralis Minor can round the shoulder blades forward because of its attachment from the chest wall to the shoulder blade. By performing the same method (tennis ball or carabiner), the individual could apply pressure on this muscle. However, since this muscle is deeper than the Pectoralis Major, slightly more pressure is required to reach this muscle.

Pectoralis Minor Soft Tissue Release


Soft tissue mobilization should be followed by stretching to improve the range of motion. After increasing the pliability of pec major and minor, you can stretch the muscles. To achieve benefits from the stretch, the individual has to stay in position for at least thirty seconds and perform this stretch three times.
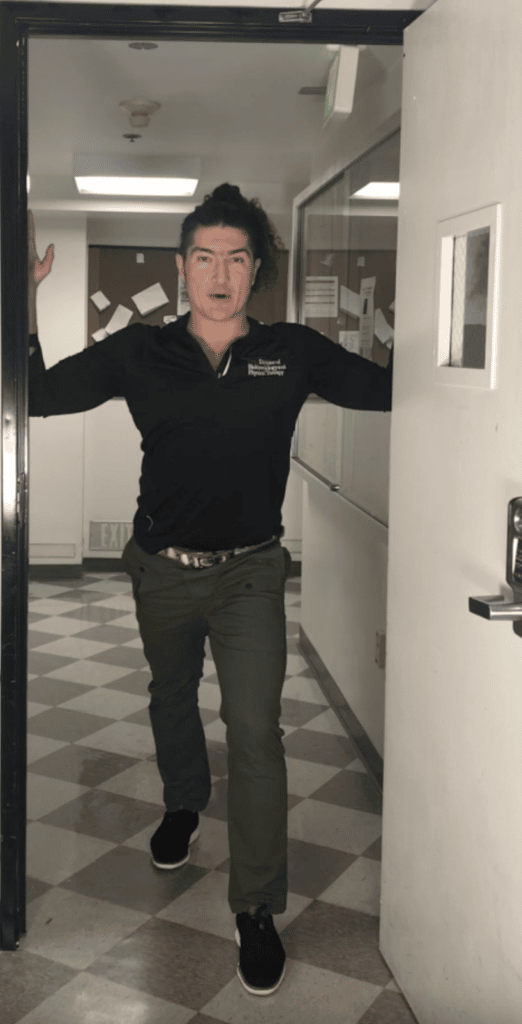
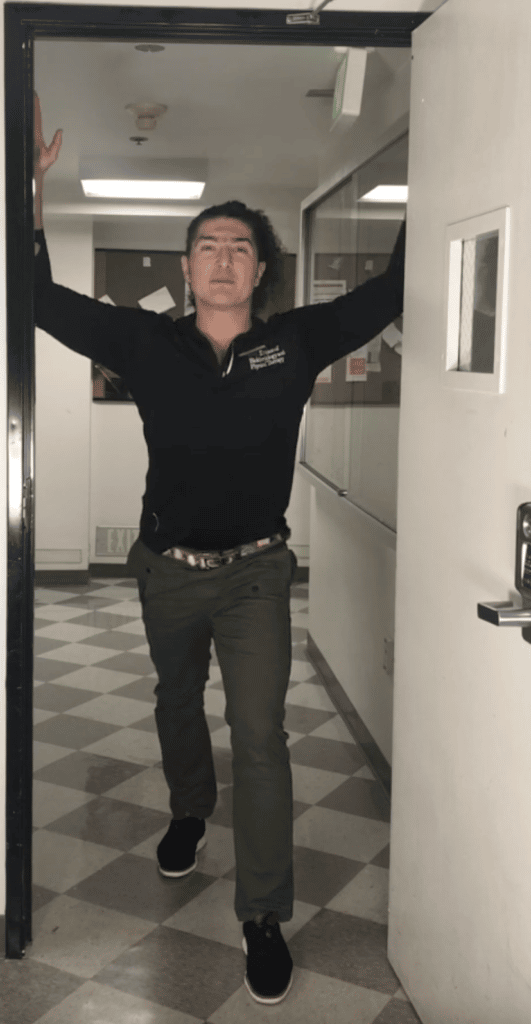
Pectoralis Major Doorframe Stretch
To stretch the pec major muscle, the climber should stand between a door frame as shown below with external rotation and horizontal abduction of the arm, while lunging forward to apply force on the muscle for a minimum of 3 times and a duration of thirty seconds.
Pectoralis Minor Foam Roll Stretch
To stretch the pec minor muscle, the climber will position themselves on a foam roller. Since the pectoralis minor attaches to the shoulder blade, a partner can press on the front of the climber’s inner shoulder to isolate only the pec minor. If that is not done, this stretch is for both pectoralis minor and major.


In the next step of mobility, we need to increase the amount of pressure to achieve maximum benefit for elongating the desired muscle.
Pectoralis Minor Stretch Progression
To stretch the Pectoralis Minor, loop a band around your upper arm next to your armpit crease and face away from the anchor. Place your arm behind your head with your elbow bent and move your body forward to feel a stretch in the front part of your shoulder. Perform this stretch for a minimum of three times and a duration of thirty seconds.


Pectoralis Major Stretch Progression
To stretch the Pectoralis Major, loop a band around your upper arm next to your elbow and face away from the anchor. With your arm bent at 90 degrees, move forward to feel a stretch in front of your shoulder in the pectoral muscle. You can move the band further towards your elbow to increase the stretch or reach your arm up and down in the air. Perform this stretch 3 times at a duration of thirty seconds each.


Thoracic Spine Extension Foam Roll
This exercise targets the thoracic spine directly and pushes the spine in the opposite direction of a climbing hunch. Place the foam roller on the floor and lie on your back with the knees bent while aligning the foam roller horizontally with the shoulder blades. With arms behind the head, lower your head as close as you can to the floor until you feel a stretch behind the back of the thoracic spine. Maintain engaged abdominal muscles and proper low back posture during the exercise and make sure not to over extend your neck. This exercise should be performed three times at a thirty second duration.


Thoracic Spine Extension Progression
To progress the thoracic extension, you could sit on a ball and step forward to lower the back onto the ball. Next, you should place the ball directly under the shoulder blades and open the arms on each side to increase the stretch. Then, you should maintain this position and relax for thirty seconds and repeat three times.


Strength:
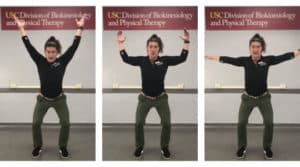
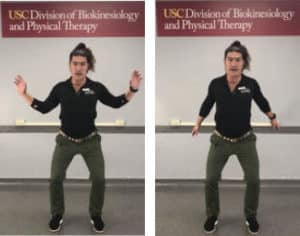
- In the first stage of strengthening, you will start with no external resistance and use body weight against gravity to perform the exercises. The first exercise provided here is done in three sets and fifteen repetitions with less than a thirty second rest in between the sets to improve the endurance of the muscles of your back.In a bent-over position with your back straight, you will do five movements with your arms. Each movement resembles an alphabetical letter.
Y, U, T, W, and I
First, you will lower the shoulders and slightly squeeze your shoulder blades. Then, you will raise your arms in a 45° angle with your thumbs up to form the letter Y. Next, with elbows bent, you will raise your arms directly to the side so that they form a 90° angle from the body to form the letter U. Then, with the elbows extended and the thumbs up, you will perform the previous posture to form the letter T. The fourth movement is the letter W, so you simply have to squeeze the shoulder blades together with your elbows bent and arms slightly below the horizon. Finally, you will move the arms down and back to be able to form the letter I. Repeat this routine three times with fifteen repetitions.
Y, U, T, W, and I on Dynadisk
To progress the strengthening, you could use the Scapular 5 x 5 (Y-U-T-W-I) technique. You will start on your knees with a band attached to the bottom of a door or other low anchor point. While keeping your shoulder blades down and back, you will raise both arms up to form
- The letter Y
- The letter U
- The letter T
- The letter W
- The letter I
Each position should be performed five times for five seconds each and fifteen repetitions.
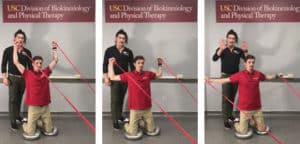
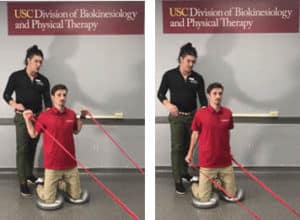
Y, U, T, W, and I on Bosu Ball
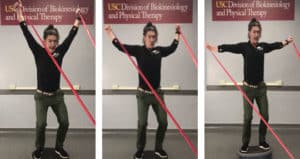
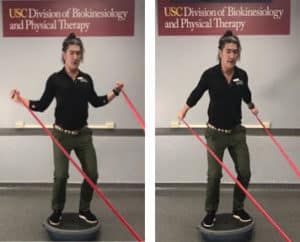
To further progress the back exercises, you should add the component of balance to the level two exercises. You should use either a Bosu ball, Indo board, or a balance disk to challenge the balance and make the exercise more similar to climbing. If using a Bosu ball or a balance disk, you should place both feet on the surface or use just one foot to make it more challenging. However, when using the Indo board, both feet have to be on the surface.
You will stand on the surface of the desired equipment with a band attached to the bottom of a door or another low anchor point. First, while keeping your shoulder blades down and back, you will raise both arms up to form the letter Y. Second, you will move your arms directly into a U. Third, into a T. Fourth, into a W, and finally into an I. You will hold each position for 5 seconds and will repeat each movement fifteen times, three sets each, with less than a thirty second rest in between the sets.
Deep Neck Flexion
In order to correct the neck alignment, you also need to strengthen the muscles in the cervical spine. You will keep a micro bend in the knee while placing the back of your head and feet against the wa
